

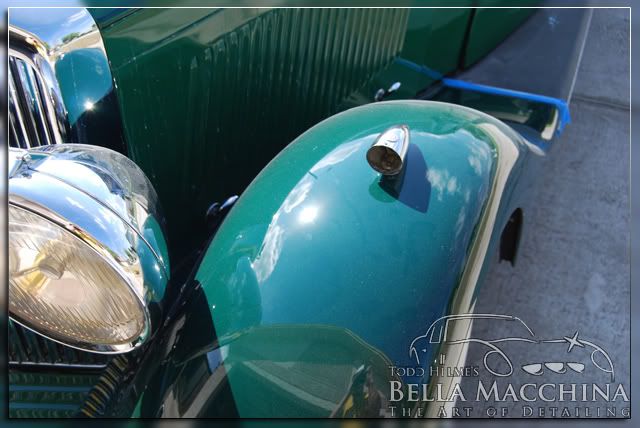
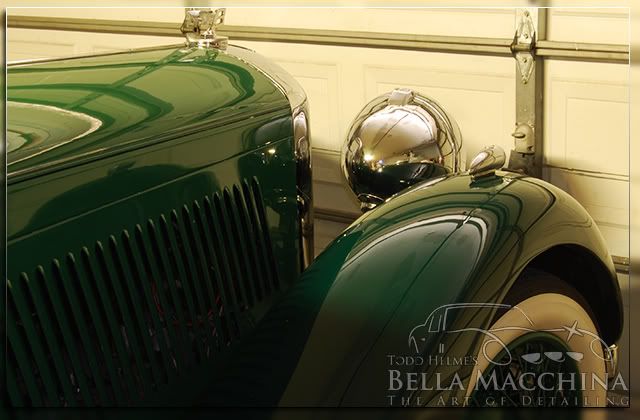
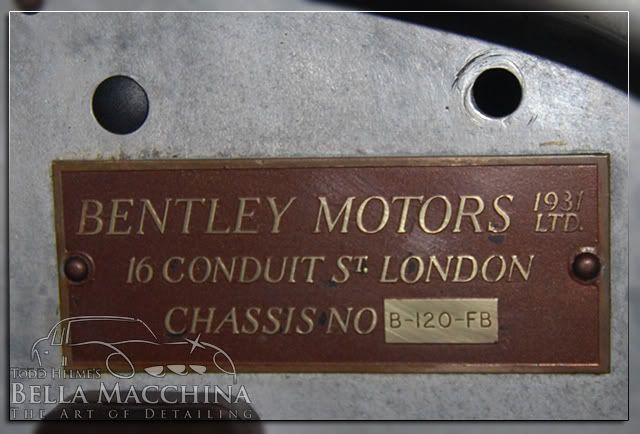
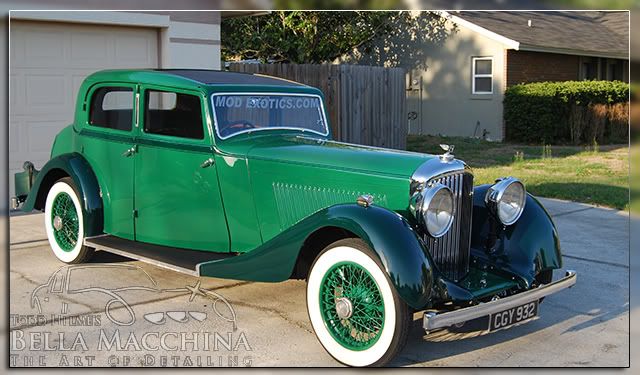
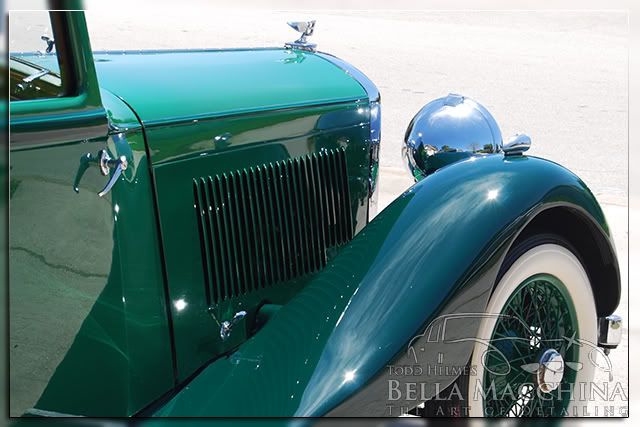
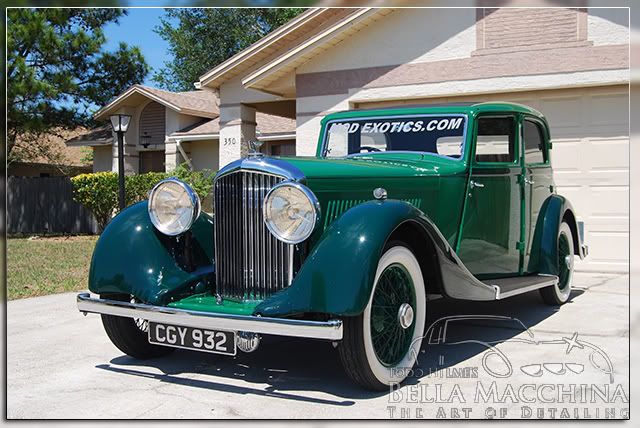
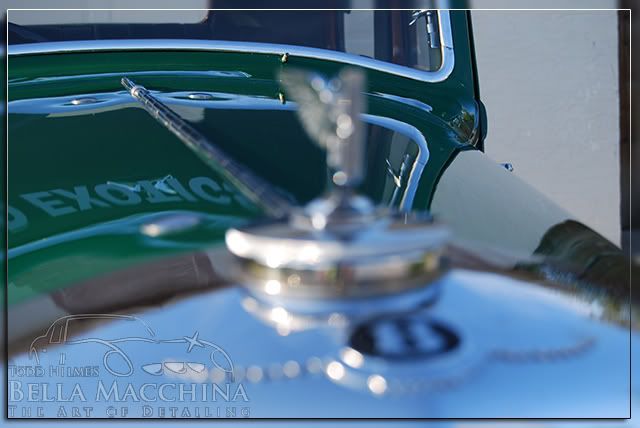
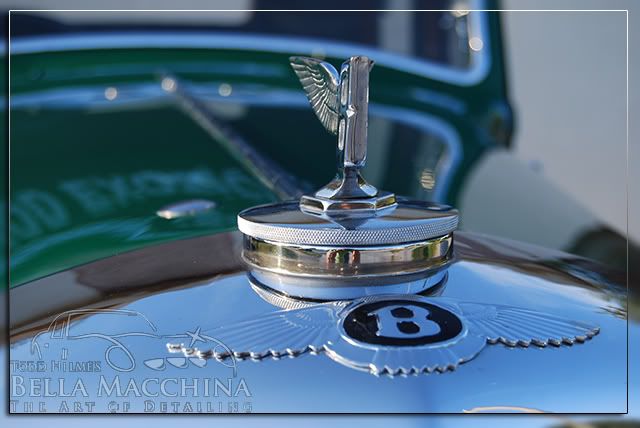
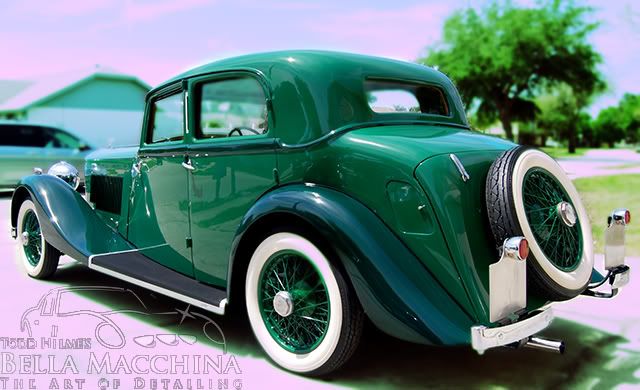
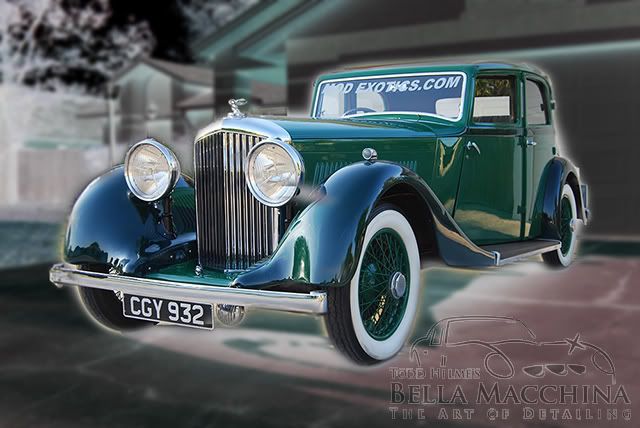
The 1931 Bentley Derby Park Ward Saloon was the first Bentley produced by Rolls Royce in Derby, England. The car`s coach work was built by Bentley`s most prolific coach builder, Park Ward, hence the name. It features a robust, for the day, 3.5L straight 6, and a 4 speed manual transmission. The steering wheel has four levers, controlling the ignition timing (you do this yourself), the choke, the intake opening, and a throttle stop similar to cruise control.
This particular Bentley belongs to a client of mine from South Florida who had the car shipped in an enclosed trailer to my house in Orlando. The paint was very rough with numerous blend marks, DA sanding trails, orange peel, holograms, and swirl marks. Over the course of a month about 80 hours of work went into the Bentley to transform it to the jewel it deserved to be. The entire exterior was sanded, cut, polished, and jeweled. The tires where dismounted, cleaned, and dressed; the wheels cleaned, polished, and sealed. The original wood was removed, sanded, and re coated (my first time doing this). Various nuts and bolts where removed and polished, the engine bay gone through...
When I first thought about doing a write up on this car it was going to use it as an instructional piece on how to wet-sand for www.truthindetailing.com. The fact is that this detail became an all consuming obsession for perfection. Most work was done on my `off-time` from detailing cars and side projects for Classic Motoring Accessories, in fact from start to finish I did 8 full corrections on other vehicles, wrote four articles, and attending two weddings. Please bare with the opening of the write-up as it is a basic instruction on wet sanding with a little bit of theory.
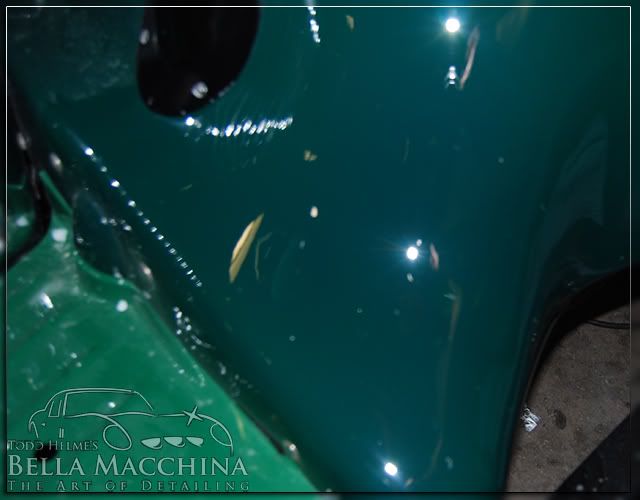
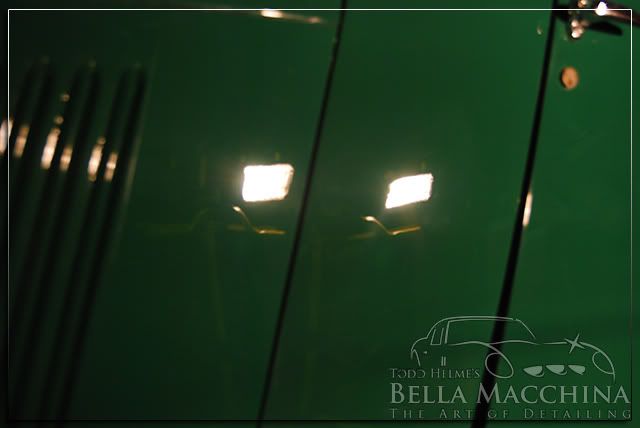
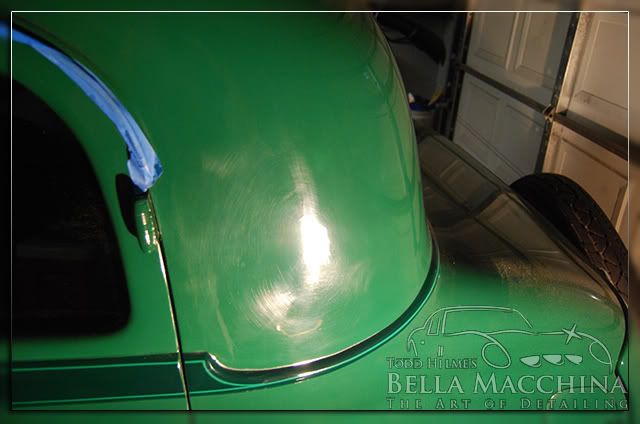
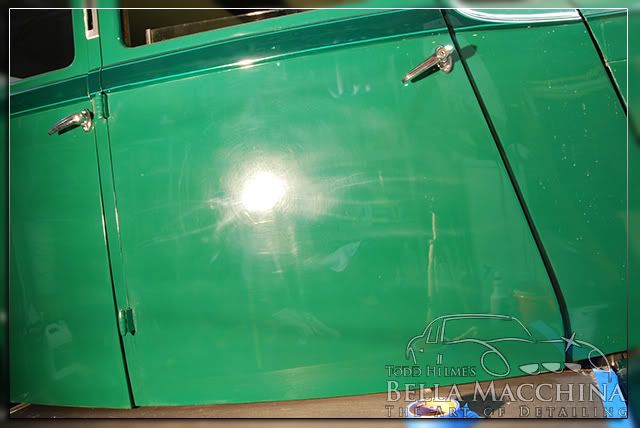
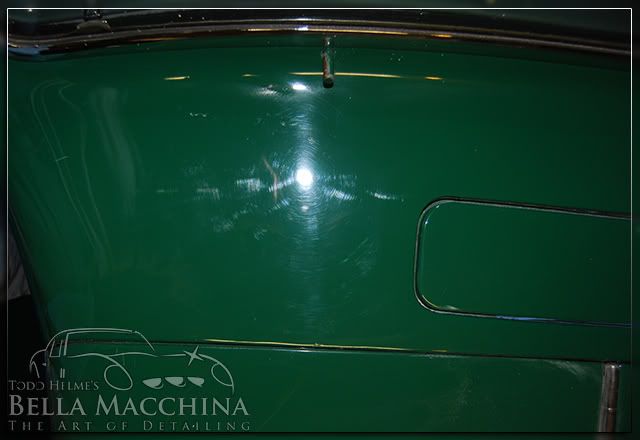
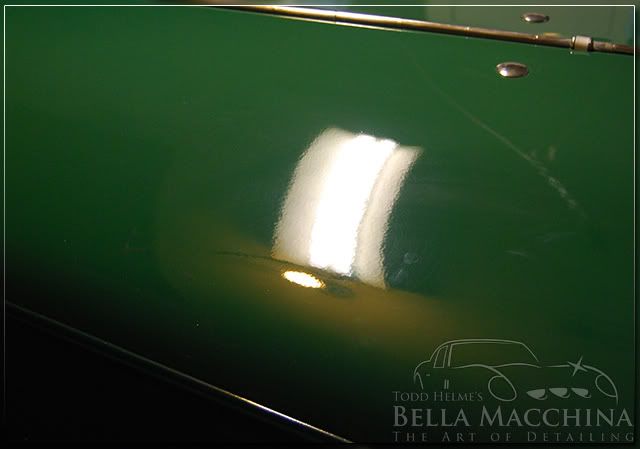
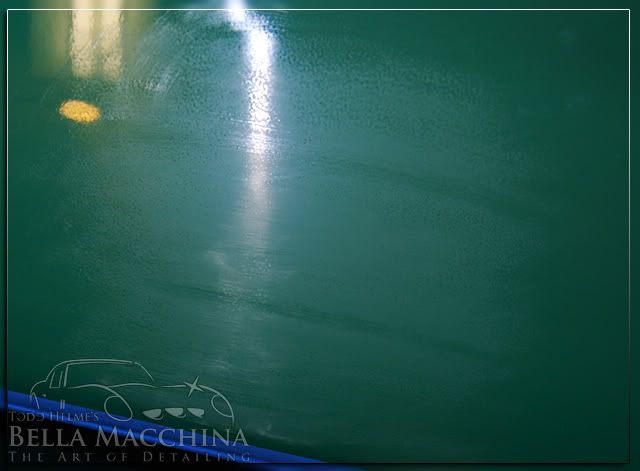
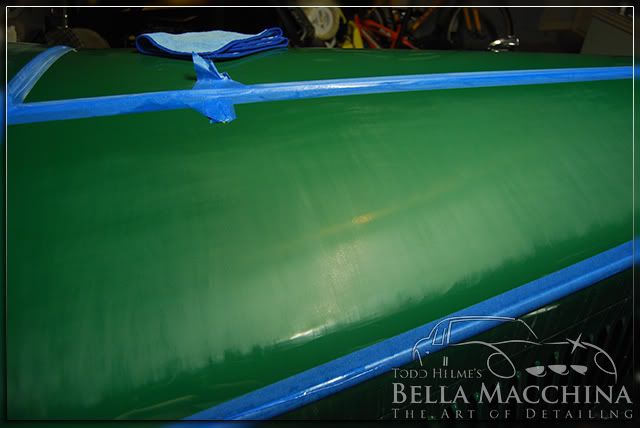
After carefully washing the entire vehicle with Meguiar`s Hyperwash and drying with Big Blue III Waffle Weave towels, I thoroughly inspected each surface. This car had so much orange peel that even polishing the car could only do so much to increase the gloss.
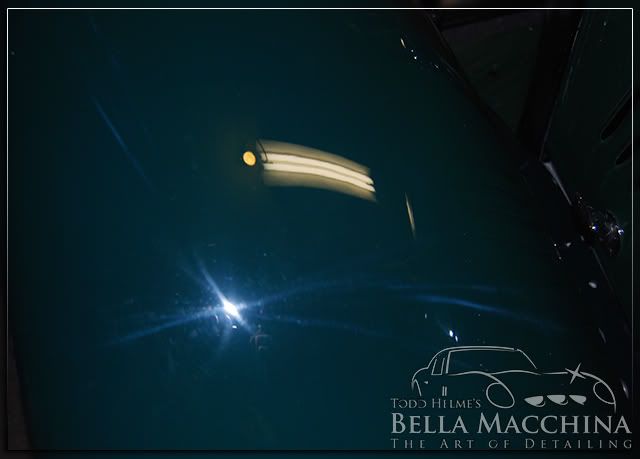
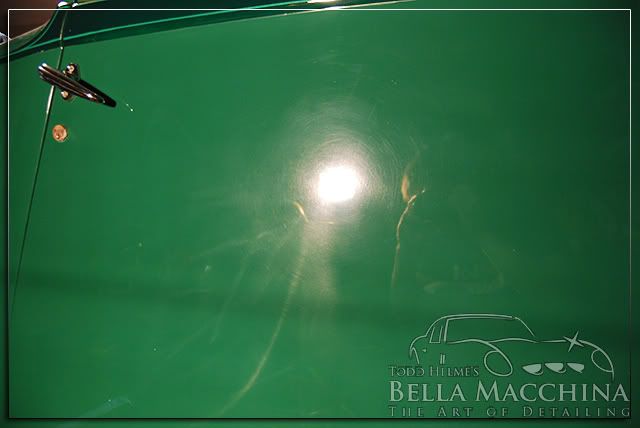
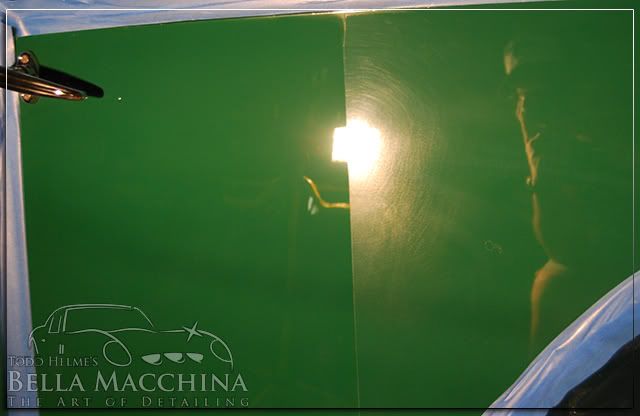
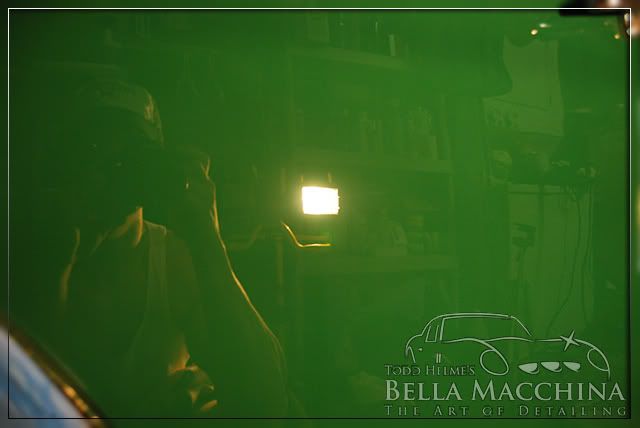
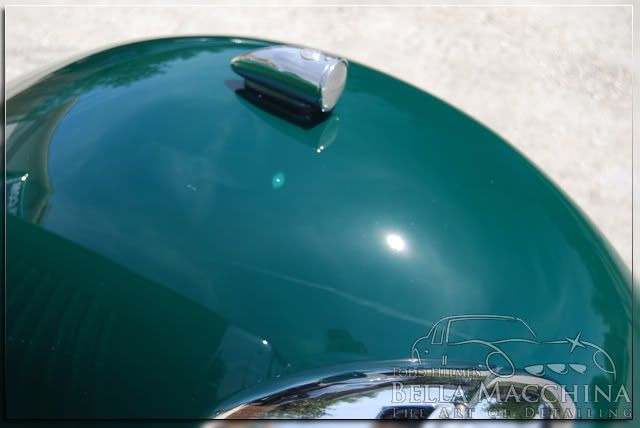
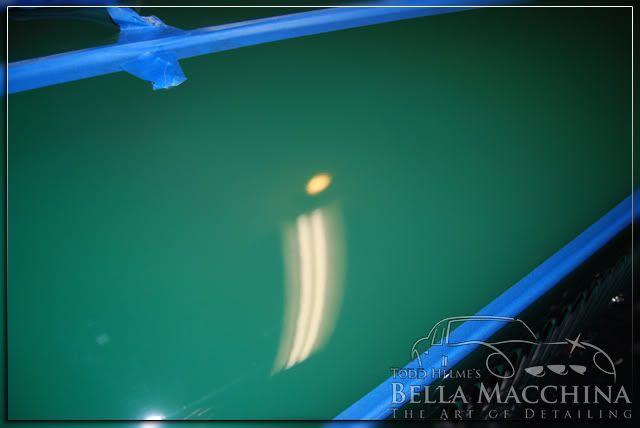
Here is a picture of the hood under a generic ultraviolet light. The orange peel texture of the paint is clearly evident.
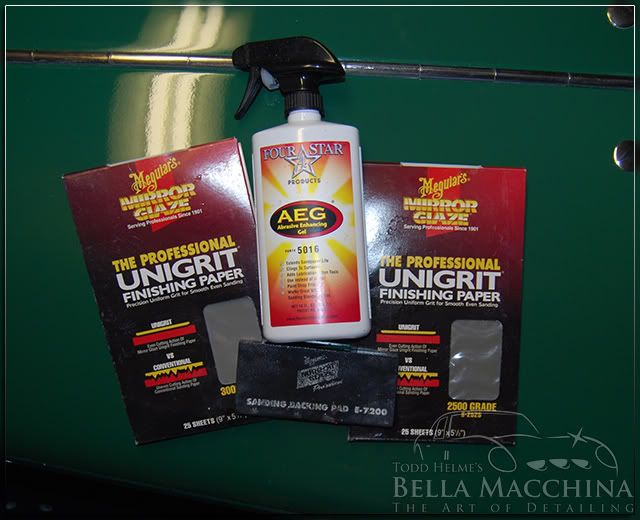
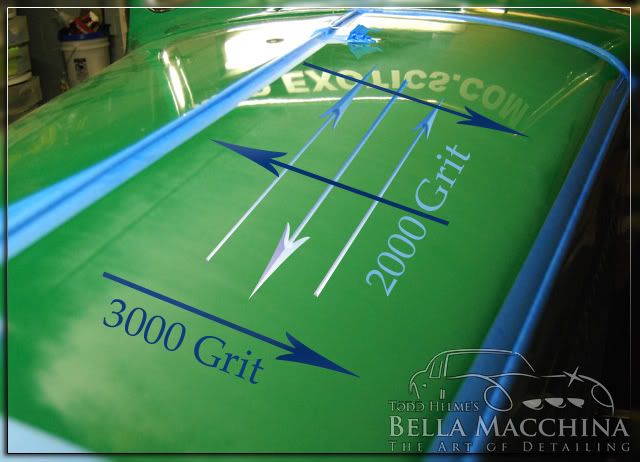
The tools I was going to use to sand the paint: Meguiar`s Unigrit paper in 2000, 2500, and 3000 grit (with 2000 and 3000 being the most common), Meguiar`s Sanding Pad, and 4 Star Abrasives Sanding Gel.
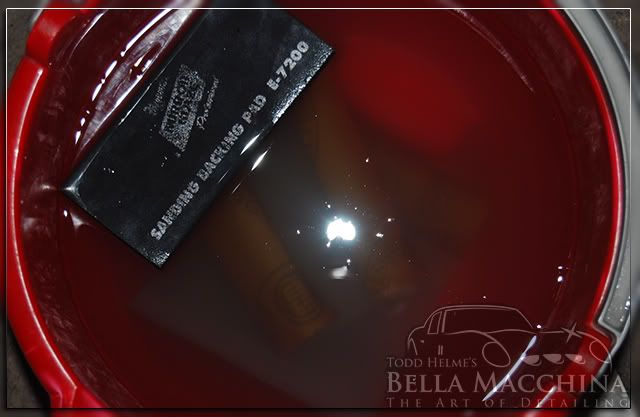
It is good practice to let the sanding paper soak in water for at least 15 minutes prior to use. I added a couple drops of Meguiar`s M00 Hi Tech Wash to bucket help soften the paper.
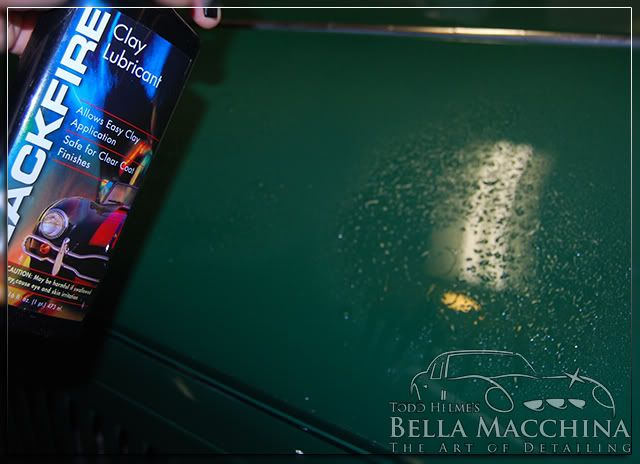
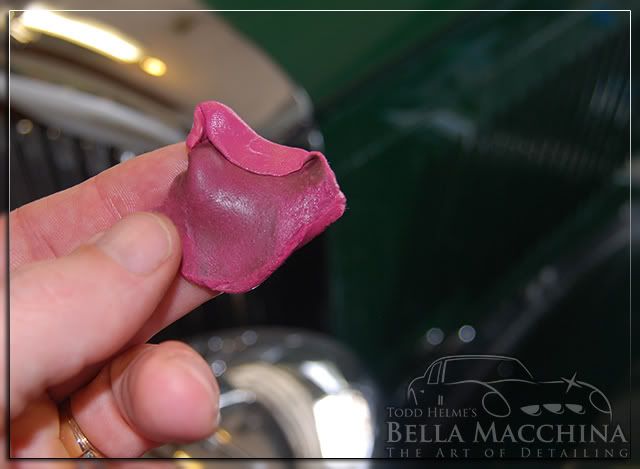
Prior to sanding it is a good idea to make sure the paint is perfectly clean and free from any contamination that could sheer off and become lodged in between the paper and the paint, causing deep scratching. I clayed the surface with Blackfire Clay Lubricant and Meguiar`s Professional Red Clay.
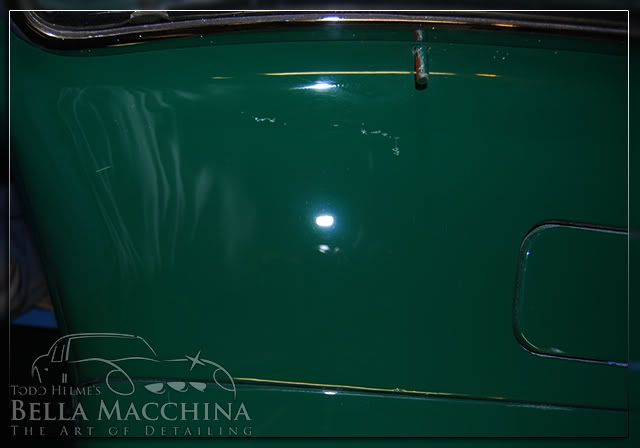
The amount of contamination on half of the hood was quite large.
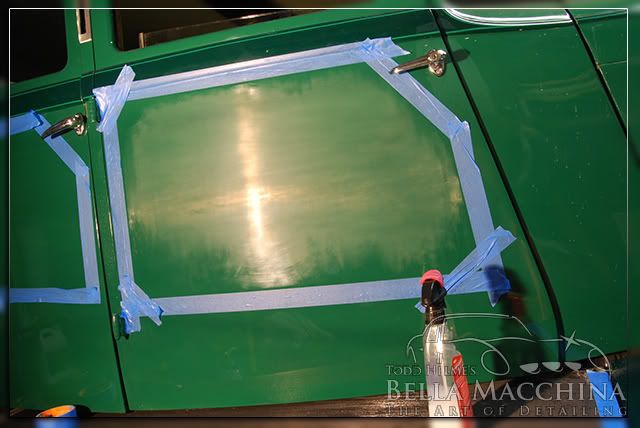
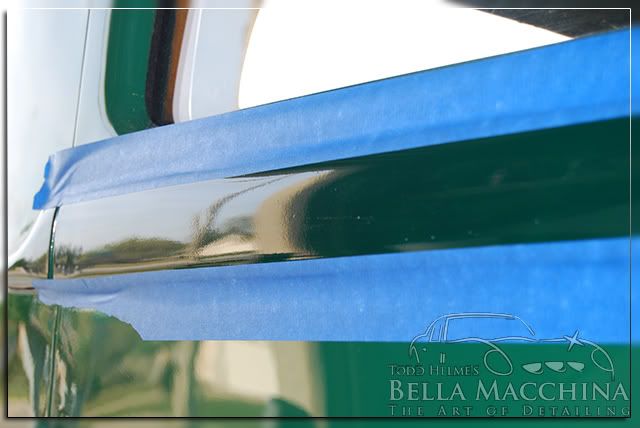
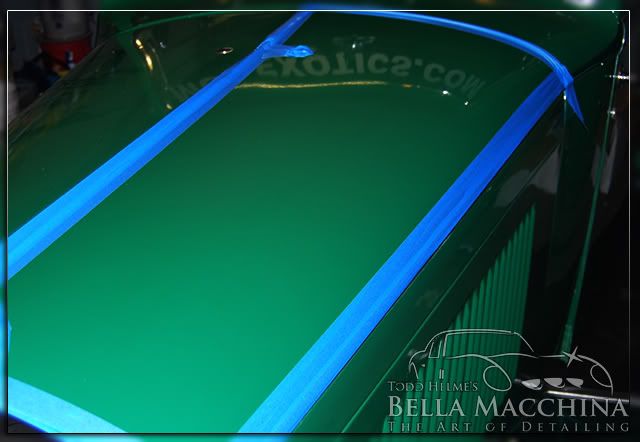
I like to run tape along the border of each section I am sanding to ensure that I do not sand to close to the edges where it could be difficult, if not impossible, to fully remove the sanding marks with out risking damage to the paint.
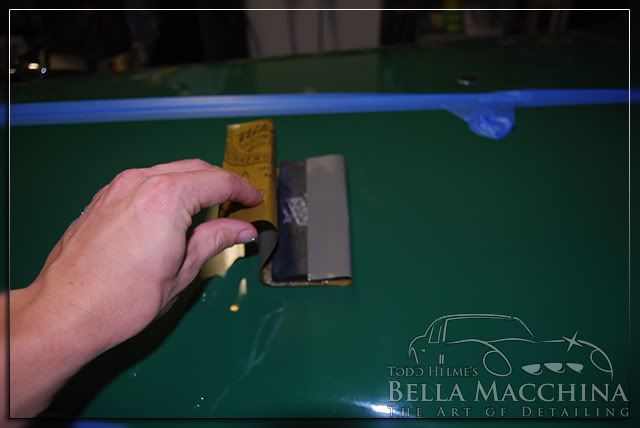
After letting the paper soak, wrap it around the Meguiar`s Sanding Block. It is imperative to always use a backing pad for sanding to prevent the uneven pressure from our hands from creating waves in the surface. The Meg`s sanding pad fits perfectly to the paper, simply wrap it tight and make sure that there is excessive slack or bent edges creating pressure points.
Start sanding in one direction, holding the pad at a slight angle to prevent the 4 edges of the pad from creating gouges or tracers. Sand in one direction, in this case back and forth, until all the defects have been removed.
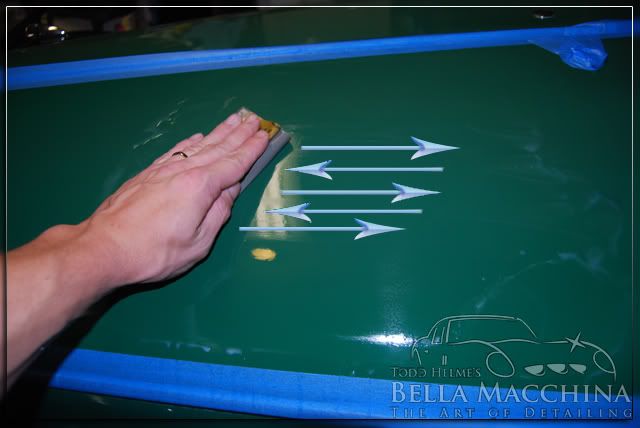
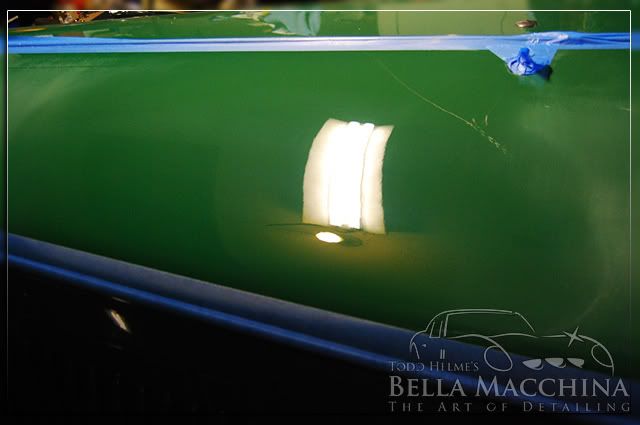
The sanding pad acts as a squeegee to remove the sanding lubricant, in this case 4 Star`s Sanding Gel (you can use water mixed with a drop of M00 Hi-Tech Wash as well). It is important check your work frequently to prevent removing excess paint.
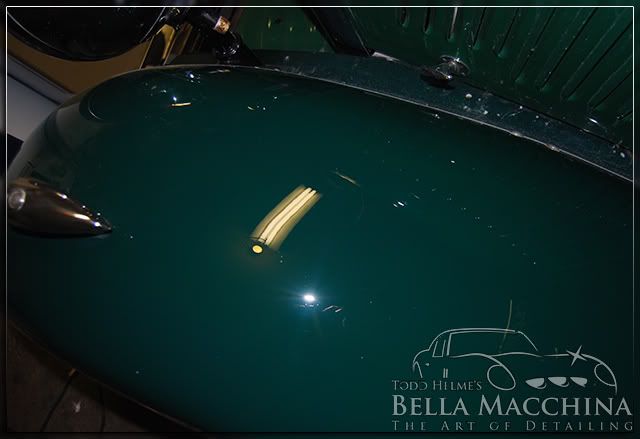
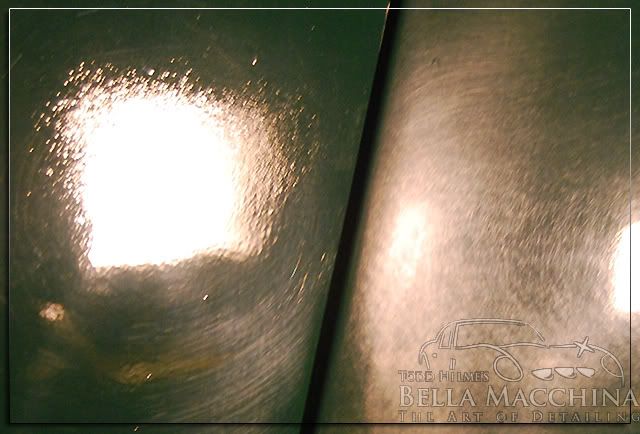
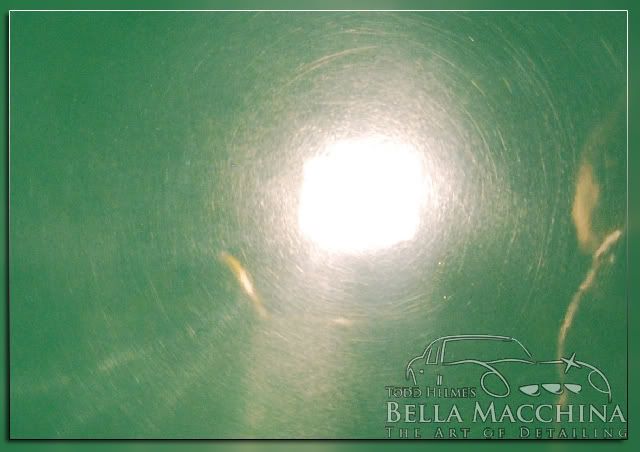
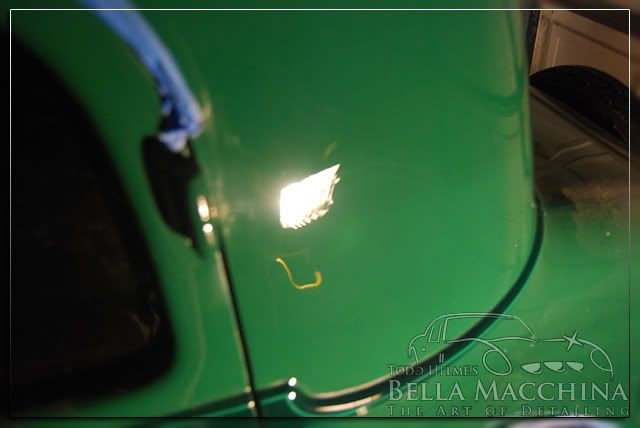
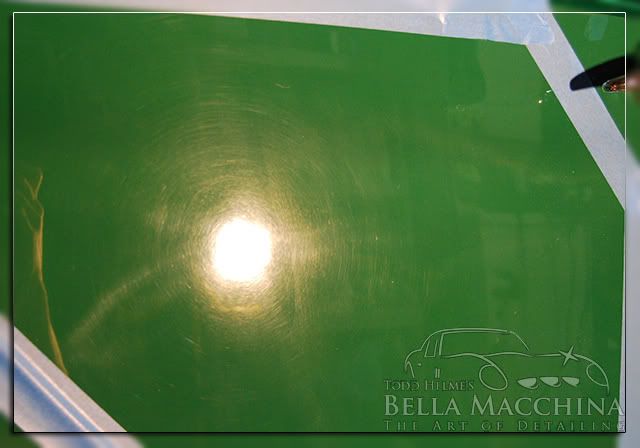
As the sanding paper skims over the surface it will remove the highest points in the paint, causing them to dull. The low spots will remain shiny. The shiny dots in the picture represent the low, missed spots of the orange peel. More sanding will be required to fully remove them.
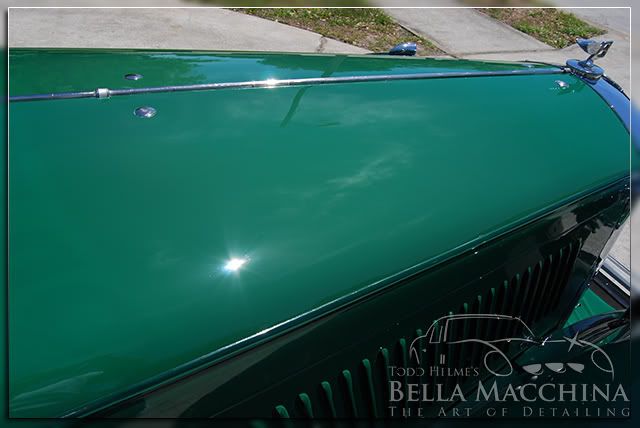
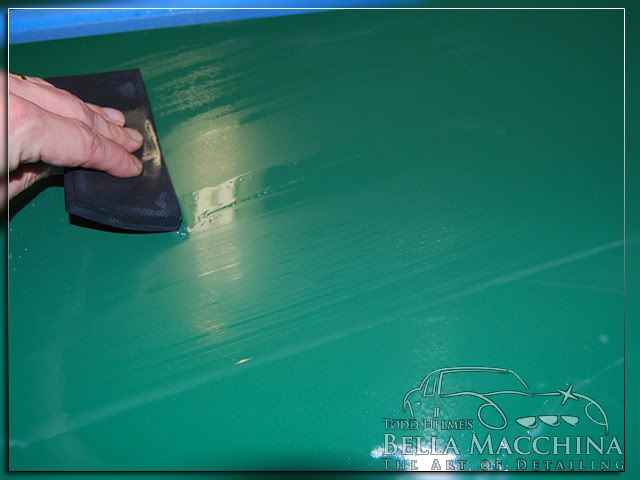
Once the entire panel has been leveled and the surface is uniformly flat it is a good idea to use a less aggressive paper in the opposite direction. This is known as cross hatching. Sanding with a finer grit will make `cutting the paint` or restoring the gloss a easier, as well as eliminate some of the texture that is may be visible on the surface. After the entire panel was flat and free of orange peel, I sanding in the opposite direction using Meguiar`s 3000 Unigrit until the majority of the 2000 grit scratches where no longer visible.
After removing the 2000 grit lines with the 3000 grit, it is a good idea to go back over the finally sanded surface in the opposite direction once again lightly. The surface is nice and flat with no visible sanding marks and ready to be `cut`.
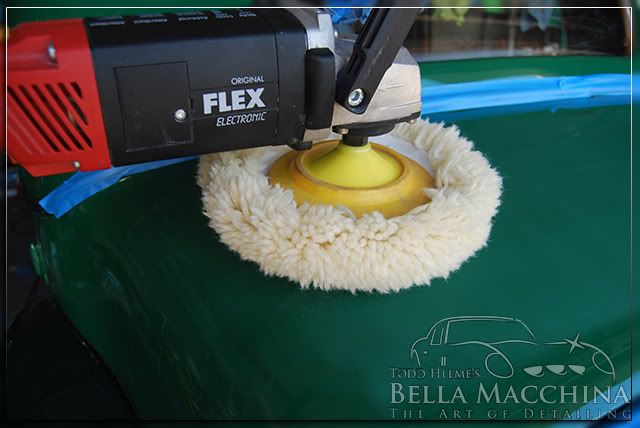
In my experience removing sanding marks completely requires aggressive compounding. I used Meguiar`s M105 Ultra Cut Compound on Flex Rotary with the Kevin Brown Rotary Method to remove the sanding scratches and restore the gloss. After priming a Lake Country Pad with a mist of Meguiar`s M34 Final Inspection and working working some polish into the pad by hand, I began polishing at about 1500 rpm with medium pressure. Once the polish `flashed` I misted the paint with a spritz of distilled water and continued to work the polish until it flashed again, then removed the residue with a Dragon Fiber Perfect Shine Buffing Cloth. In most cases two full applications where required to remove all of the sanding marks and restore a very high gloss.
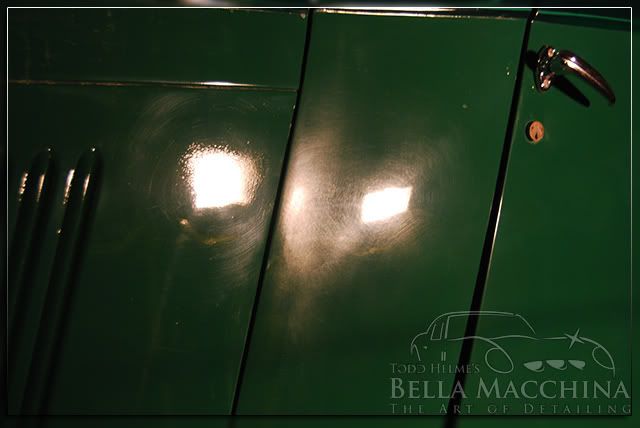
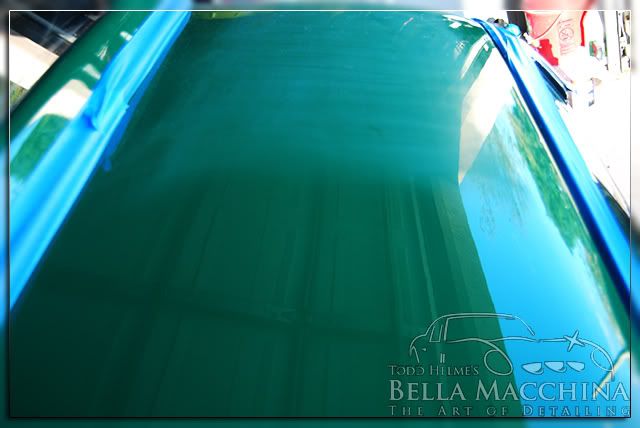
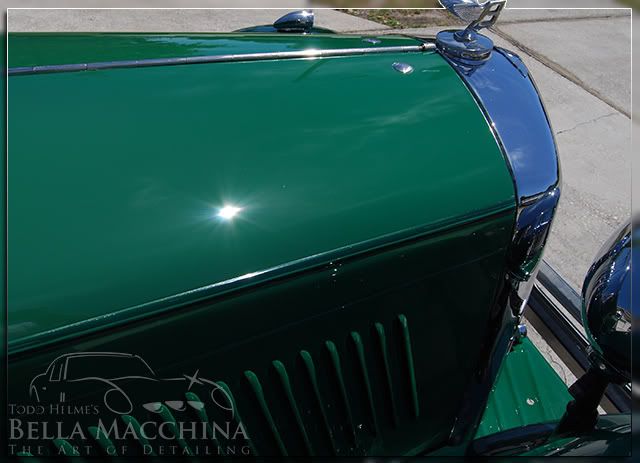
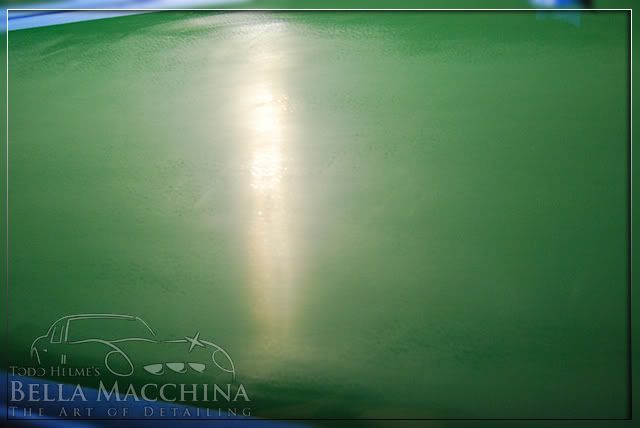
A test section after cutting. While there is still some slight orange peel, the paint looks 1000x`s better.
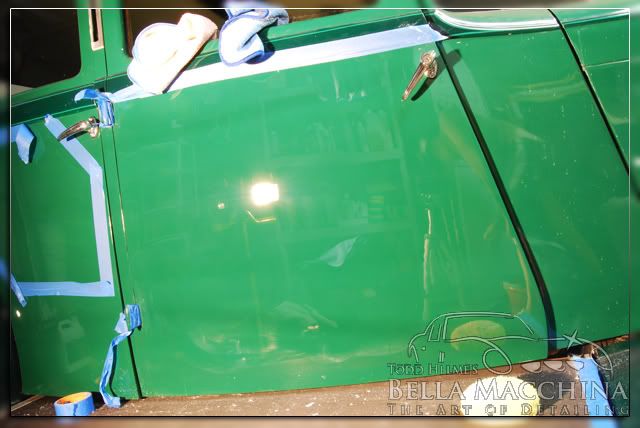
Because I was working on this Bentley over the course of a month, I elected to sand, cut, and polish a section at a time, focusing all of my attention in that area. After cutting with M105 Ultra Cut Compound, I polished using a Lake Country White Pad (still on a rotary) and a new prototype polish from Germany. I elected to save final polishing until the entire car was done.
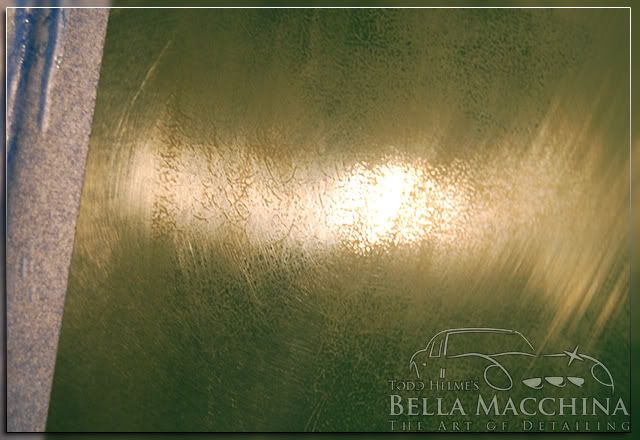
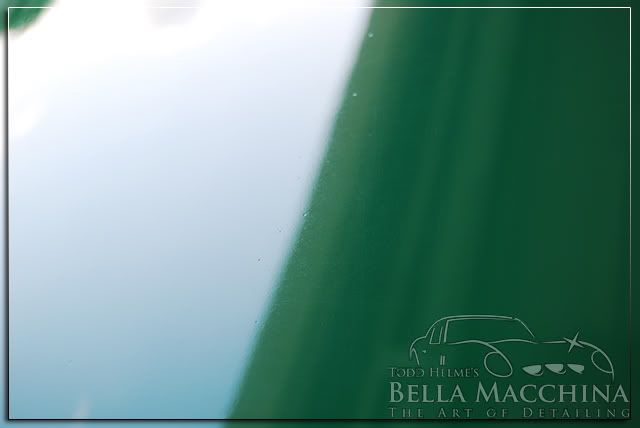
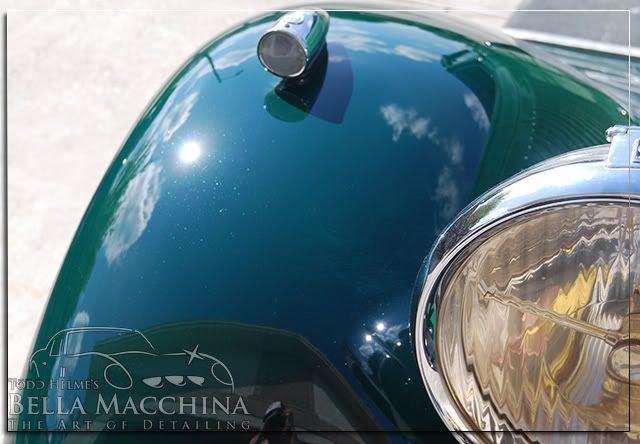
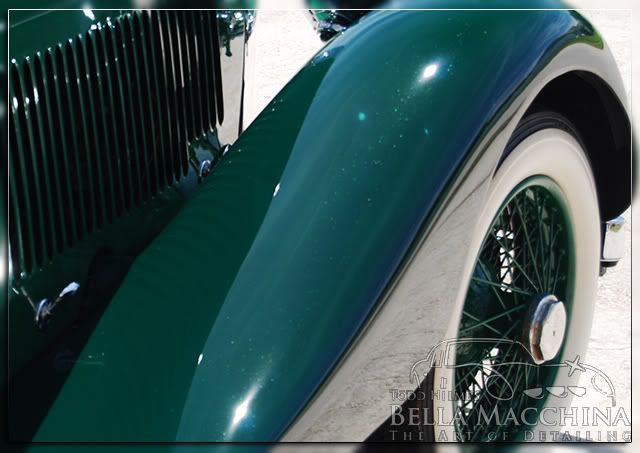
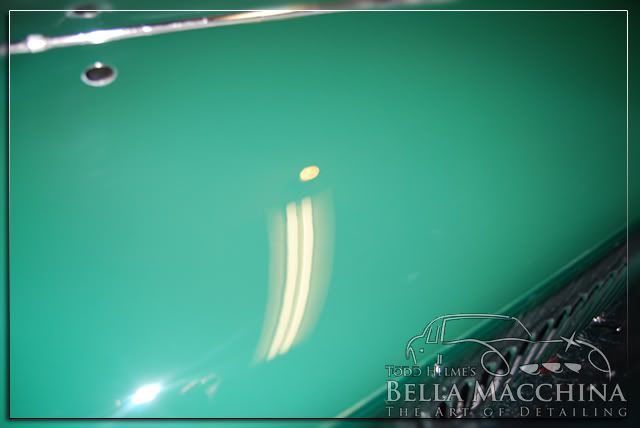
The passenger side of the hood had much finer orange peel texture that was difficult to photograph but acted to `blur` the reflections.
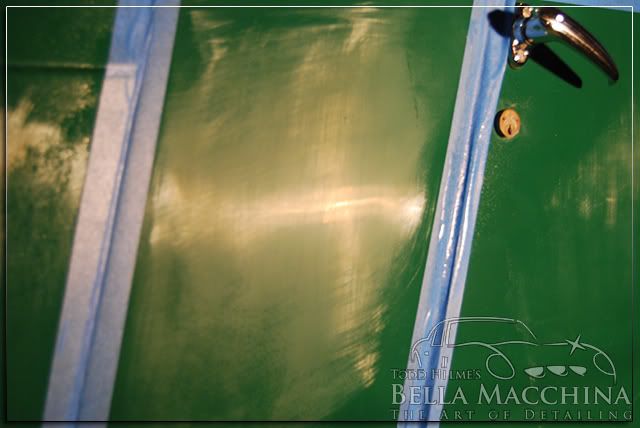
After sanding with 2500 grit/3000 grit Meguiar`s in a crosshatch pattern...
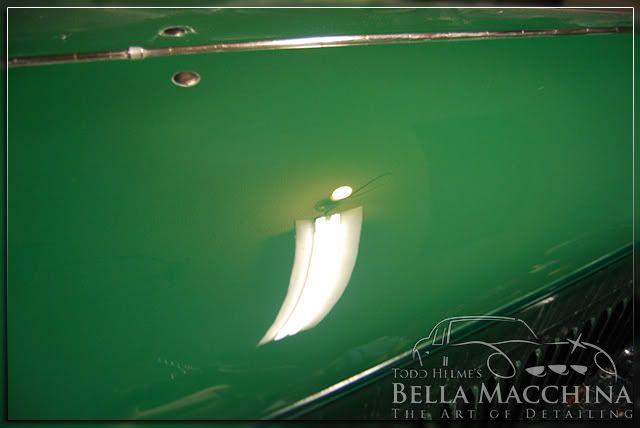
After cutting and polishing the same as above, the gloss and sharpness was greatly improved...
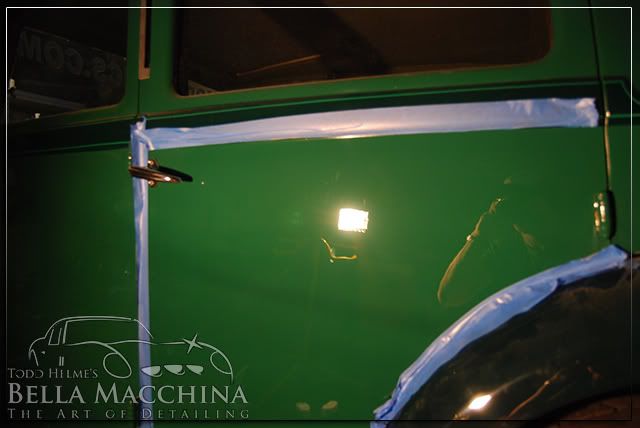
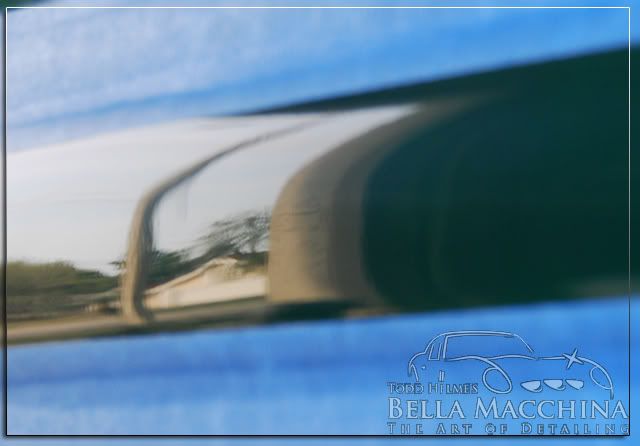
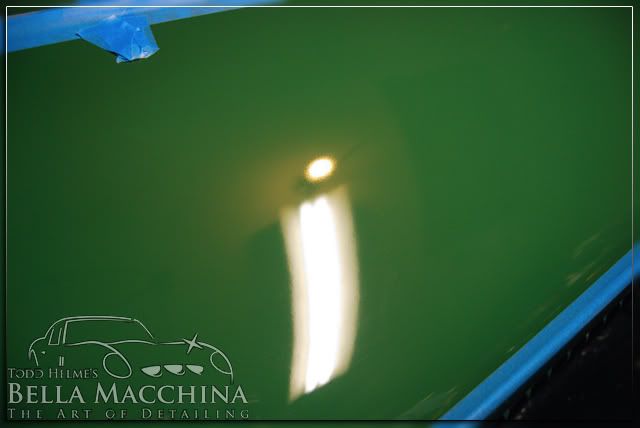
Here is another before picture of the same area using the flash setting on my camera. The light`s reflection is dull and `out of focus`...
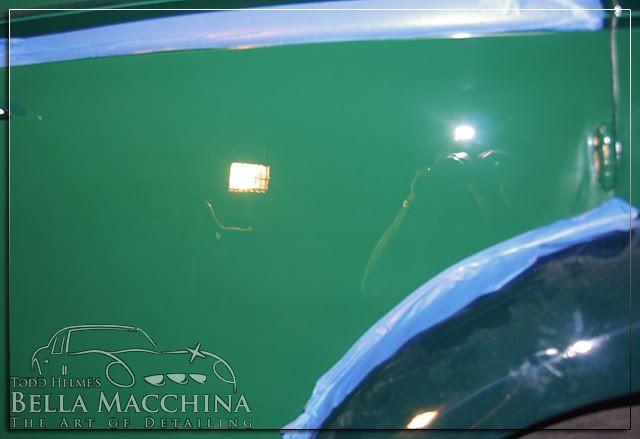
After sanding/cutting/polishing it looks much better....
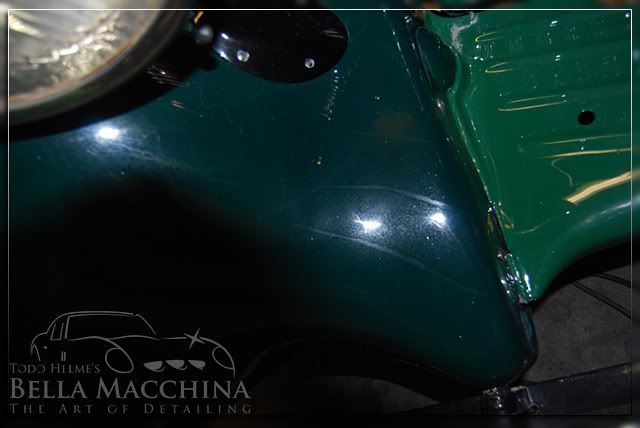
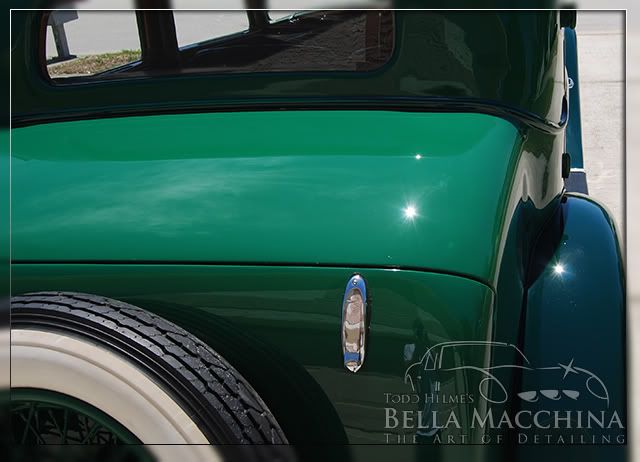
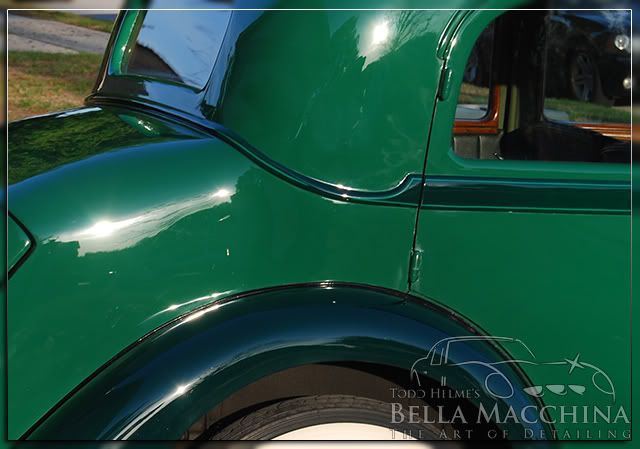
After completing the hood I started working counter clock wise around the Bentley, starting with the driver`s side fender. A before picture using the flash of my Nikon D40x.
Results 1 to 15 of 39
-
04-22-2009, 10:35 PM #1Just a regular guy


- Join Date
- Feb 2009
- Location
- Oviedo/Stuart Florida
- Posts
- 15,278
- Post Thanks / Like

1931 Bentley Saloon: Full sand, buff, and detail
-
04-22-2009, 10:36 PM #2Just a regular guy
- Join Date
- Feb 2009
- Location
- Oviedo/Stuart Florida
- Posts
- 15,278
- Post Thanks / Like
A couple of after shots of the same fender...
The engine side covers where in particularly poor shape with huge amounts of orange peel. It took about 4 hours per side to tape of a section, sand/cut/polish it, then tape of another section of the side cover, cut/sand/polish it, etc because of the small areas and large amount of vents.
Here is a cropped area from the previous photo showing the poor condition of the paint.
The same area after a lot of measuring the paint and sanding...
After cutting and polishing... Unfortunately I didn`t document the work done on the left side of the photo, by the engine vents, as it was extremely time consuming.
This shot in the halogen shows the general swirled up condition of the paint, which by itself would make for pretty dramatic before and after shots.
A cropped version of the previous photograph...
Sanding revealed how poor the paint was. In numerous spots on this car there was a lot of `pig-tails` and damage that required heavy amounts of sanding. It almost looked like the paint was cracked in this area on the leading edge of the door, but it was really deep sanding scratches from a terrible attempt at a blend mark.
This Bentley was also blessed with heavily damaged paint around each hinge, door handle, and tight corner, which honestly doubled the time spent polishing the exterior. As I mentioned previously, I became obsessed with achieving perfection on this car, and some of these tight areas where so small that only hand polishing (and a lot of it) would work. It took nearly and hour to polish out the tight areas around the door handle by hand. Multiply this by at least 10 different spots on the body (each handle, hinges, and tight areas).
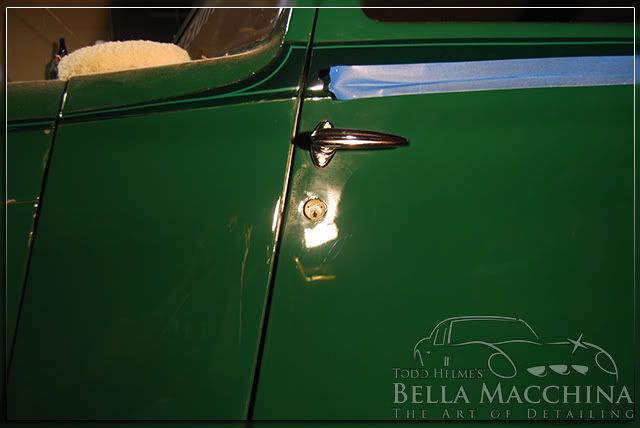
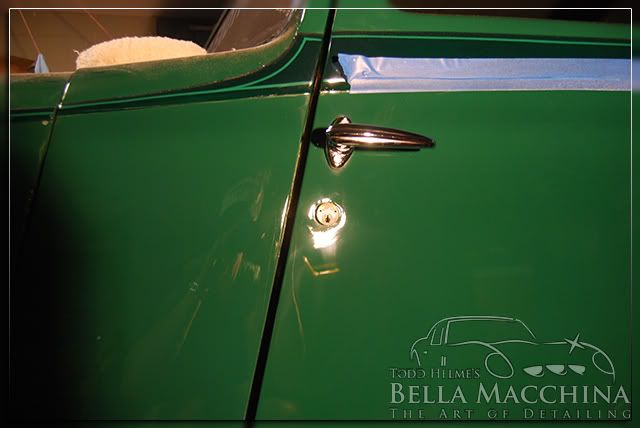
After sanding/cutting/polishing the door.
A similar time consuming process was carried out on the driver`s side rear door. 50/50 split shots are always fun
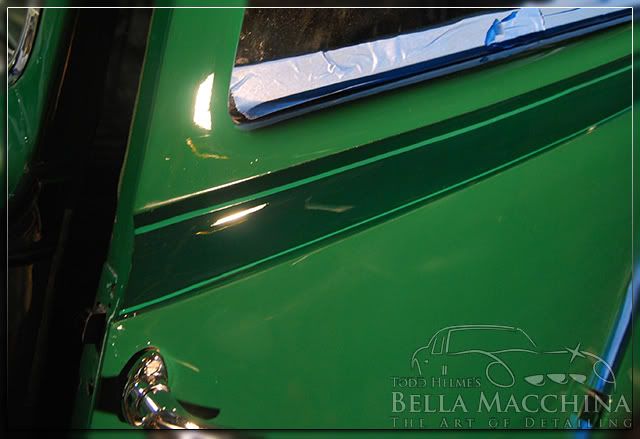
The pin striping on this Bentley was all done by hand. All small detailed areas required taping and working in sections when sanding and polishing to avoid removing the hand painted lines.
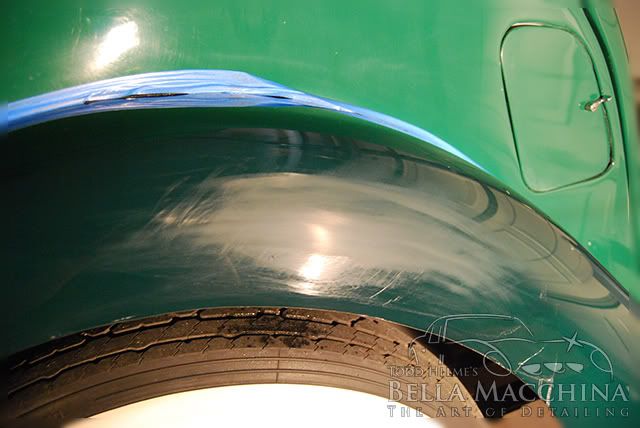
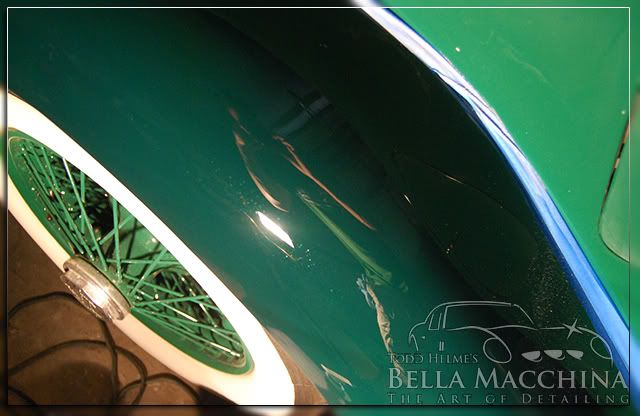
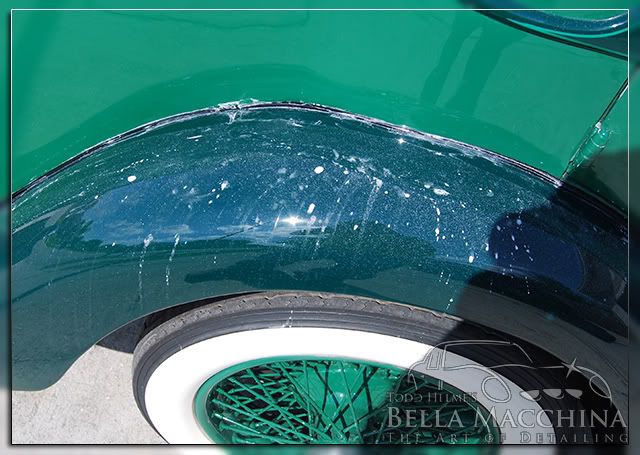
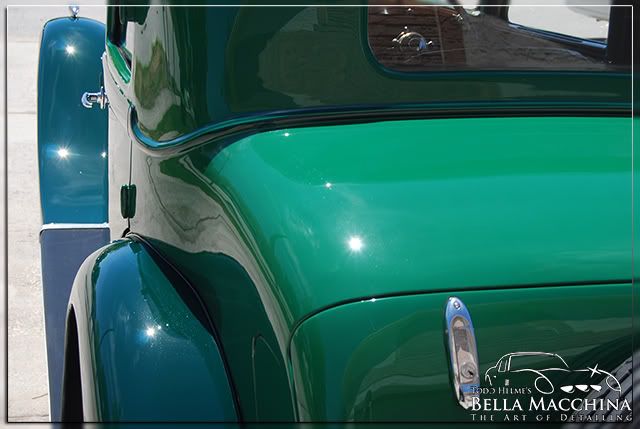
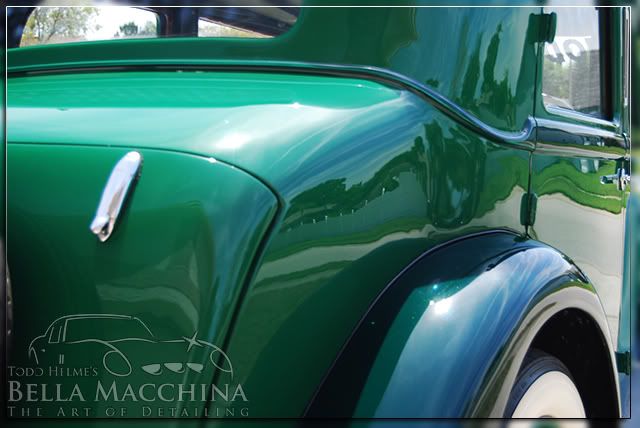
The rear fenders where in as poor of shape as the rest of the car and far from their highest potential...

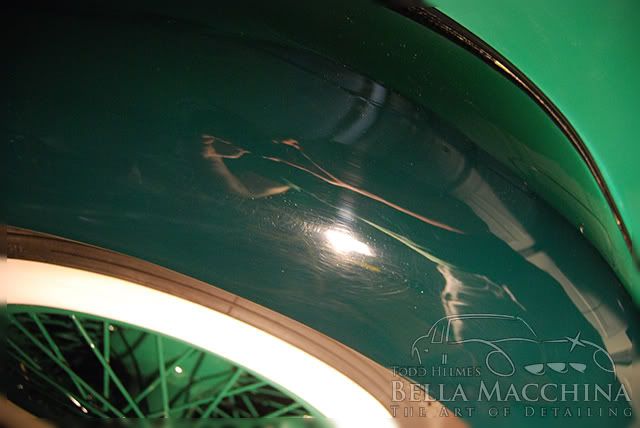
After sanding/cutting/polishing I was shocked to discover that the darker green fenders had a light metal flake, which was completely invisible at first!

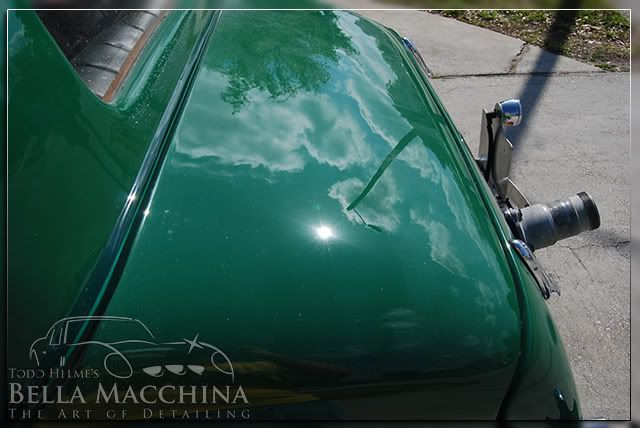
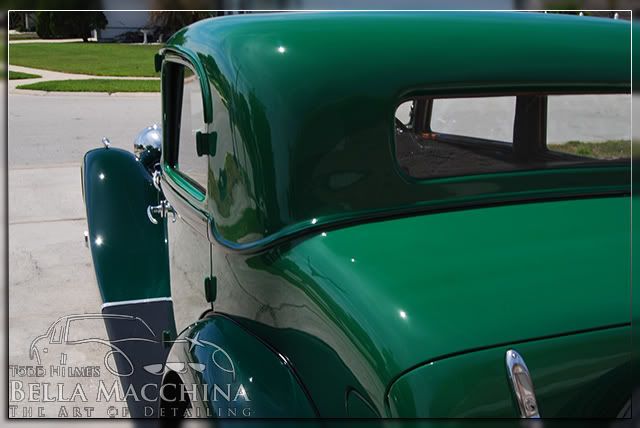
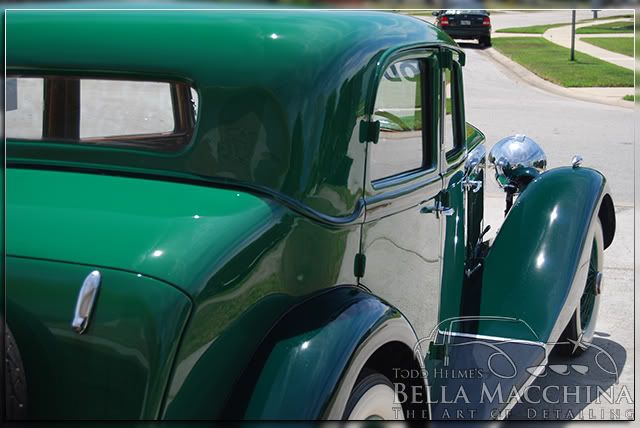
The rear `c pillars` on both sides had very deep DA sanding marks, as did the majority of the roof.
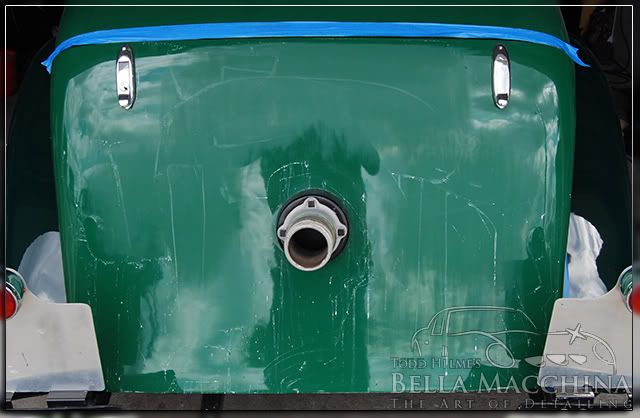
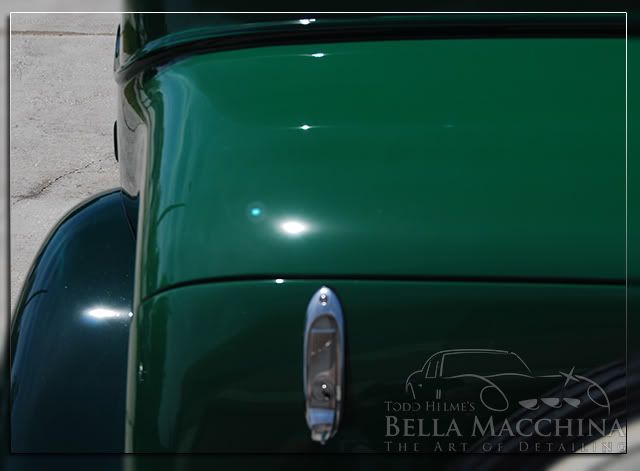
A before picture of the condition of the trunk cover...
After sanding with 2000/2500/3000 grit Meguiar`s Unigrit...
Removing even fine sanding marks from large areas (as well as deeper sanding marks known as tracers) requires a pretty aggressive go. In this case several passes where required with a Flex rotary polisher and a Lake Country Twisted Wool Pad with Meguiar`s M105 Ultra Cut Compound to completely level the surface and restore gloss.
The difference in the finish was dramatic!
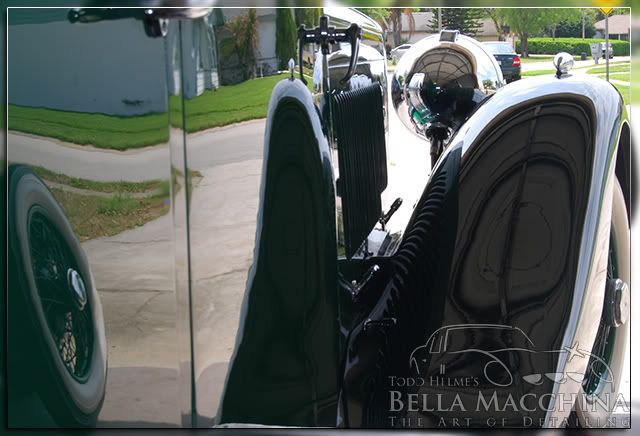
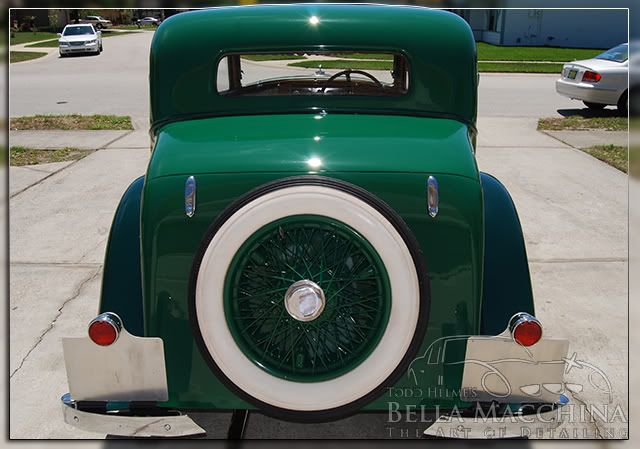
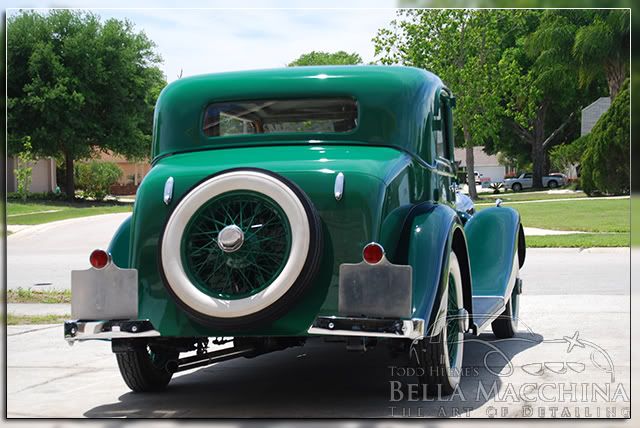
The spare tire and wheel where removed to allow full access to the rear of the Bentley.
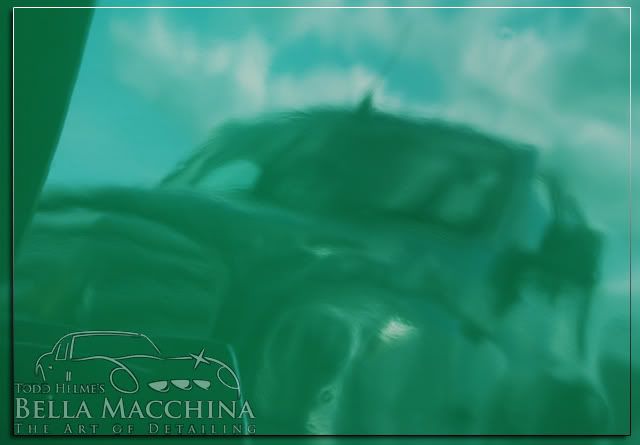
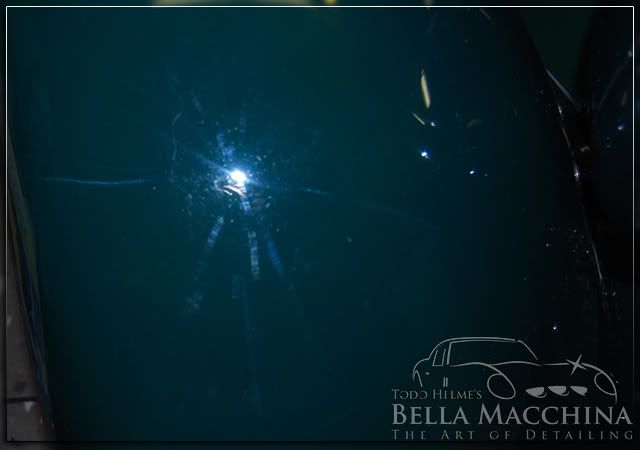
A reflection shot from the rear shows how poor the condition of the rear`s paint was.
During sanding with 2000 Unigrit (followed by 3000 Unigrit)...
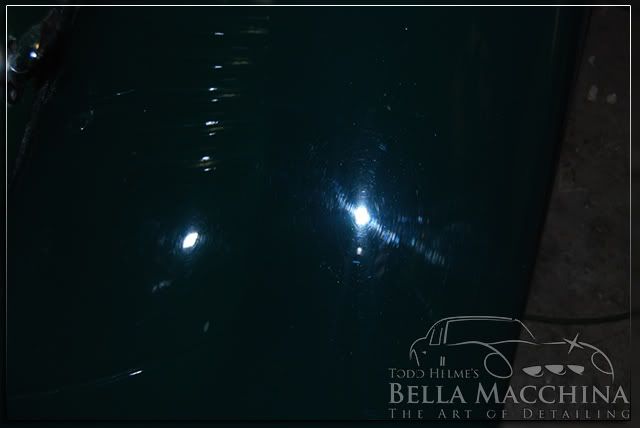
After cutting and polishing the rear section is looking much better!
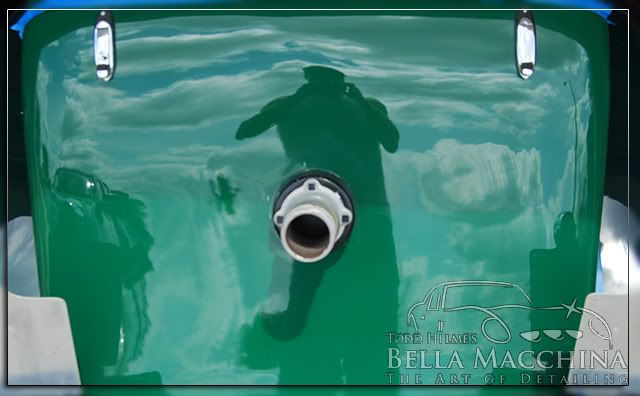
Now my car is completely visible
After finishing the entire driver`s side, roof, and rear of the Bentley I started back at the front of the passenger side and worked back along it. At this point the Bentley had been in my garage for two weeks.
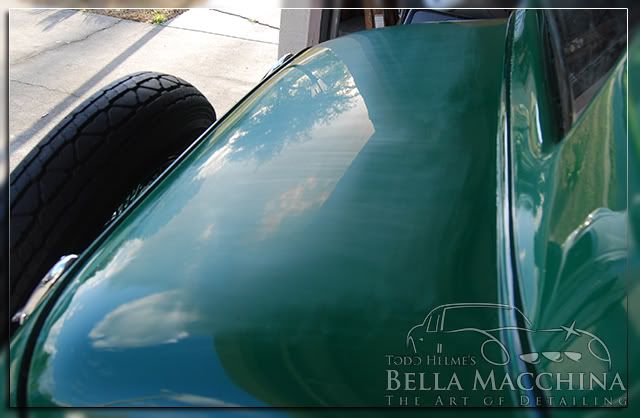
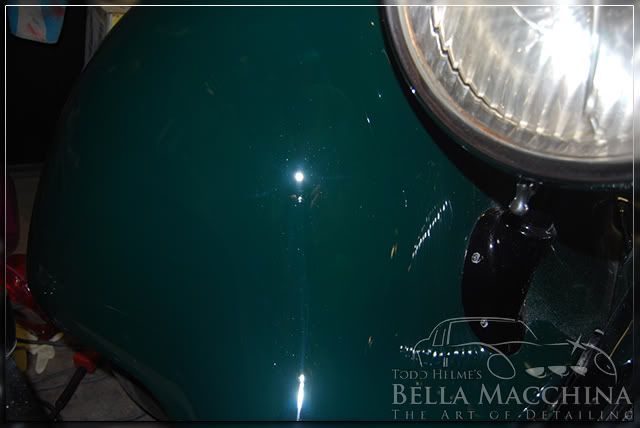
The passenger side fender looked almost dull and lifeless to begin...
[/IMG]
-
04-22-2009, 10:37 PM #3Just a regular guy
- Join Date
- Feb 2009
- Location
- Oviedo/Stuart Florida
- Posts
- 15,278
- Post Thanks / Like
After sanding/compounding/polishing...


The passenger side door before...
After sanding...
After the subsequent machine polishing... Under the `watermark` logo you can see a 4 inch wool pad that was used to polish all the tight areas which where originally taped up.
The passenger side rear door was probably the roughest of the entire car. It had crazy deep scratches and sanding marks that looked like little worms over the entire surface.
After initial sanding the paint looked worse!!! The deeper scratching over the entire door is clearly visible...

A long time was spent leveling out these scratches while measuring the paint thickness frequently to ensure that excess material was not removed.
Finally ready to cut and buff

That looks much better!!!
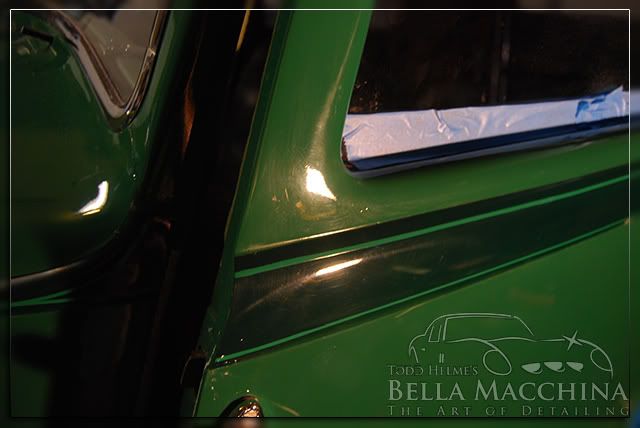
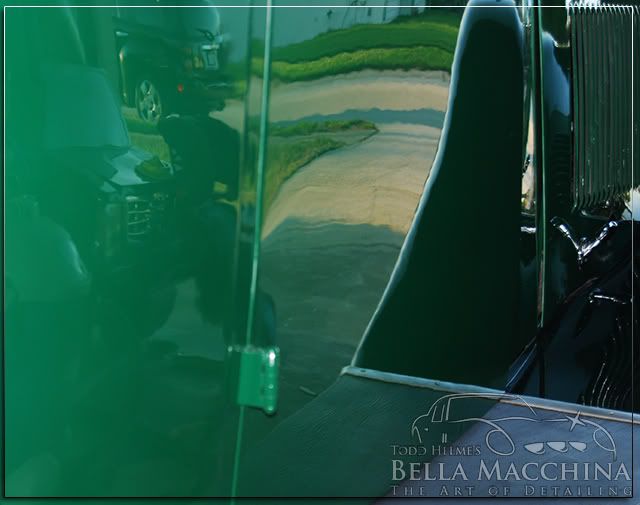
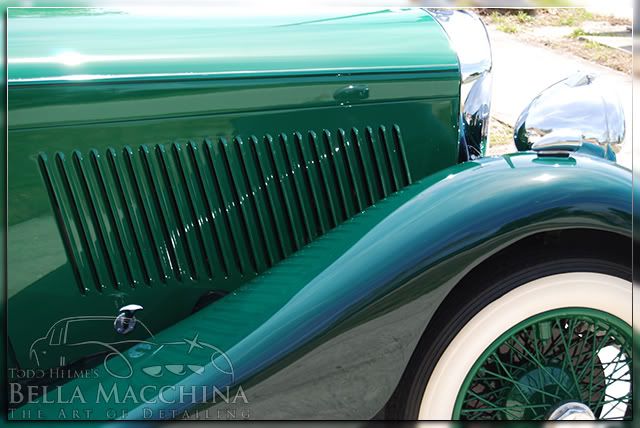
The leading edge of the windshield was the only area on the car that did not require wet sanding. The paint was fairly even, although a swirled mess.
Meguiar`s M105 on a Lake Country Orange Power Pad followed by Meguiar`s M205 on a Lake Country Black finishing pad made quick work over the area.
`Perfection is in the details`. Small trim pieces such as those below the windows ended up being extremely time consuming. The hand laid pin stripping (above the clear coat) had to be carefully taped over.
The orange peel in these pieces was as bad as the rest of the car.
A cropped image from the previous photograph...

Sanded and fixed up...

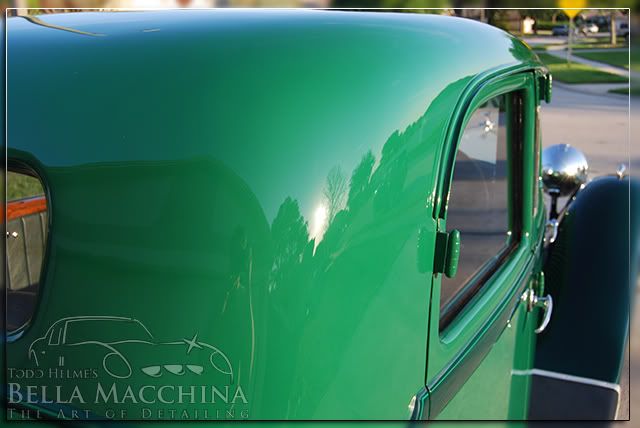
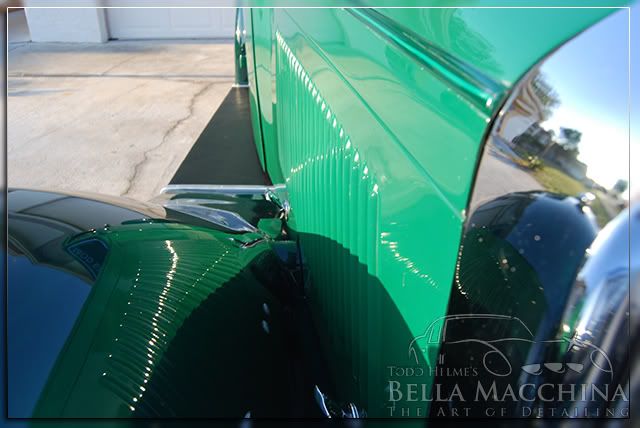
The Bentley was pulled outside and thoroughly inspected for any remaining defects in the sunlight. Some areas still had a little bit of dust, splatter, and polishing residue.


Now that the paint was perfect it was time for a little detailing. I did not document most of this work with photographs because truthfully it had grown a little long in the tooth and I really had to get it wrapped up.
The Bentley was thoroughly pressure rinsed and the body was carefully washed using Meguiar`s Hyperdressing and a Lake Country Gold Ultimitt. After carefully drying the car was final polished using Meguiar`s M205 Ultra Finishing Polish on a Flex Dual-Action with a Lake Country Black Finishing Flat Pad. After the final residue was removed, the classic British Iron was once again carefully washed and dried.
Each wheel and tire was dismounted and cleaned individually. Eimann Fabrik Hi-Intensity Cleaner was used in the in the wheel arches. Eimann Fabrik Tire Cleaner and a Meguiar`s Versa Angle Tire Brush was used to scrub the white walls. Meguiar`s All Wheel Cleaner and an EZ-Detail Brush made quick work of the spokes. Each wheel was then sealed with Blackfire Wet Diamond All Paint Protection. The tire`s were dressed with 2 coats of 1Z Einszett`s Tienfenphelger (Rubber and Vinyl Protectant).
All of the interior and exterior metal was polished using Blackfire Wet Diamond Show Polish. The original wood in the interior was lightly sanded and feed with Lucas Wood Restore, then re lacquered. The leather was cleaned with Leather Therapy Wash then treated with Leather Therapy Restorer and Conditioner, before being topped with Leather Therapy Finish.
Various metals and plaques in the engine compartment were two step polished with Blackfire Fine Cut Aluminum Polish then Blackfire Wet Diamond Show Polish. The hoses, plastics and rubber where dressed with Meguiar`s Hyper Dressing cut 3:1.
Finally 2 coats of Blackfire Wet Diamond Paint Sealant where applied 8 hours apart, topped with two coats of Blackfire Midnight Sun (batch 24) 8 hours apart to create the `Wet Ice over Fire` combination.
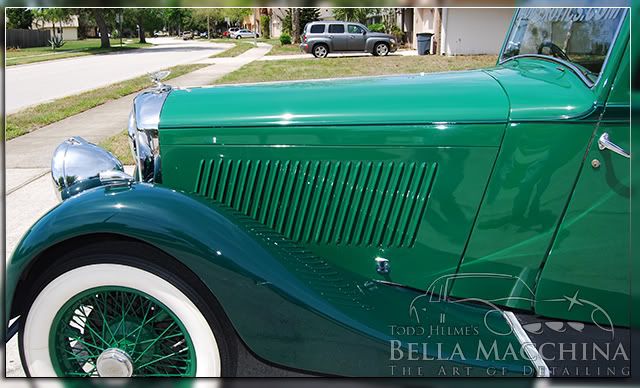
I photographed the Bentley on two separate days trying to capture as many sun shots as possible from as many angles as possible so that the true, perfect condition of the paint could be seen. I hope I don`t offend anybody but I am damn proud of results of this car considering the amount of hard work that I put into it.


-
04-22-2009, 10:39 PM #4Just a regular guy
- Join Date
- Feb 2009
- Location
- Oviedo/Stuart Florida
- Posts
- 15,278
- Post Thanks / Like

-
04-22-2009, 10:58 PM #5Forza Auto Salon

- Join Date
- Aug 2004
- Location
- Troy, MI
- Posts
- 12,534
- Post Thanks / Like
Jesus F`ing Christ!!! You did it again and raised the bar even higher. Great job, this thread is a work of art. Bravo:thumbup:
-
04-22-2009, 11:09 PM #6
- Join Date
- Mar 2009
- Posts
- 371
- Post Thanks / Like
Beautiful.........80 hours you say?
 ut:
ut:
-
04-22-2009, 11:17 PM #7
- Join Date
- Mar 2009
- Posts
- 9
- Post Thanks / Like
Congratulations on finally finishing that car. You told me that you wanted a challenge, and you truly handled it like a professional. Thanks for the incredible write-up and brief wet sanding how-to.
-
04-23-2009, 07:32 AM #8
- Join Date
- Mar 2009
- Posts
- 271
- Post Thanks / Like
Awesome job Todd....Top notch..:notworthy:
-
04-23-2009, 07:49 AM #9TOGWTGuest
That vehicle and your detailing work bring a new meaning to "the art of detailing" Kudos > > >
-
04-23-2009, 07:50 AM #10AMG Classic Car Detailing

- Join Date
- Feb 2008
- Location
- Sunny Florida
- Posts
- 11,199
- Post Thanks / Like
We are bless to have you and your talented workmanship here on Truth In Detailing,:w00t: the other places are sure to missed you Boo Hoo, but their lost is our gain:thumbup:. The Bentley is so sweet looking and after your process of wetsanding and buffing which told over 80 hrs is truly one one your best works to date. Just awesome and Thank you for sharing it with us and the write up too.................Tu Amigo Angelo
AutopiaForums is the place to be.
Remember to Shop Autopia-CarCare.com for your Detailing Needs!
-
04-23-2009, 08:13 AM #11

- Join Date
- Apr 2009
- Posts
- 31
- Post Thanks / Like
Wow, great work Todd, a true master piece.
I like the "perfection is in the details" part too.
JoshPerfection Is In The Details
-
04-23-2009, 08:30 AM #12
- Join Date
- Apr 2009
- Posts
- 746
- Post Thanks / Like
Awesome work Todd! And an outstanding write-up as well!!! :thumbup:
Tim
-
04-23-2009, 08:42 AM #13
- Join Date
- Mar 2009
- Posts
- 76
- Post Thanks / Like
Wow! When I look at the work you do Todd, I am in awe. Your attention to detail is second to none. The work looks better than any paint job the owner could have gotten.:notworthy:
-
04-23-2009, 09:37 AM #14
- Join Date
- Mar 2009
- Posts
- 396
- Post Thanks / Like
Well Todd, once again you did an AMAZING job, I dont know how anyone could question it. You sure you dont have trained monkeys running around doing the work for you??
Presidential Automotive Detailing
Billy Aylward
-
04-23-2009, 10:47 AM #15
- Join Date
- Mar 2009
- Posts
- 742
- Post Thanks / Like
todd, what can i say that hasn`t already been said.... " U DA MAN!!!!!!!":thumbup:

 Reply With Quote
Thread Information
Users Browsing this Thread
There are currently 1 users browsing this thread. (0 members and 1 guests)
Similar Threads
-
`60 Imala, Full Wet Sand and Buff: Rasky`s Auto Detailing
By Bobby G in forum The Detailers ShowcaseReplies: 19Last Post: 06-16-2011, 02:21 PM -
EveryLastDetail Full color sand/buff Gone in 60 Seconds 67 G.T.500
By big red in forum Click & Brag -The Detailers ShowcaseReplies: 18Last Post: 05-14-2011, 05:46 AM -
Dirk Diggler rides again! ?77 Corvette, full wet sand and buff by Rasky?s Auto Detail
By bbquer in forum The Detailers ShowcaseReplies: 17Last Post: 09-01-2010, 01:16 AM -
1931 Bentley Saloon: Wet sand and polish
By Todd@RUPES in forum Click & Brag -The Detailers ShowcaseReplies: 23Last Post: 05-28-2010, 03:23 AM -
Full wet sand n` buff on `05 NBP Acura RL, by Rasky`s Auto Detailing
By imported_RaskyR1 in forum The Detailers ShowcaseReplies: 26Last Post: 10-15-2009, 12:41 AM
Bookmarks