

Review: CarPro PERL
Introduction:
PERL stands for Plastic, Engine Rubber, Leather. When PERL was introduced some months ago (before AG picked this line up there was a lot of excitement from people. As you all know Iâve been a big fan of Ultima Trim and Interior sealants for a long time and Iâm always skeptical that a product can stand up to the durability of UTTG (or ETS for that matter now). I questioned how could PERL do something for trim that UTTG does not. CarPro improved its formula between then and now by introducing a higher concentration of one of their chief active ingredients. Will that translate into excellent durability? We will soon see.
Product Claims:
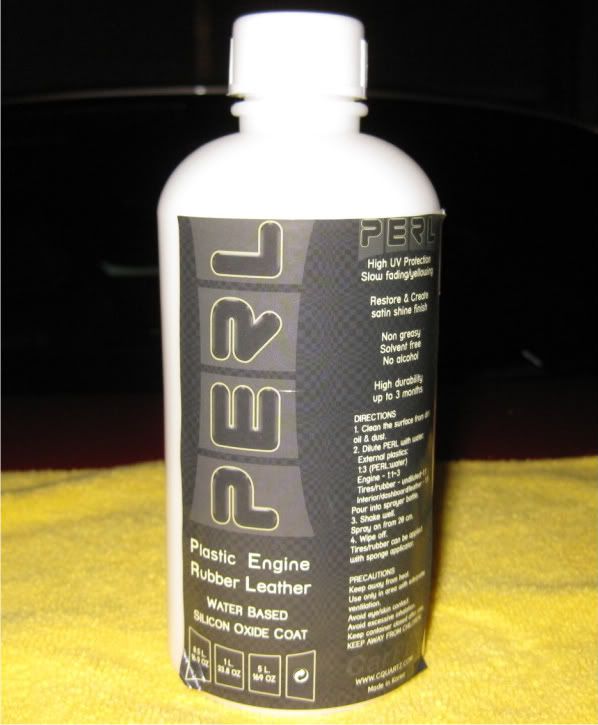
PERL Coat by CarPro is a water-based, protective coating for plastics, rubber, and leather. PERL Coat restores the like-new appearance of these surfaces and keeps them looking good with strong UV and hydrophobic protection. Best of all, PERL Coat lasts up to three months!
Details:
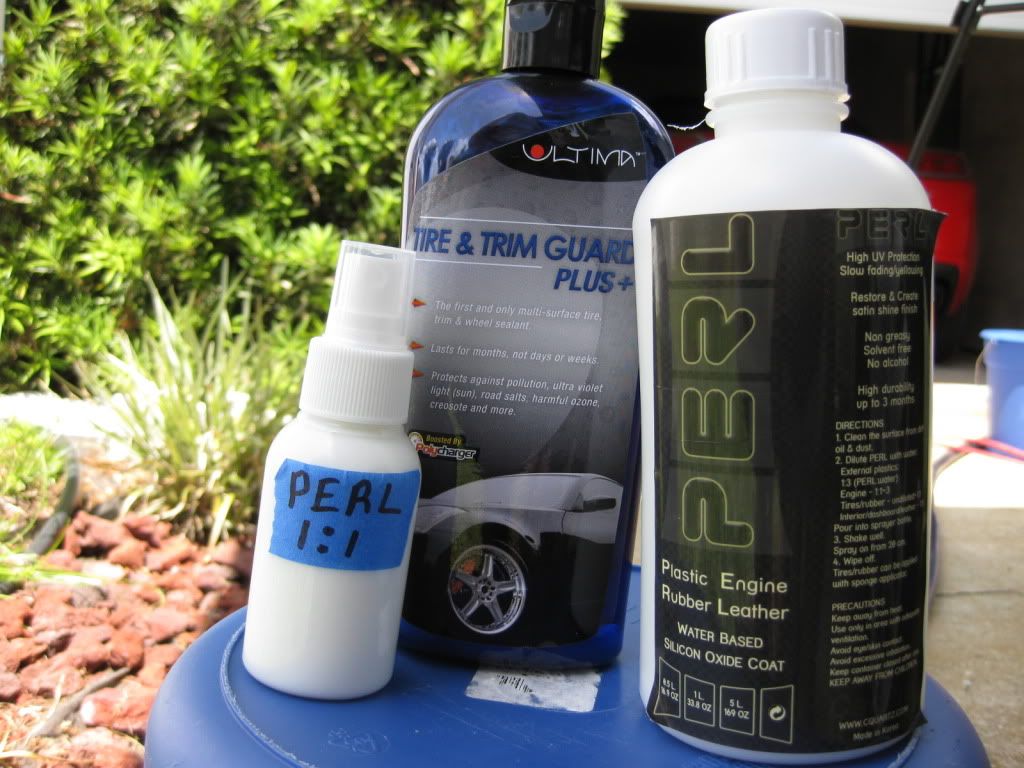
1.- Packaging: Plastic bottle with durable plastic plug and threaded cap
2.- Directions: Clearly labeled
3.- Viscosity: Thick (Before Diluting)
4.- Color: White
5.- Scent: Faint - So familiar but I canât place it (Meant to be apple)
6.- Regular Price: 1.7 oz. (50ml) = $ 4.99
7.- Regular Price: 16.9 oz. (500ml) = $15.99
8.- Regular Price: 33.8 oz. (1000ml) = $24.99
9.- Manufacturer: CarPro
10.- Made in: Korea
Recommended Dilutions:
1.- Tires/Rubber â Undiluted~1:1
2.- Engine - 1:1 ~1:3
3.- External Plastics - 1:3
4.- Interior Vinyl & Leather â 1:5
Product used for application:
Micro Fiber Towel or foam applicator depending on surface and goals
Product
Average Conditions (Fahrenheit)
Average Conditions (Celsius)
PART 1: Tires
As we all know a tire dressing can have different affects on different tires so I will show the product on 4 different types of tires and applied in various manners but first things first.
Video: Preparation of Tire
Wash Tire.wmv - YouTube
I begin by washing tires with ARO and a nylon brush twice and rinsing each time. During the final rinse an mf towel is used as well. The tire is then either left to dry or forced dry with the Metro Master Blaster.
Tire Application:
Video: Application of PERL to tires straight or 1:1
PERL.wmv - YouTube
Adams Bike (After)
Vehicle 2:
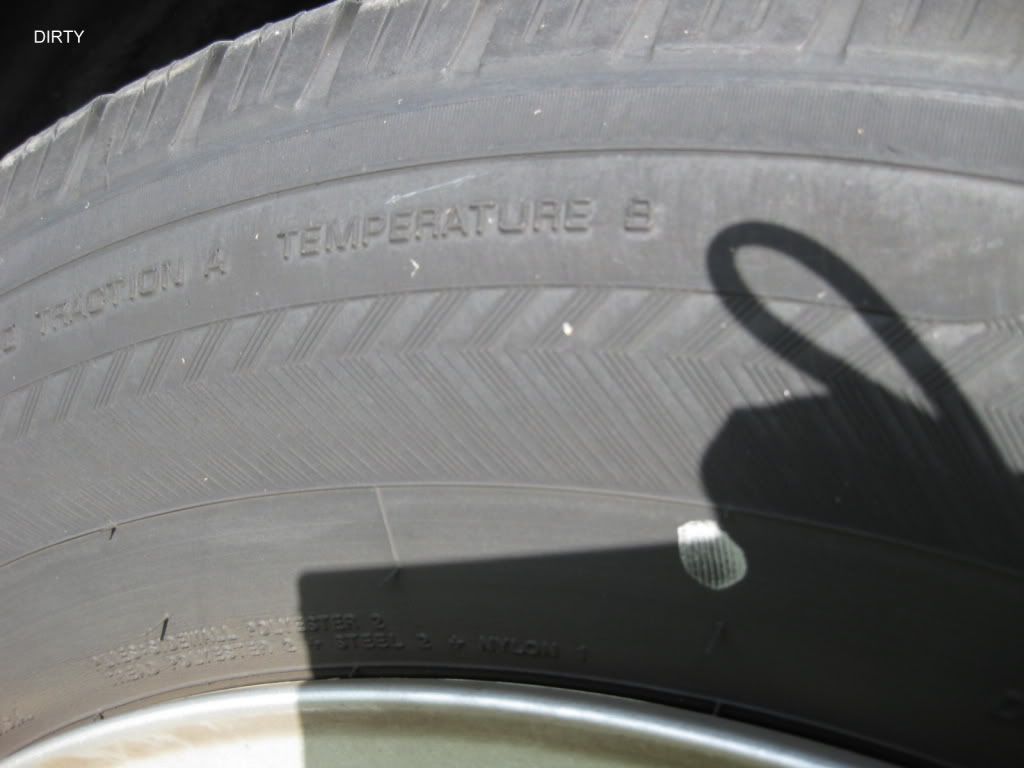
After Washing and Drying / Before Dressing
After
50/50
Vehicle 3:
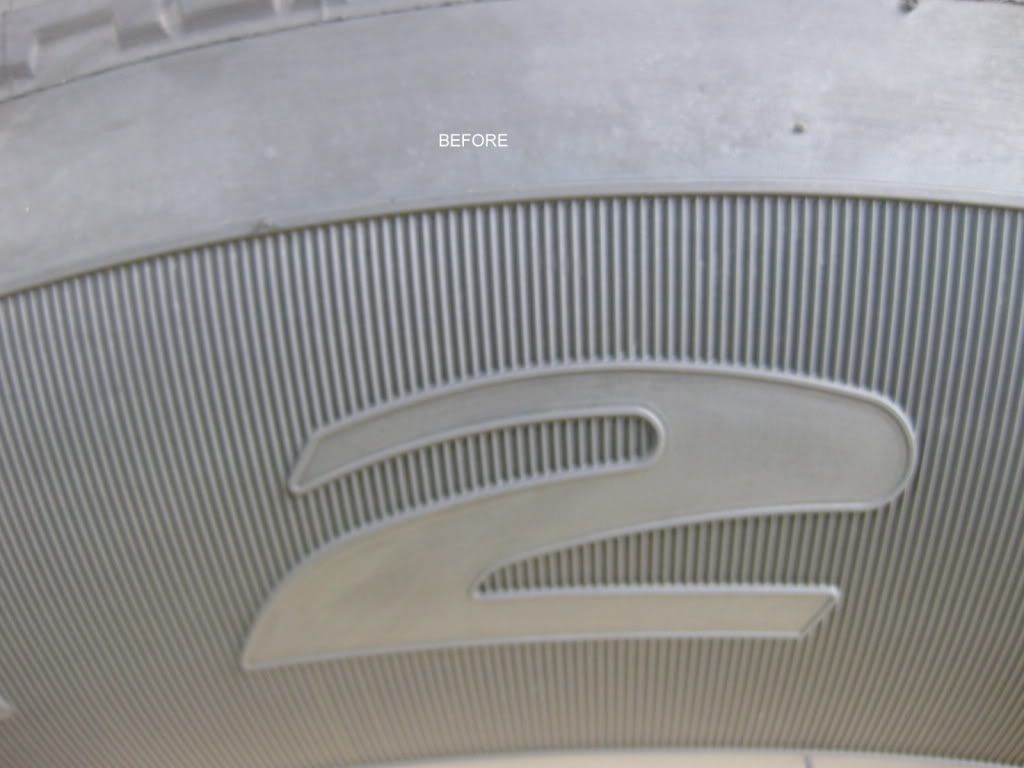
Before Washing
During Wash #1
During Wash #2
Products used on the next Tire
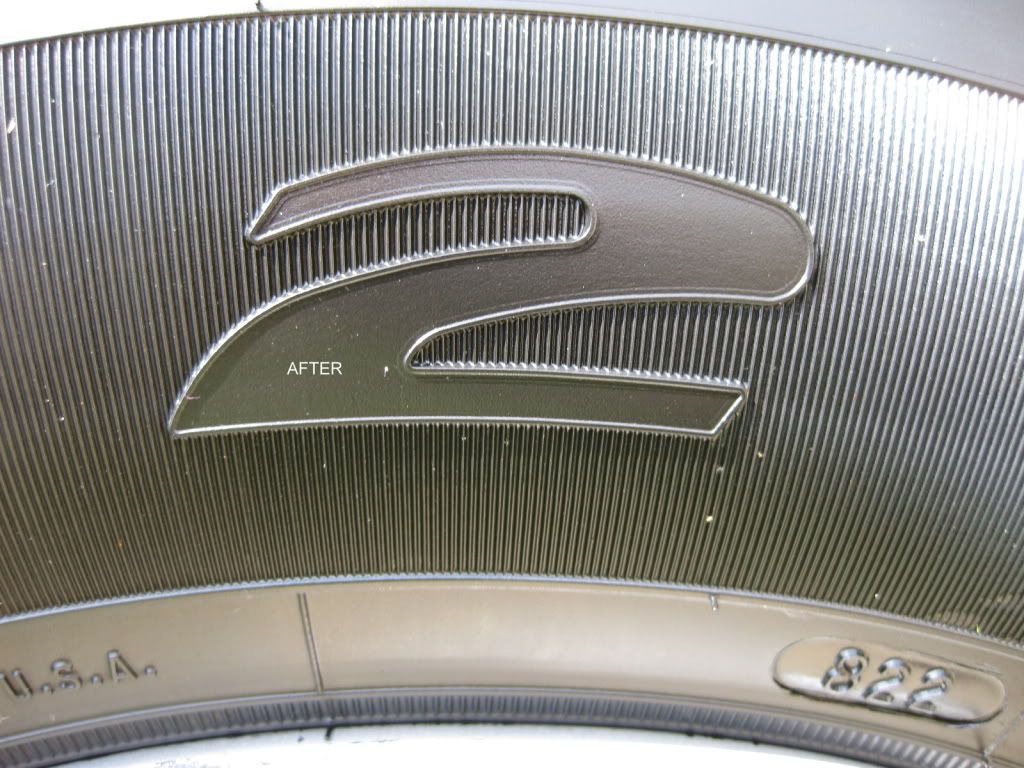
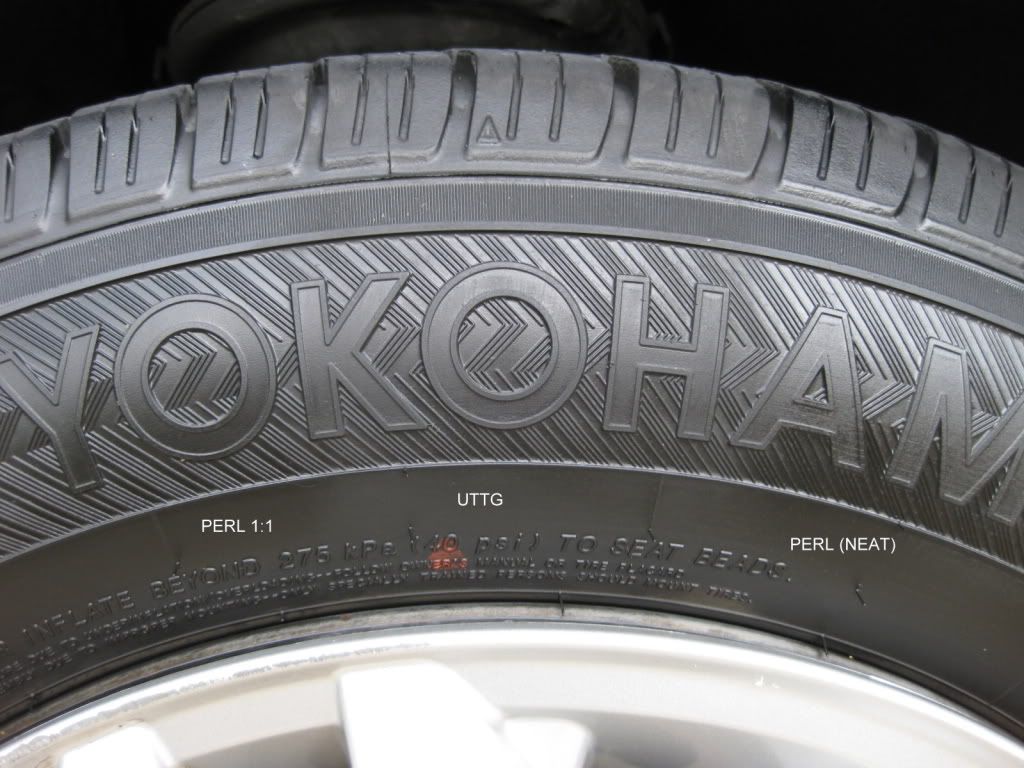
After (PERL 1:1 / UTTG / PERL)
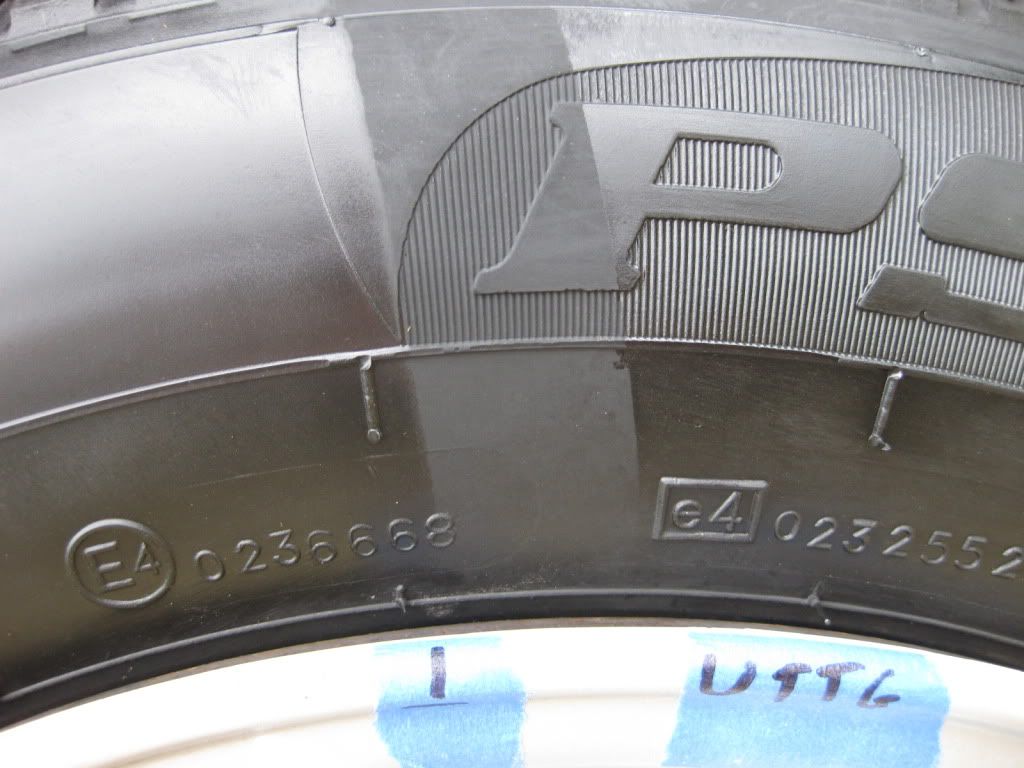
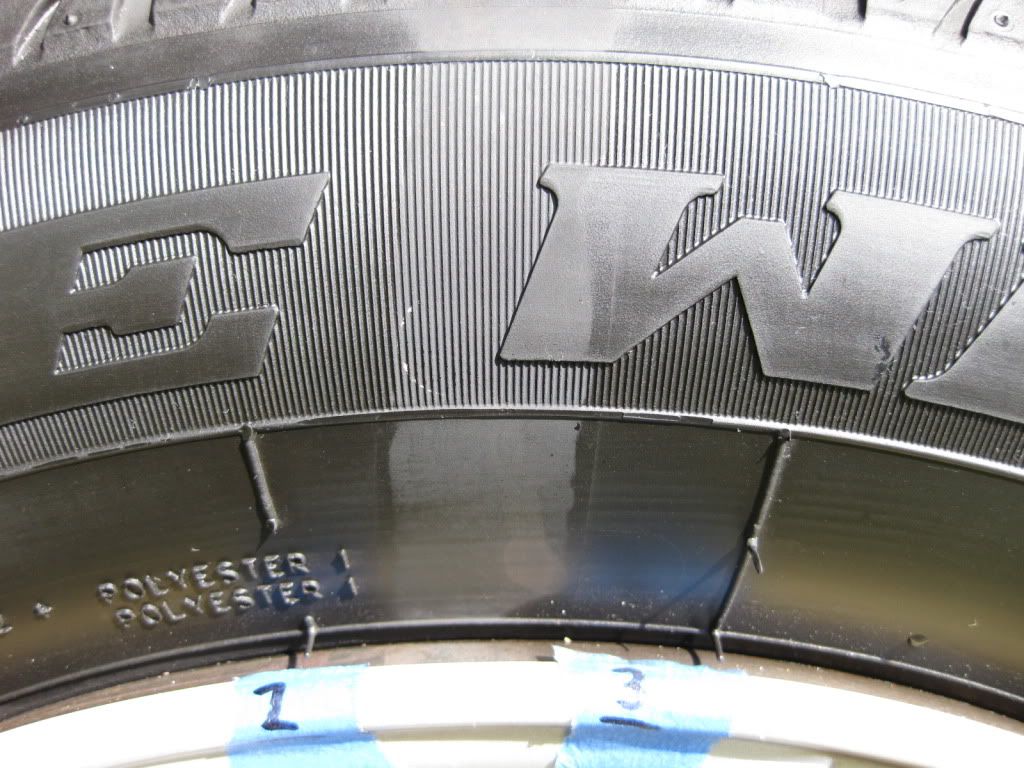
Tire Observations:
I have applied the product to a few vehicles over the last few weeks. I have to say I think the look this product provides on tires is gorgeous. Iâve applied using both 1:1 dilution and no dilution. Obviously we would assume no dilution would offer more durability but that may not be the case. One of our durability tests will prove this theory one way, or the other. I really enjoy applying the product 1:1. Using my 1:1 mix bottle I spray it directly on the tire and then with a few quick swipes the tire is dressed.
After doing a few cars with the product I checked on a couple of them. Adam told me his bike tires were still looking good after about 3 weeks. It is garage kept and Iâm not sure how much rain it has seen. I checked another vehicle (that sits outside 24/7) a couple weeks later and found the durability was not what I had hoped for when exposed to rain. The product was definitely still there and was beading but the look had dropped off. I asked Avi about this and he suggested I layer thin coats to achieve a longer durability in the looks department.
Applied 1:1 itâs so quick and easy that layering time doesnât particularly concern me. The correct way to layer is to apply a thin coat and allow PERL to dry while you continue with other tasks. After approximately 30 minutes or when the product is dry you come back and apply an additional thin coat. This can be repeated and in my next test I will apply 1, 2, and 3 layers to test the differences over time. I think in the real world 3 coats would be asking too much for most cars unless it produces phenomenal durability. We will seeâ¦
So, our durability test will show a few things:
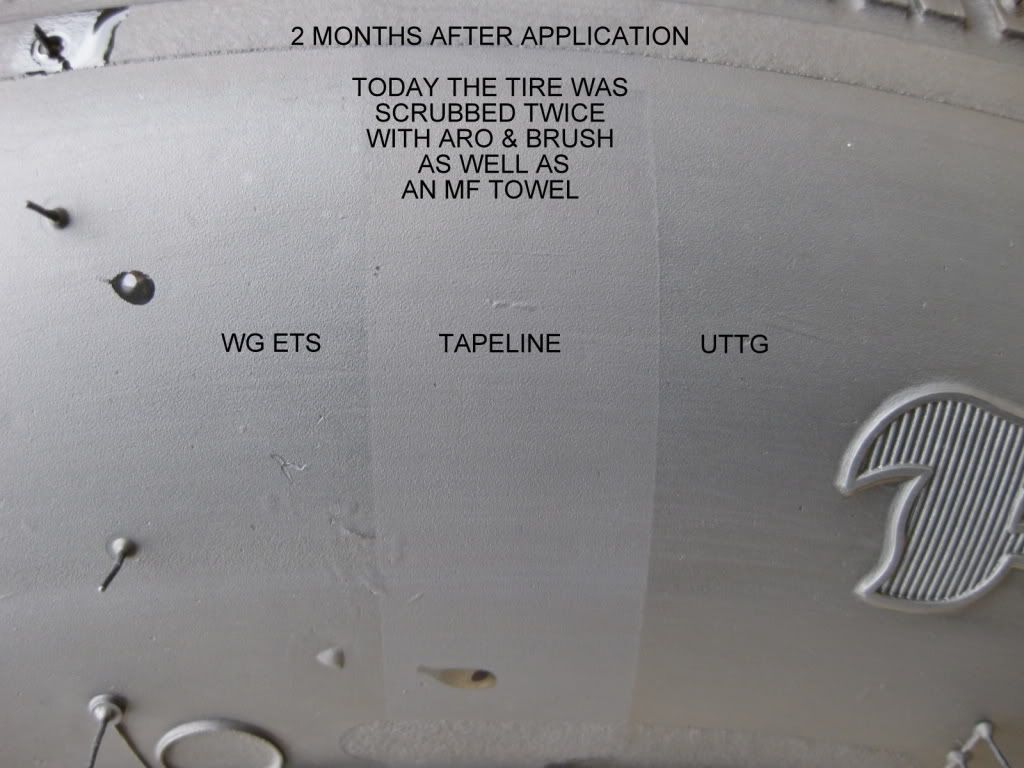
UTTG vs. PERL side by side
PERL 1:1 vs. PERL
PERL 1:1 with 1, 2, & 3 layers
Video: Ultima Trim & Tire Guard vs. CarPro PERL
First the tire was washed as described previously. While rinsing it the final time I also scrubbed it with an mf towel.
Pearl Vs Ultima Tire.wmv - YouTube
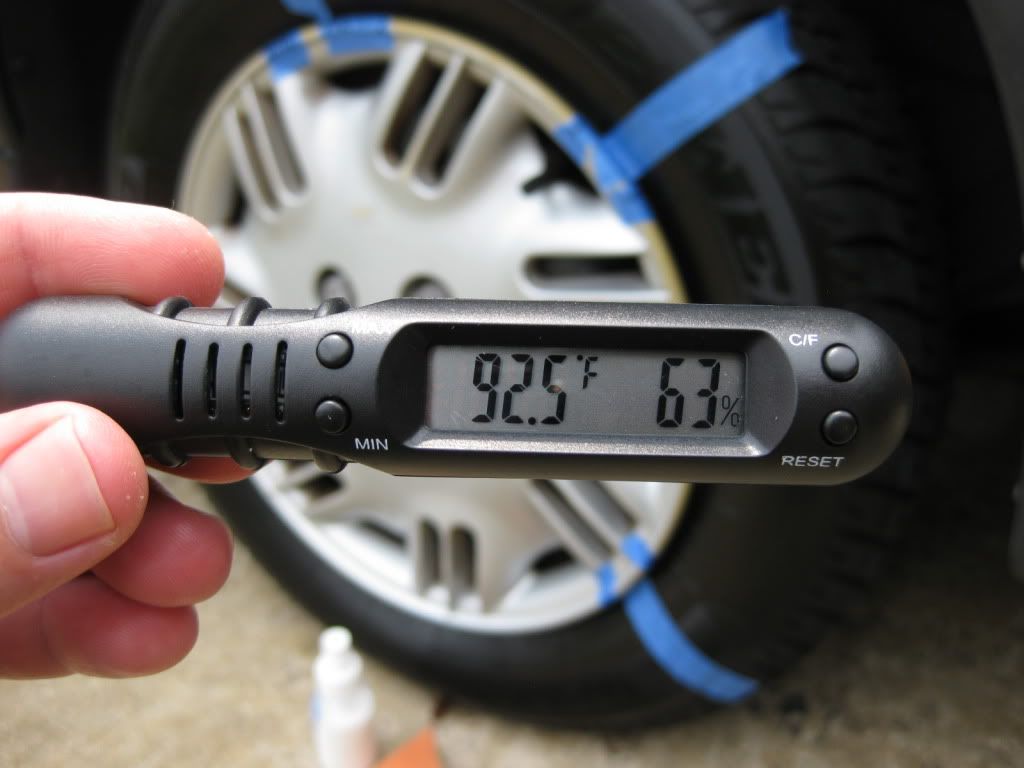
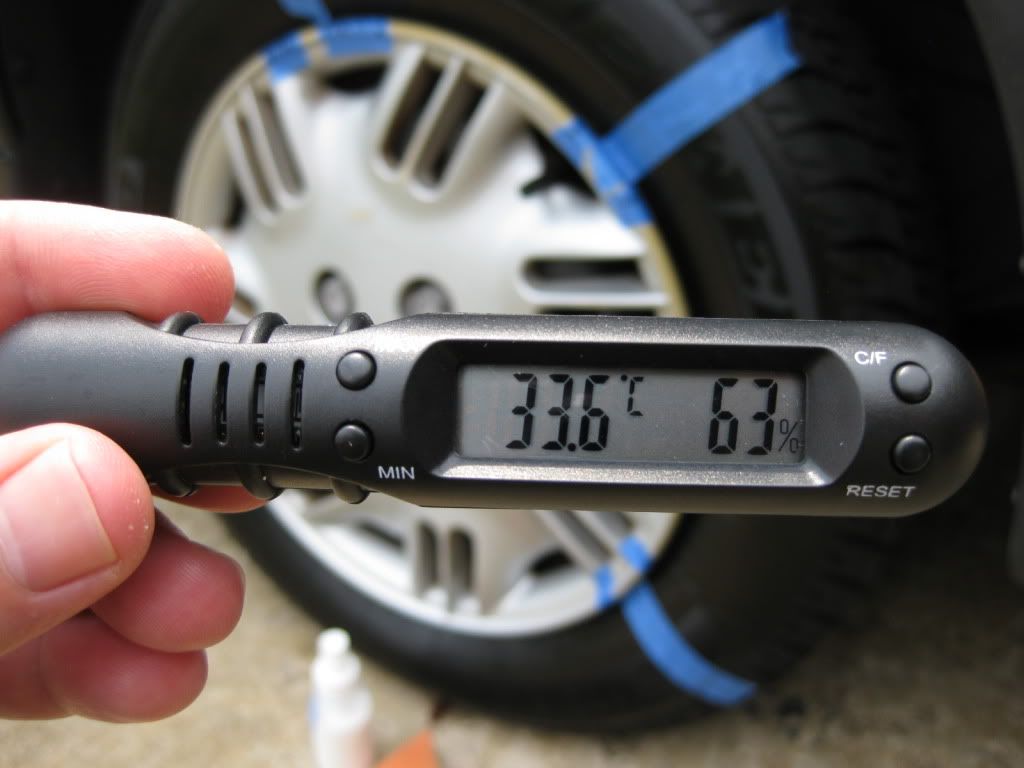
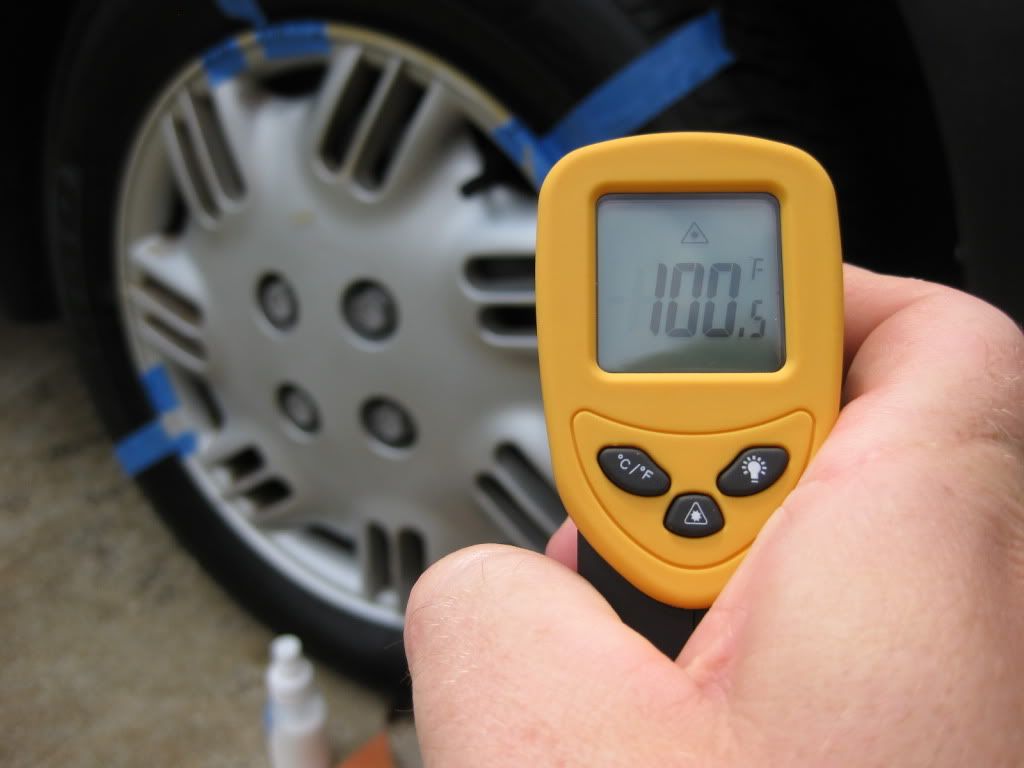
Surface Temperature
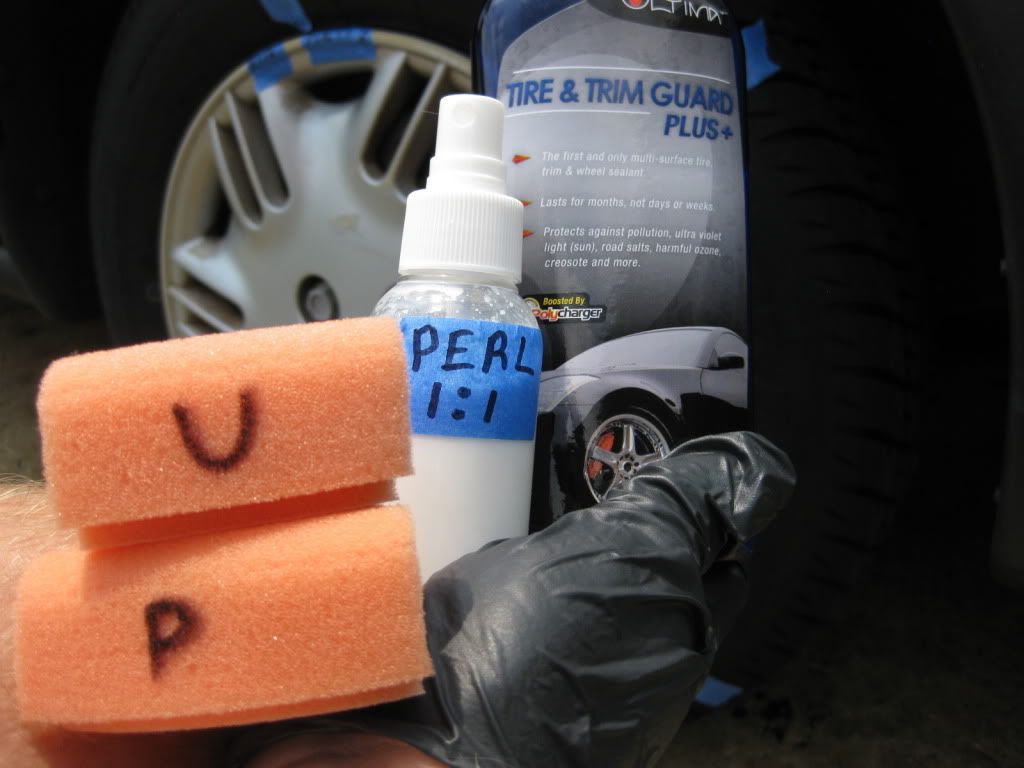
Products & Applicators
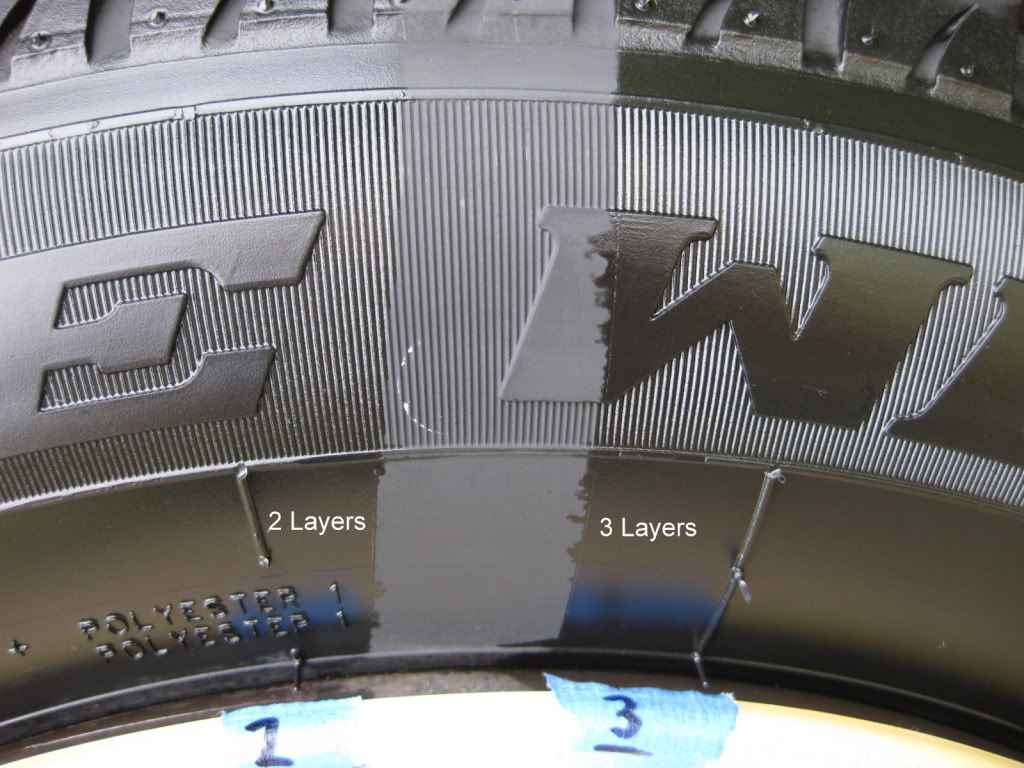
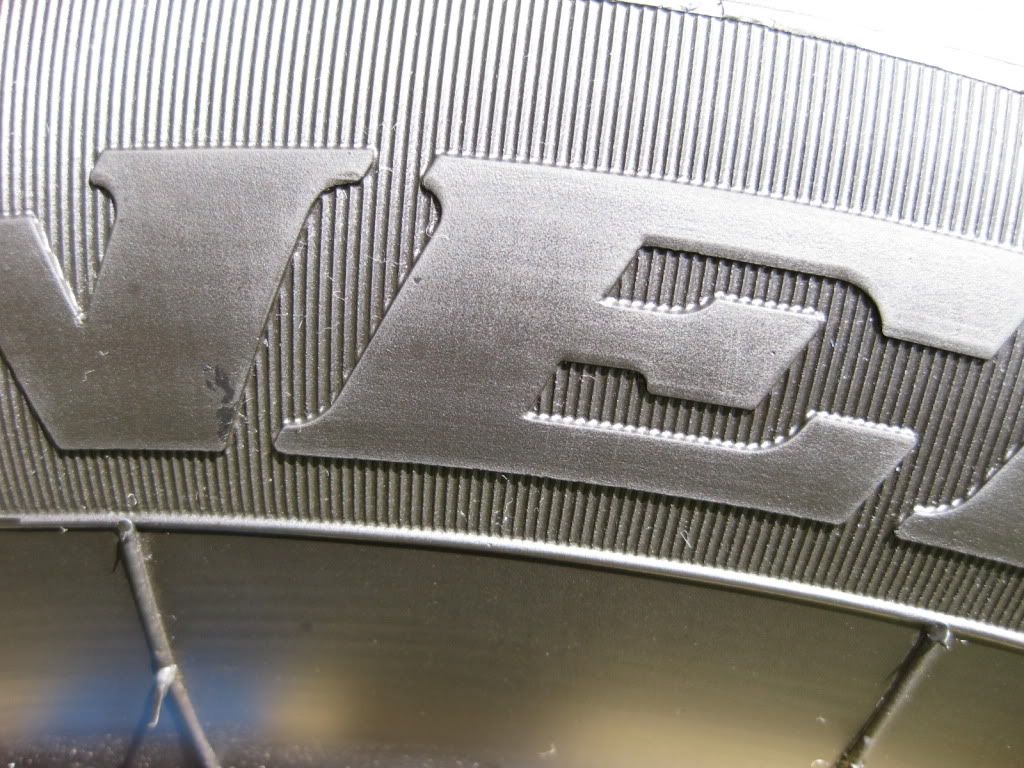
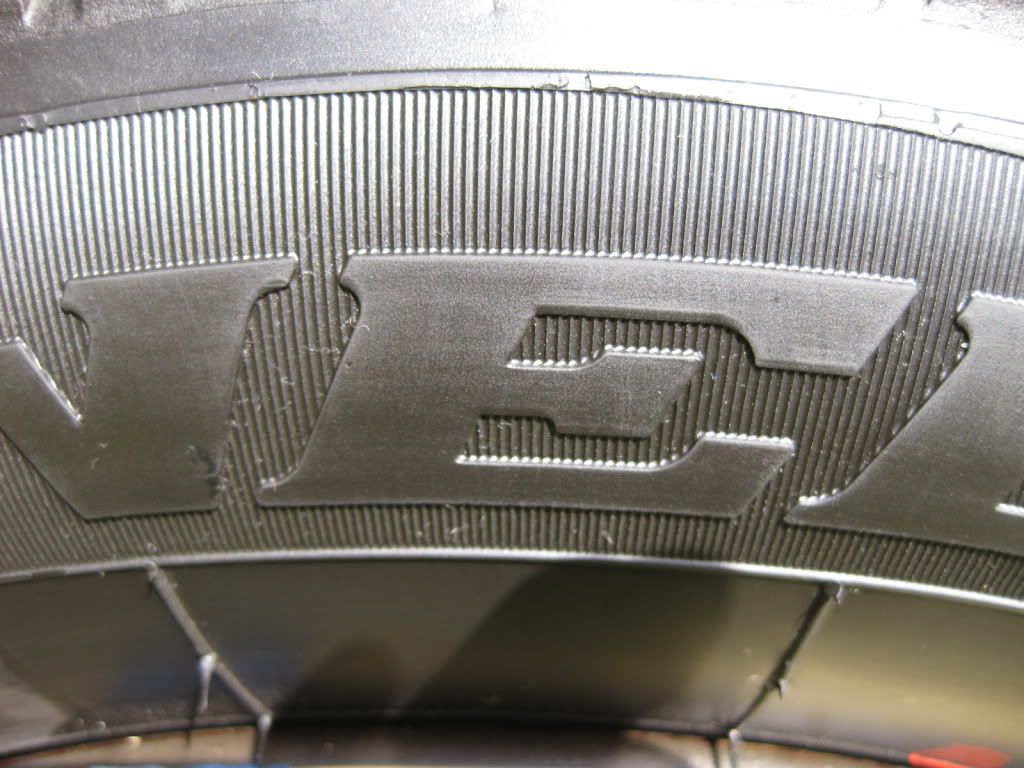
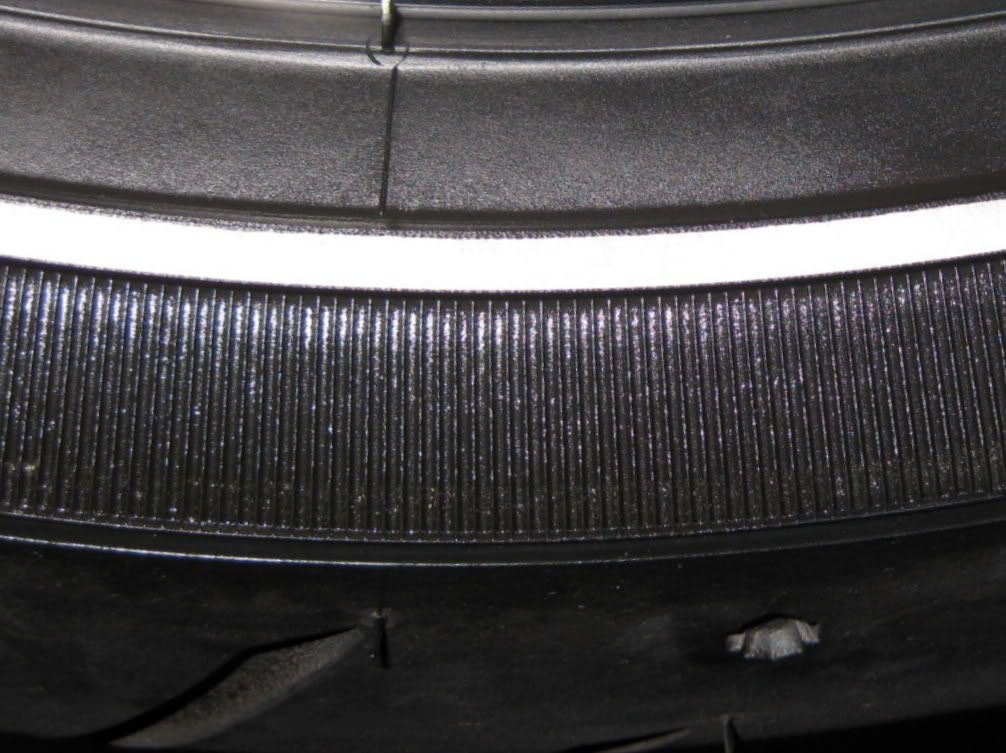
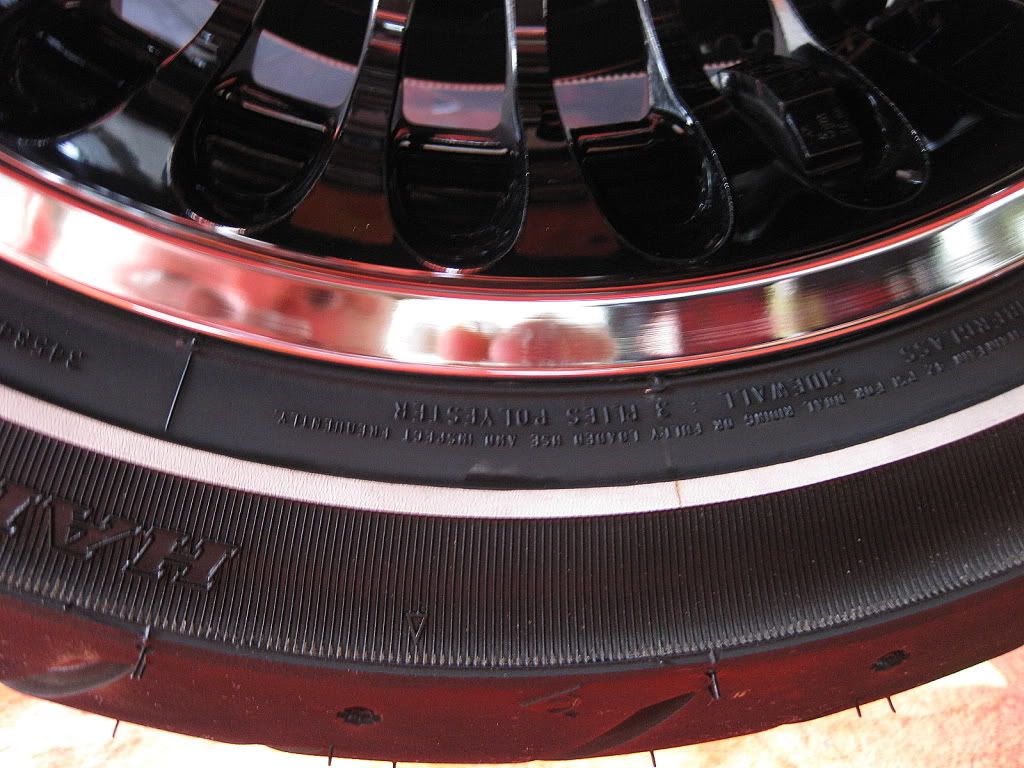
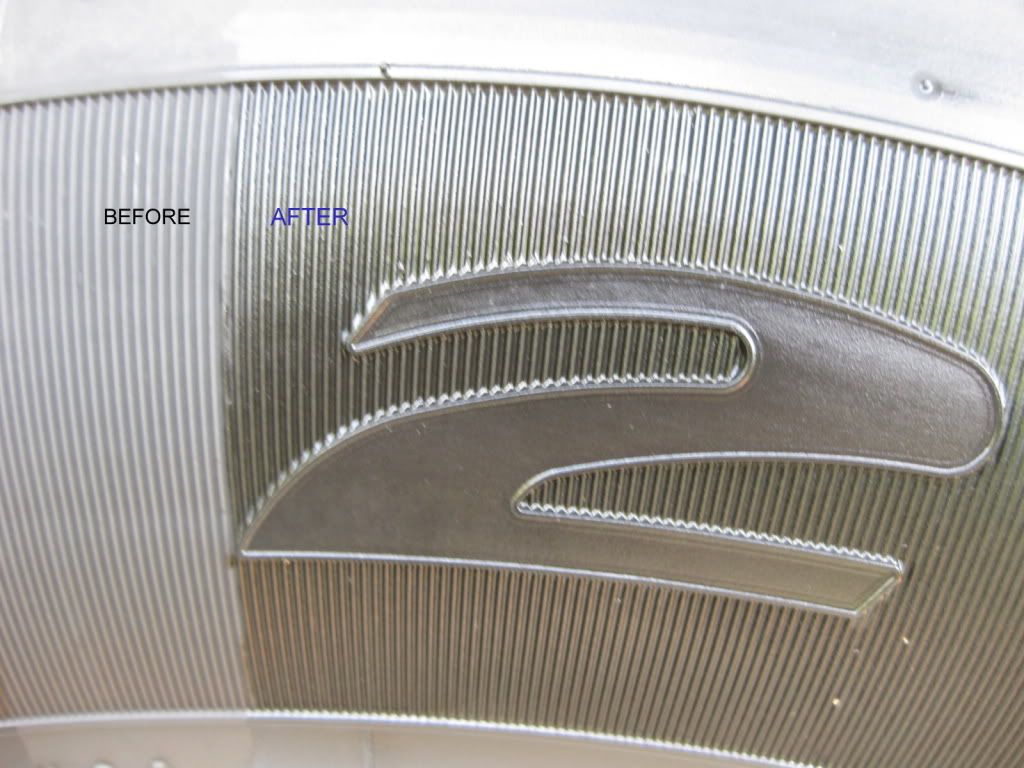
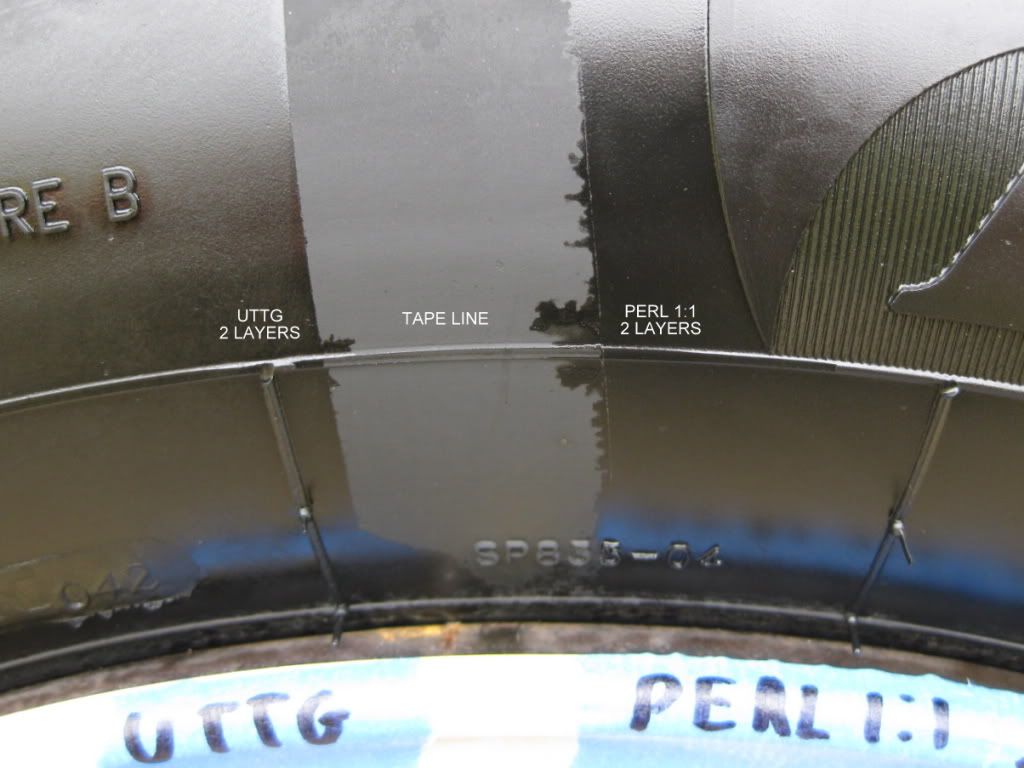
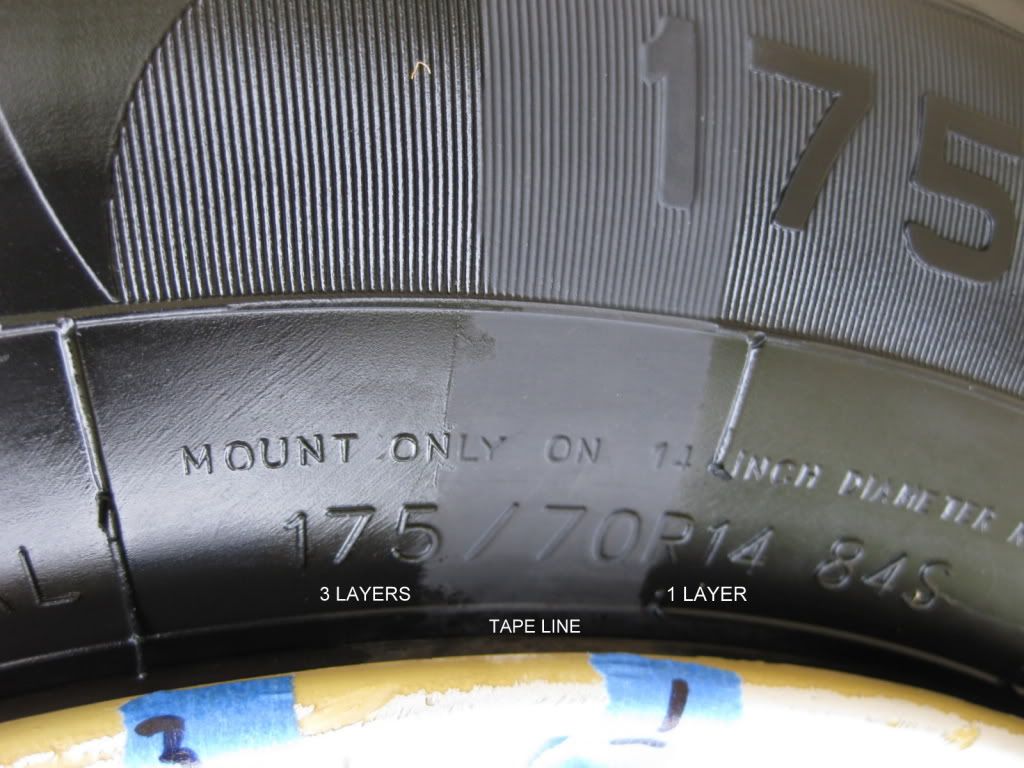
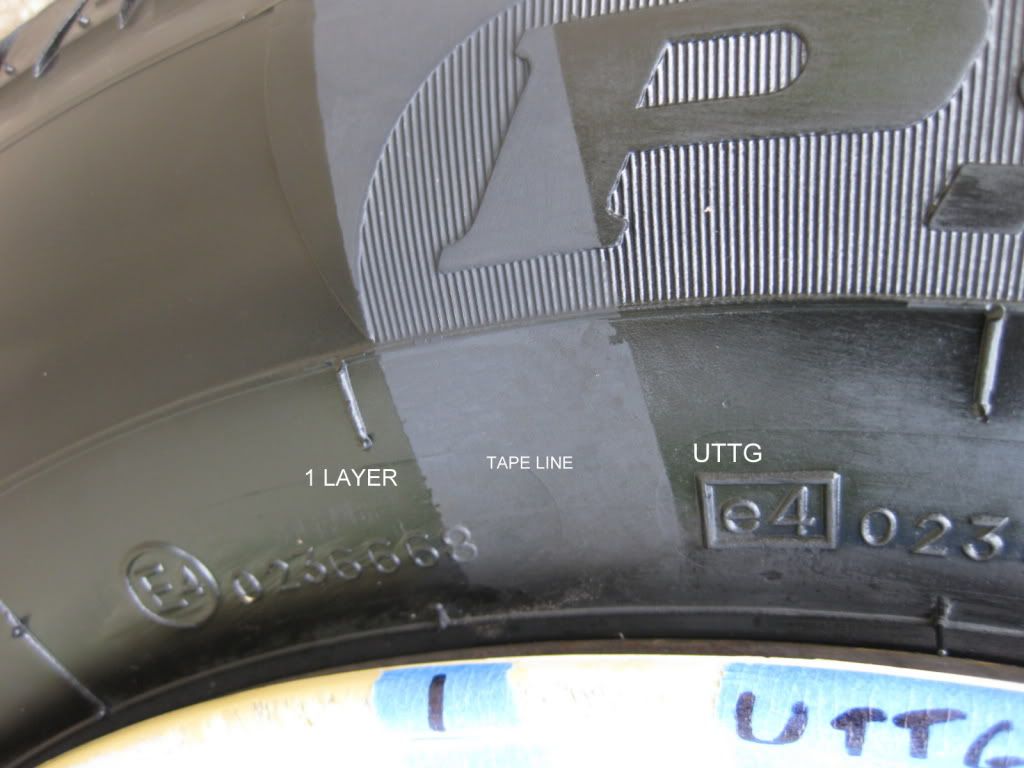
UTTG vs. PERL 1:1 (2 layers each)
PERL 1:1 (2 layers vs. 3 layers) LOOK AT THAT!
PERL 1:1 (3 layers vs. 1 layer)
PERL 1:1 (1 layer) vs. UTTG
As you can see the tire gets noticeable darker with additional layers of PERL and it looks great! As I was applying the UTTG to its section I found the homemade HT applicator didnât work so hot. The UTTG soaked into the applicator way too fast but the HT material worked excellent for application of PERL. You can see in the macro pictures my UTTG section was not as nicely coated as I had thought. This is due to the applicator and Iâll switch back to my typical UTTG applicator in the future.
Results 1 to 15 of 36
Thread: Review: CarPro PERL
-
08-29-2011, 07:49 PM #1


- Join Date
- Apr 2010
- Posts
- 1,354
- Post Thanks / Like

-
08-29-2011, 07:50 PM #2
- Join Date
- Apr 2010
- Posts
- 1,354
- Post Thanks / Like
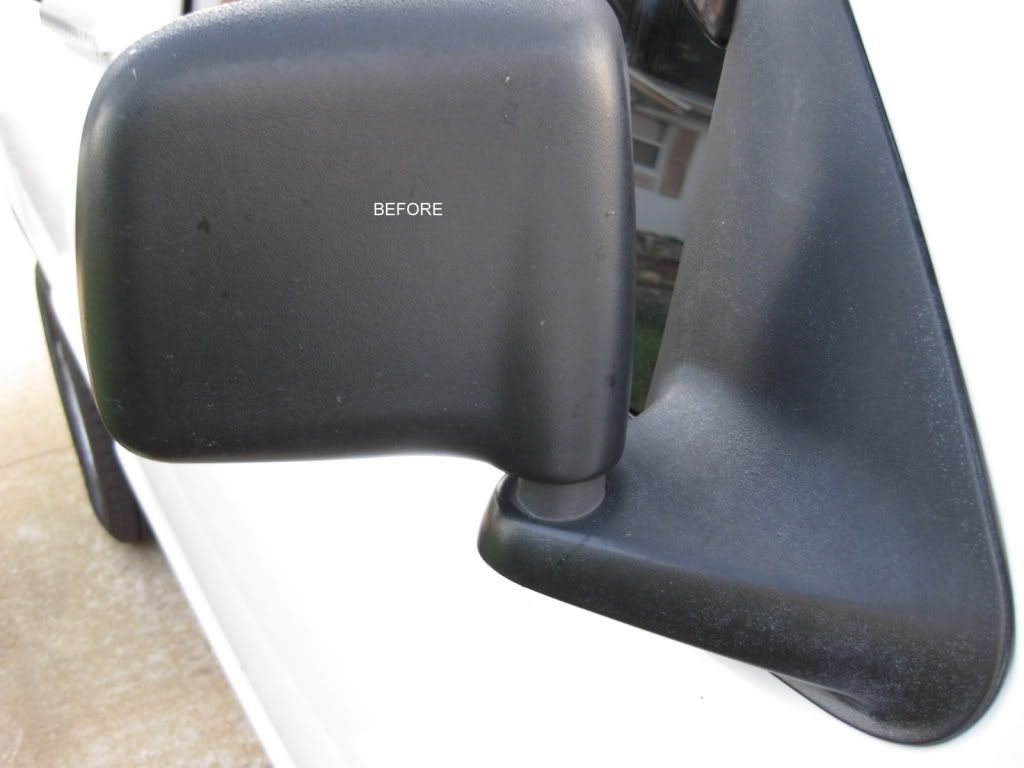
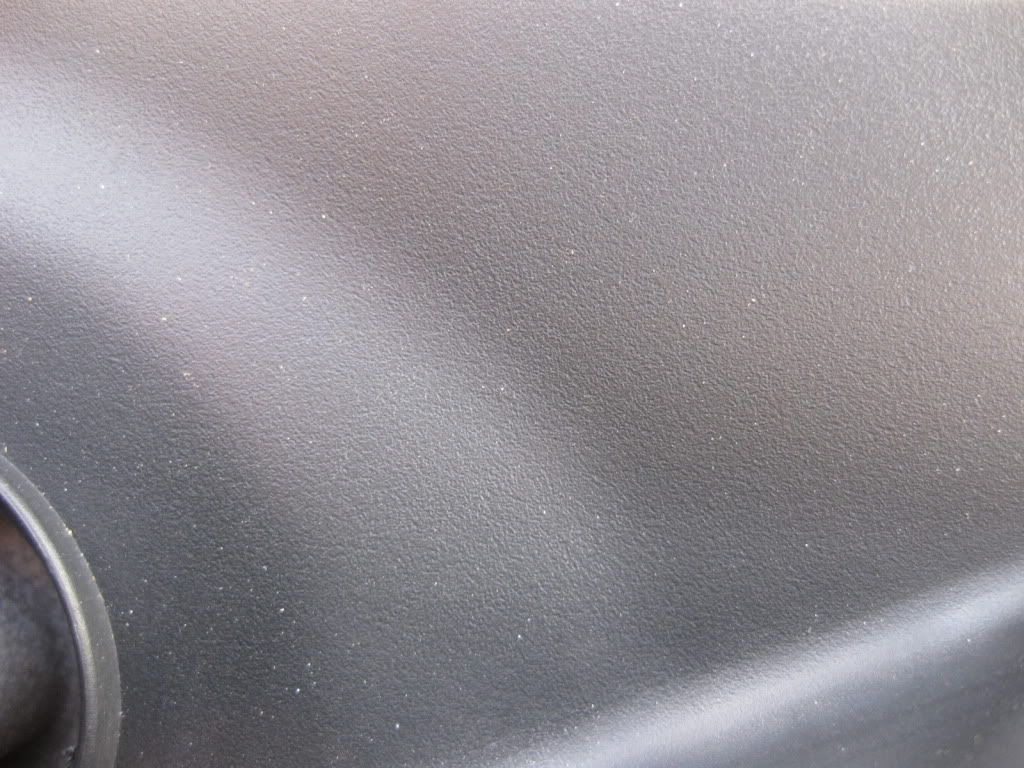
PART 2: Exterior Plastic Trim
PERL was also applied to plastic trim of 2 vehicles. For plastic trim it is recommended to dilute between 1:1 and 1:3. I found it to apply extremely easily when applied 1:1 or 1:3 and to leave a nice matte finish. It can be layered on exterior trim as well. With this type of surface you can spray on and then wipe off with a Microfiber towel or apply with foam and leave as is or lightly wipe with mf towel. I recommend spraying it on and wiping it off.
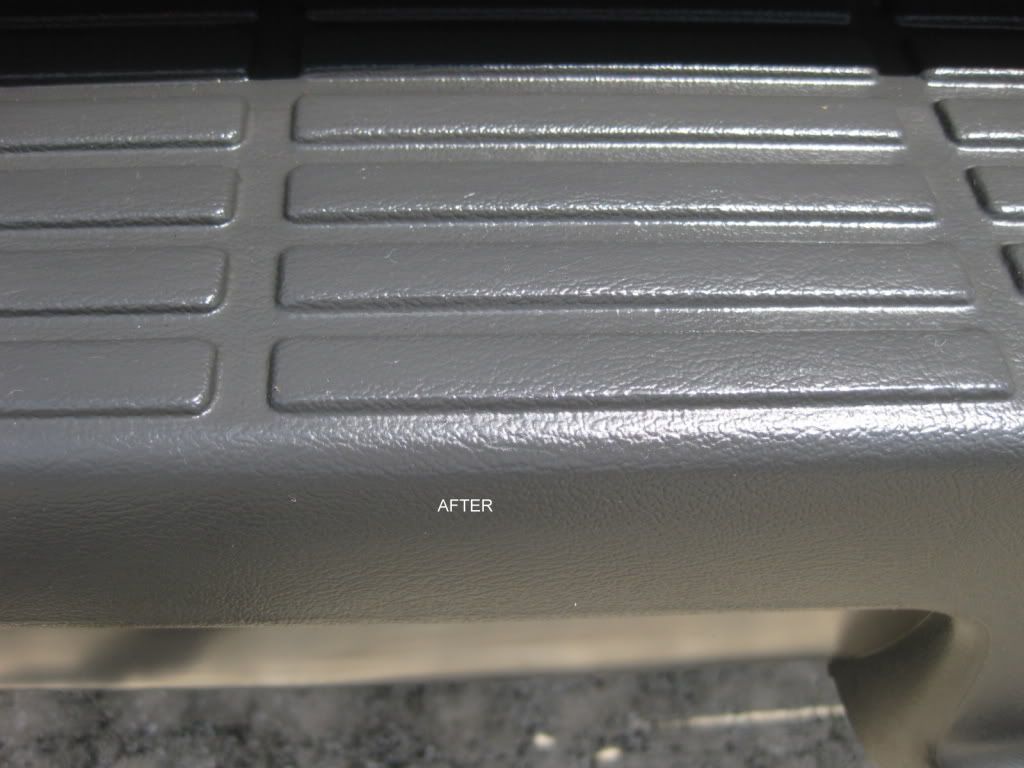
I went against the grain on one test and actually applied it un-diluted with a foam applicator. This produced a higher gloss level that looked very âplasticâ in contrast to the nice matte finish that is discovered when applying it properly.
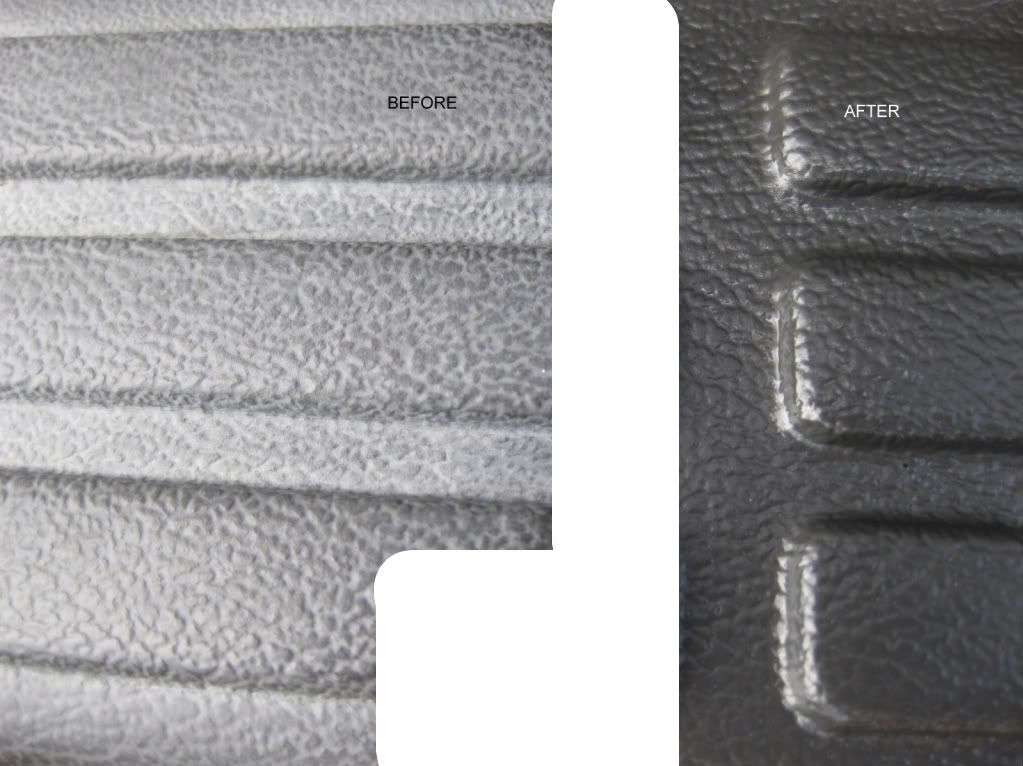
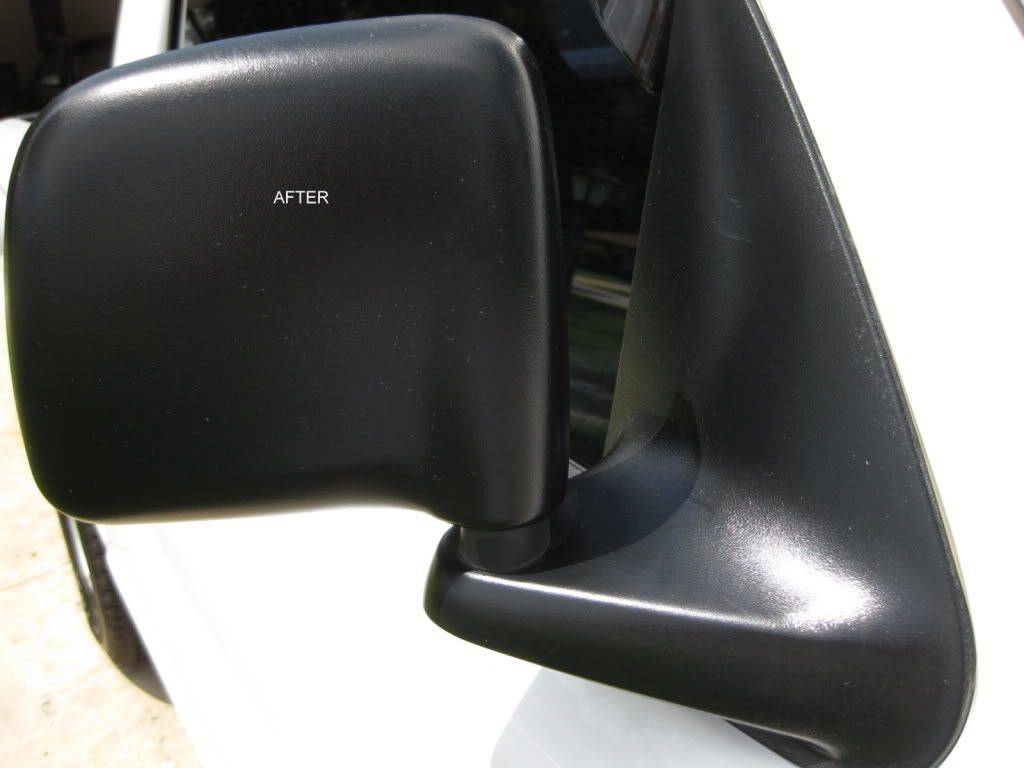
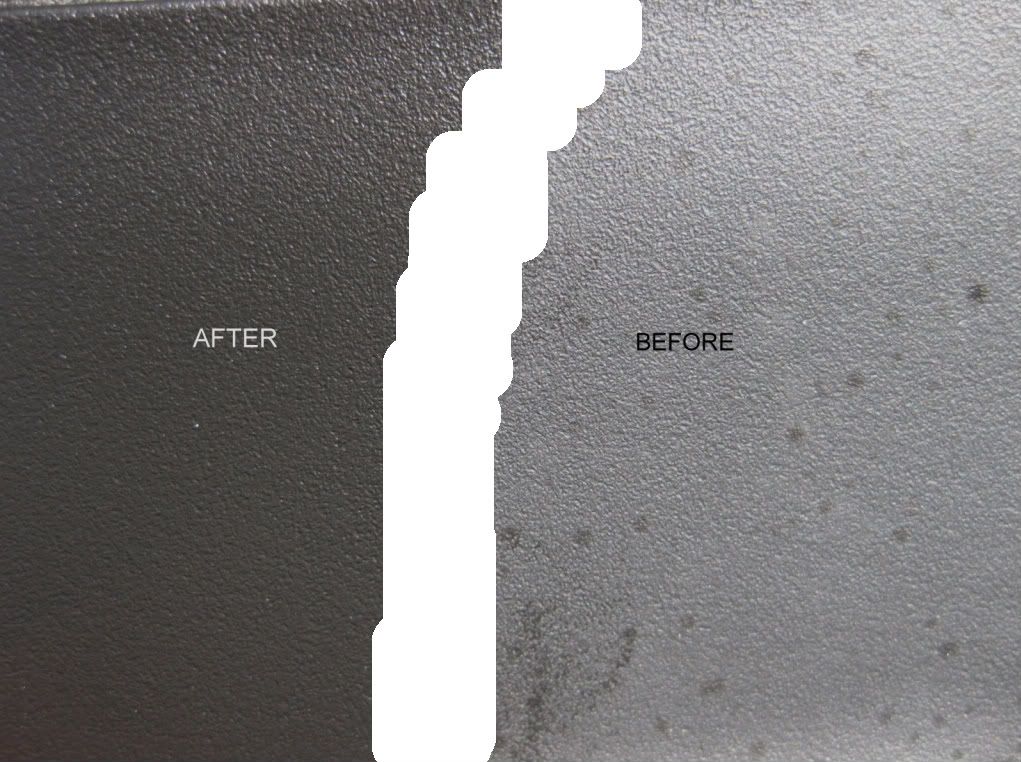
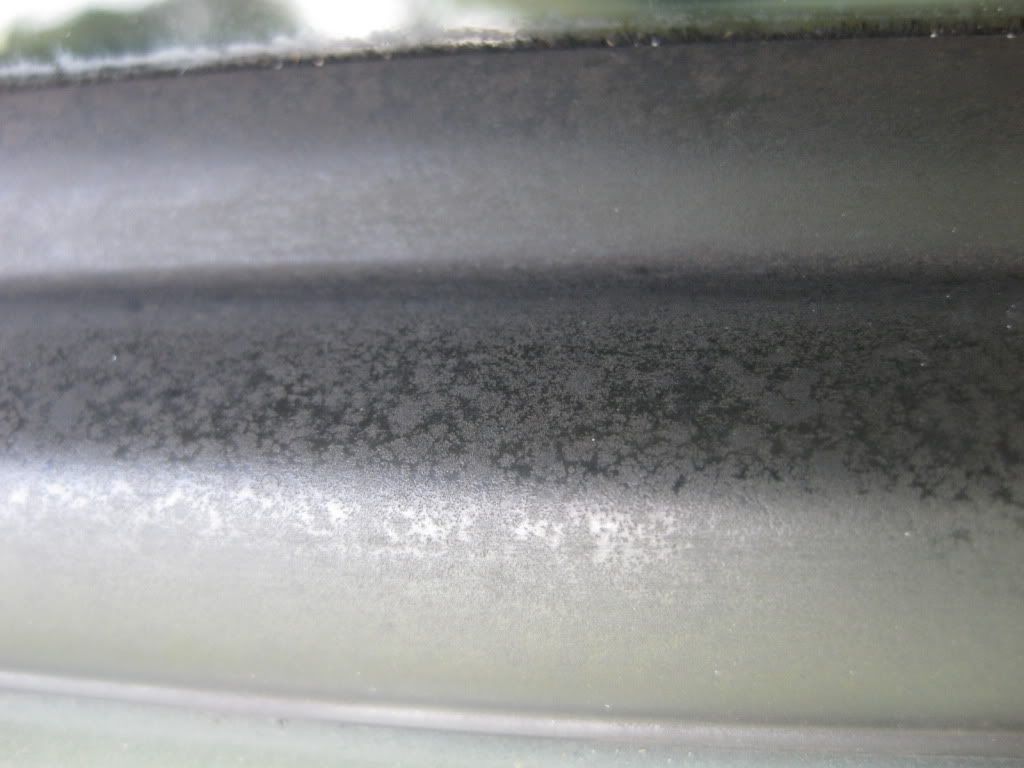
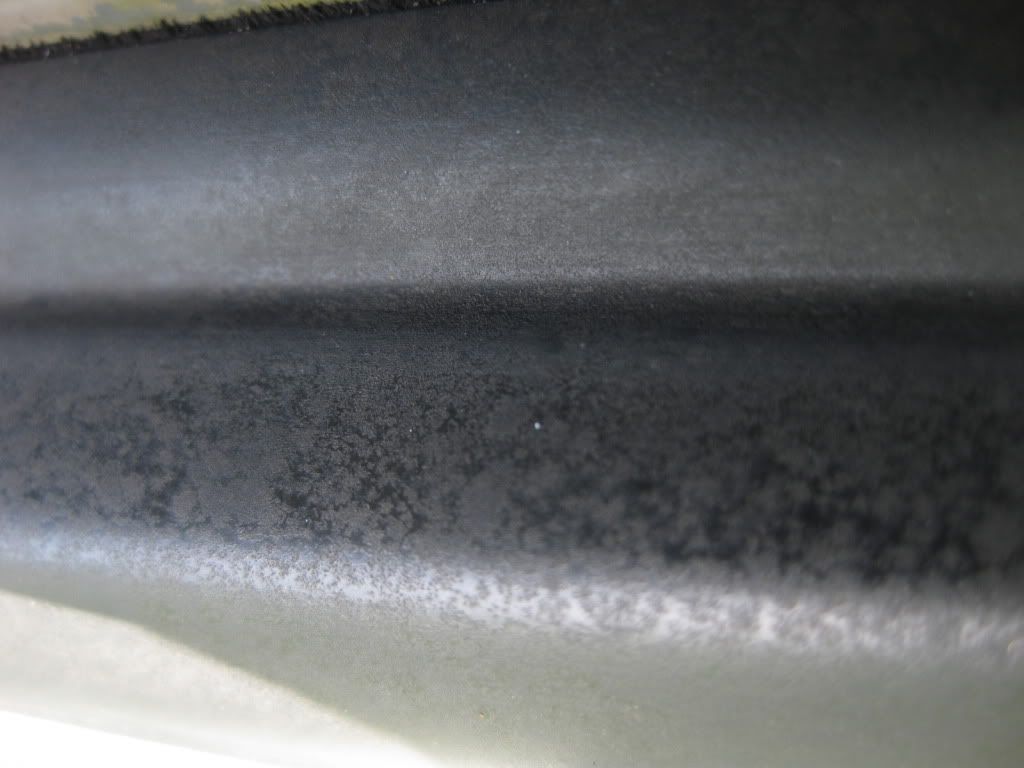
Note in the photos below the different dilutions and methods of application.
Before
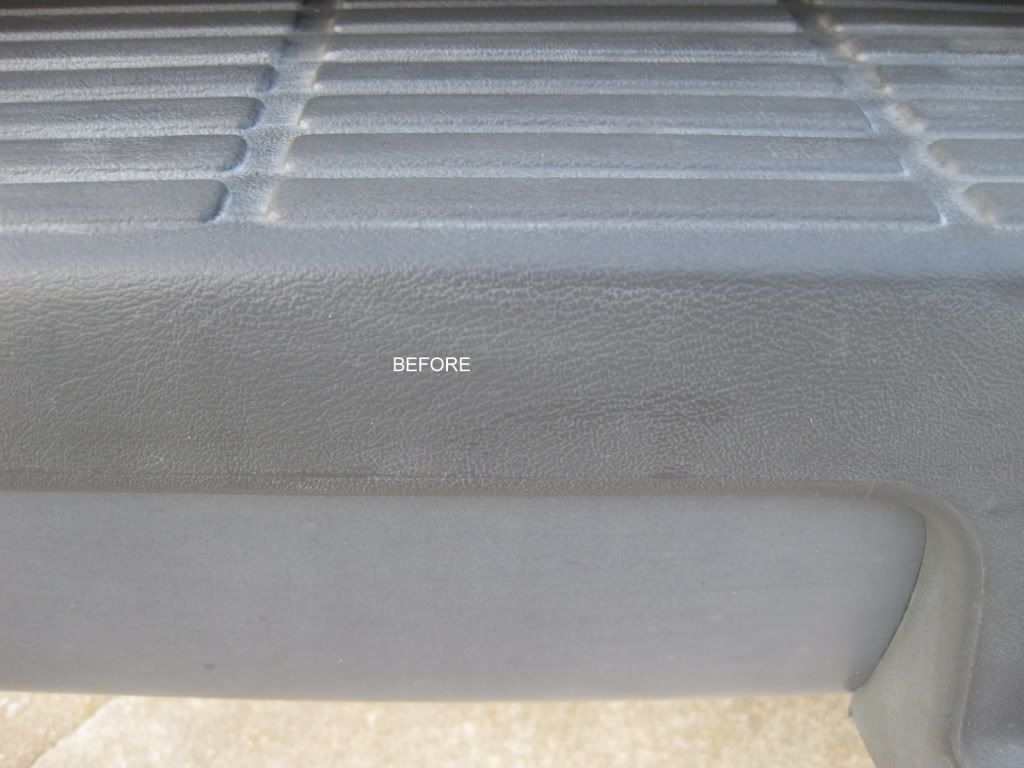
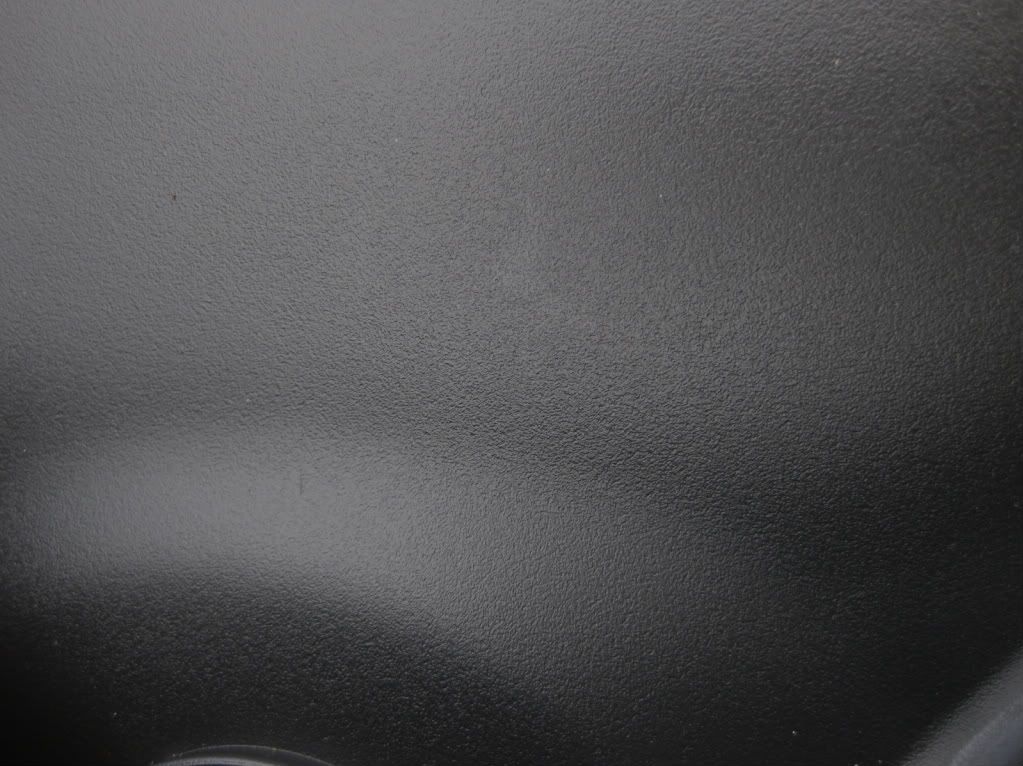
After (No dilution â Applied with foam Applicator â Not buffed)
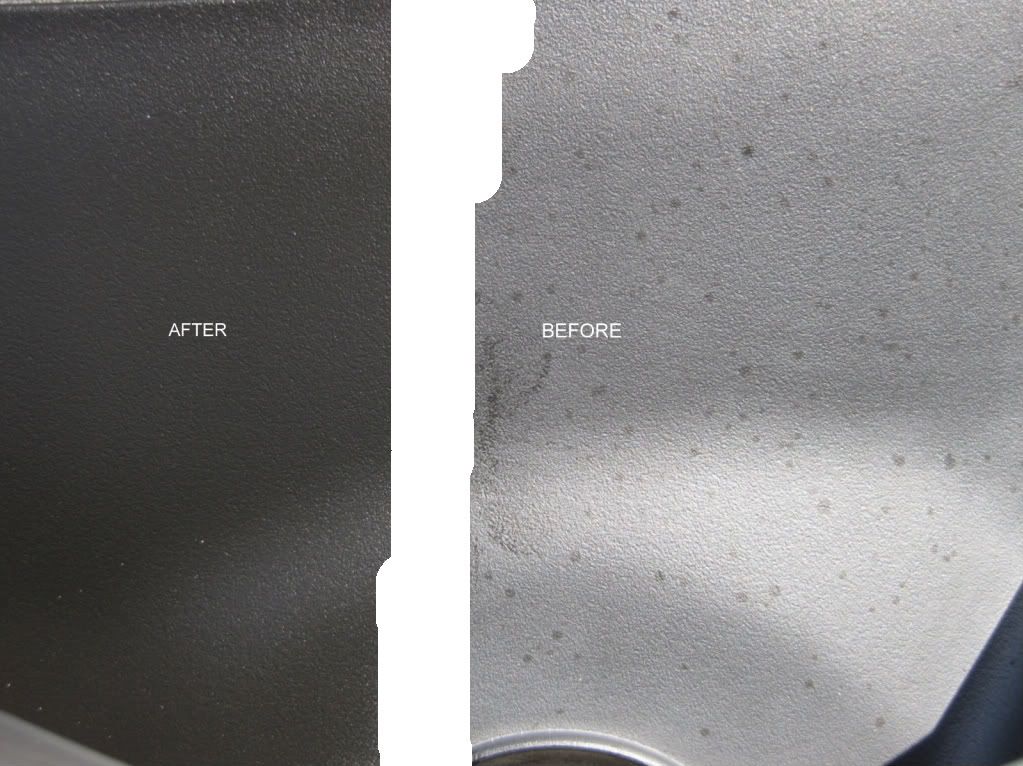
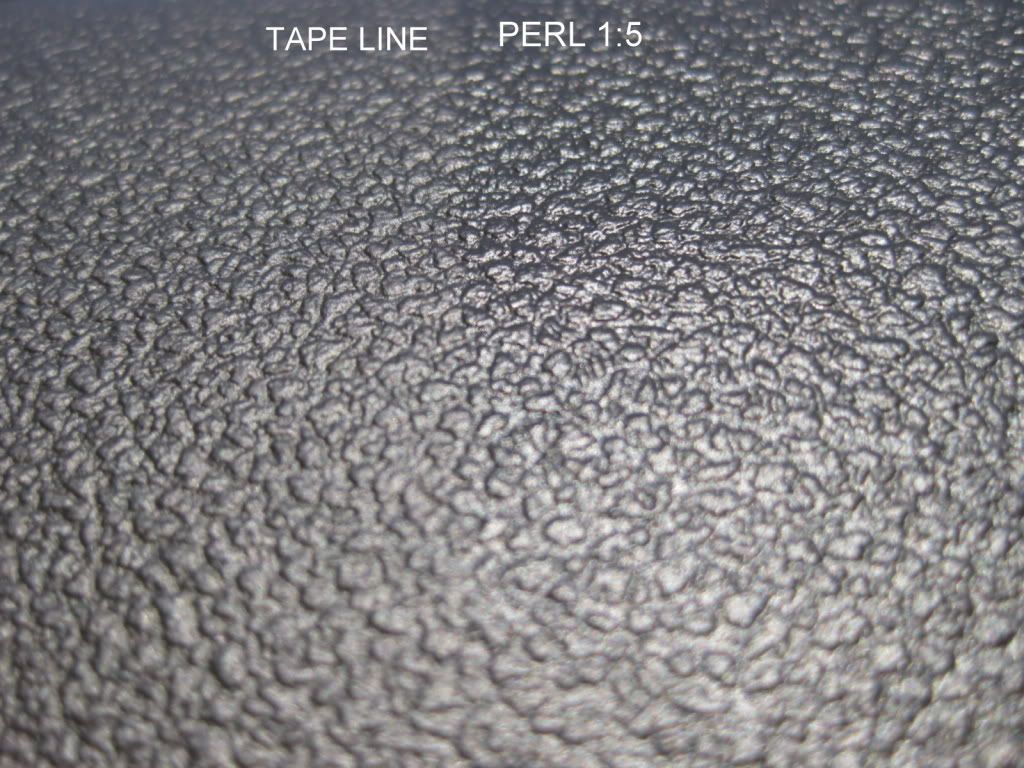
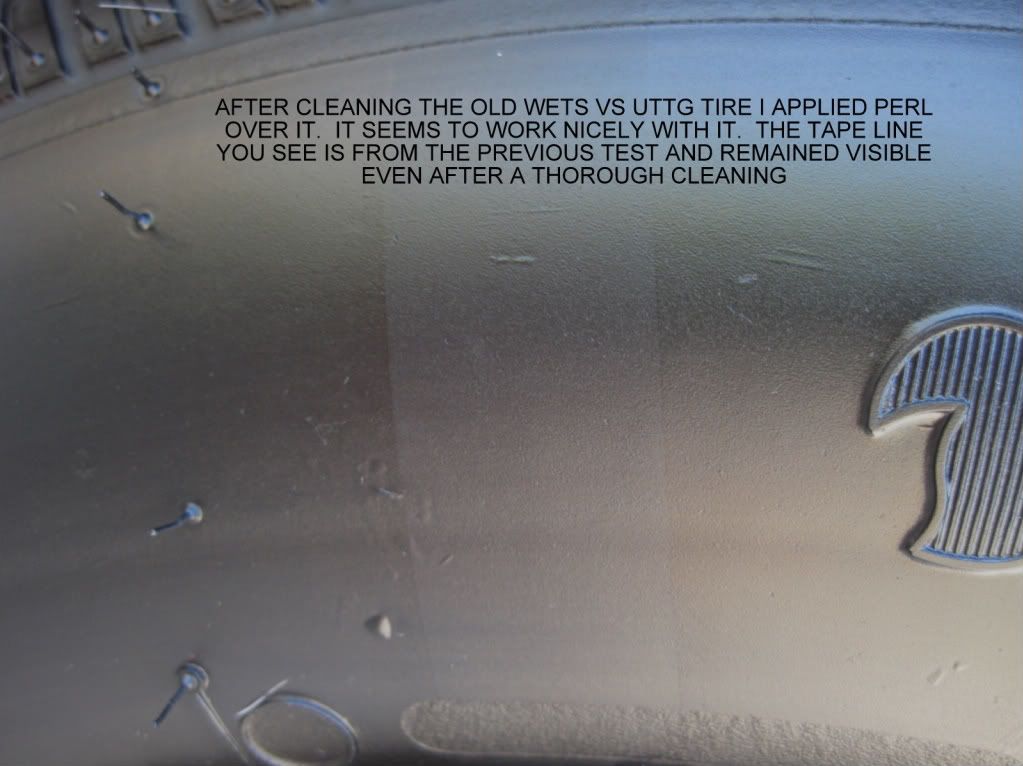
50/50 (Artificial Tape Line)
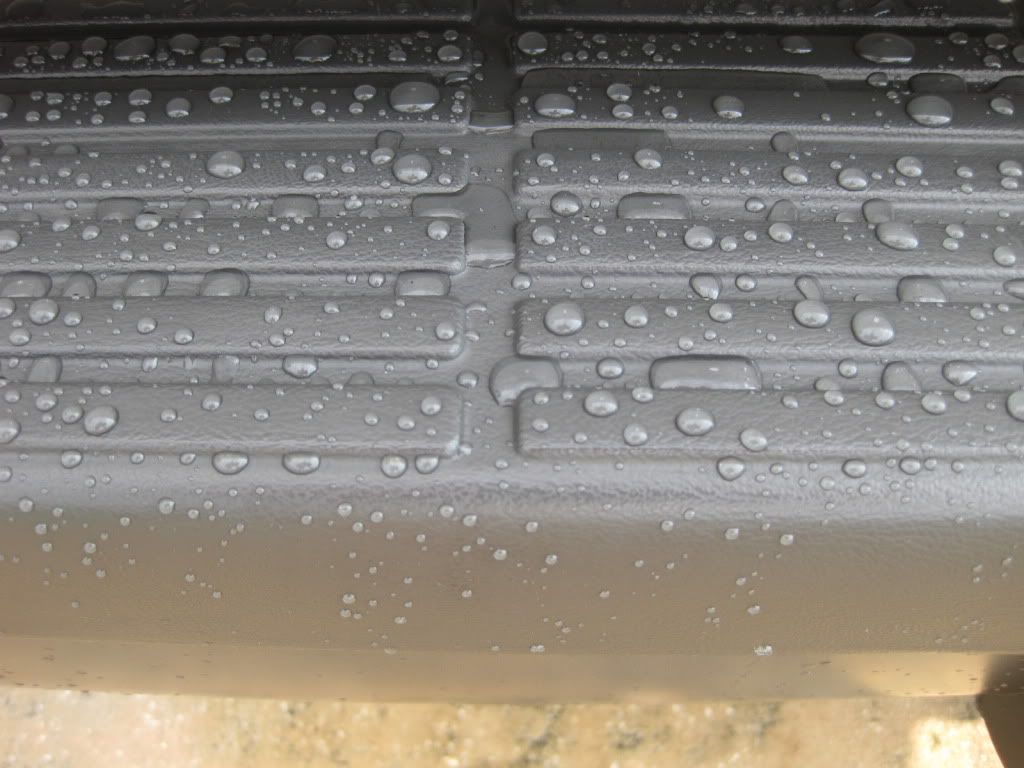
A few days later (after a storm)
Before
After (No dilution â Applied with foam Applicator â Not buffed)
Cowl 50/50 (1:1 â Sprayed on & wiped off) Artificial Tape Line shown
Cowl 50/50 (Artificial Tape Line)
Cowl After 50 (1:1 â Sprayed on & wiped off) Image lighting modified to remove flash washout
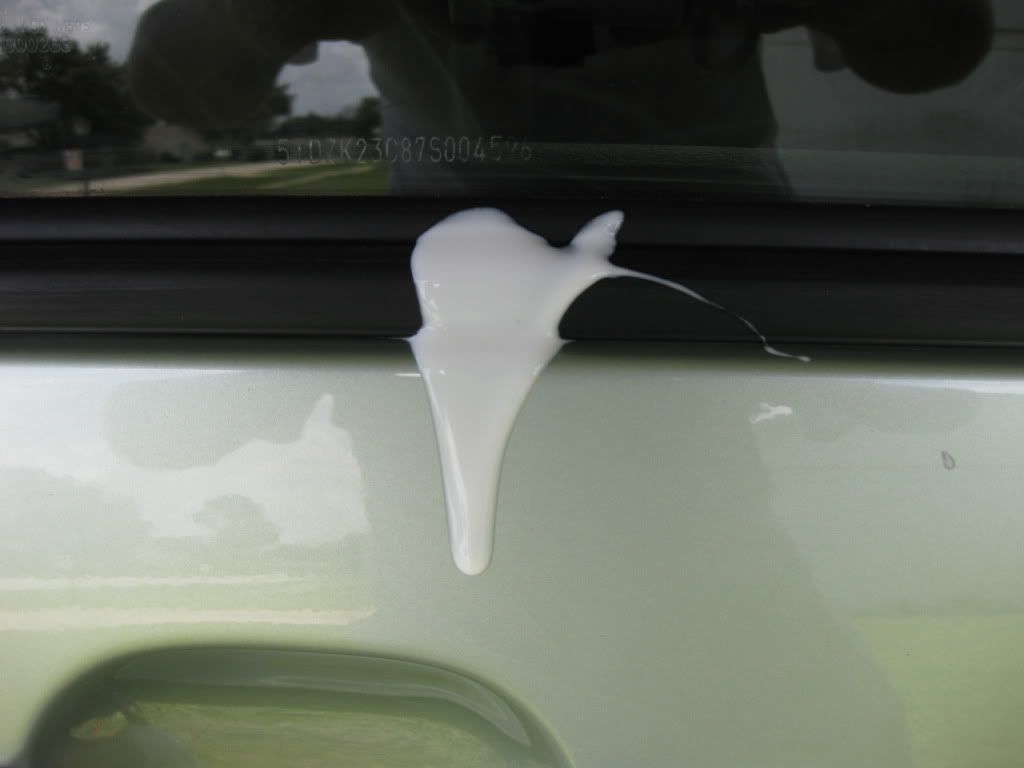
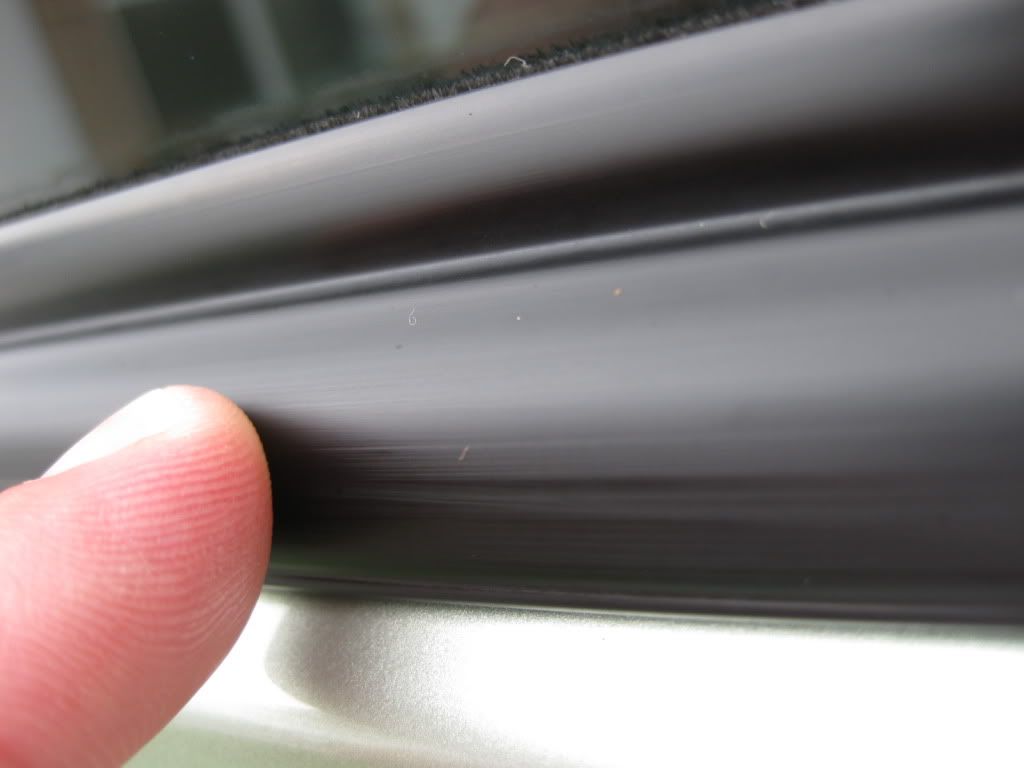
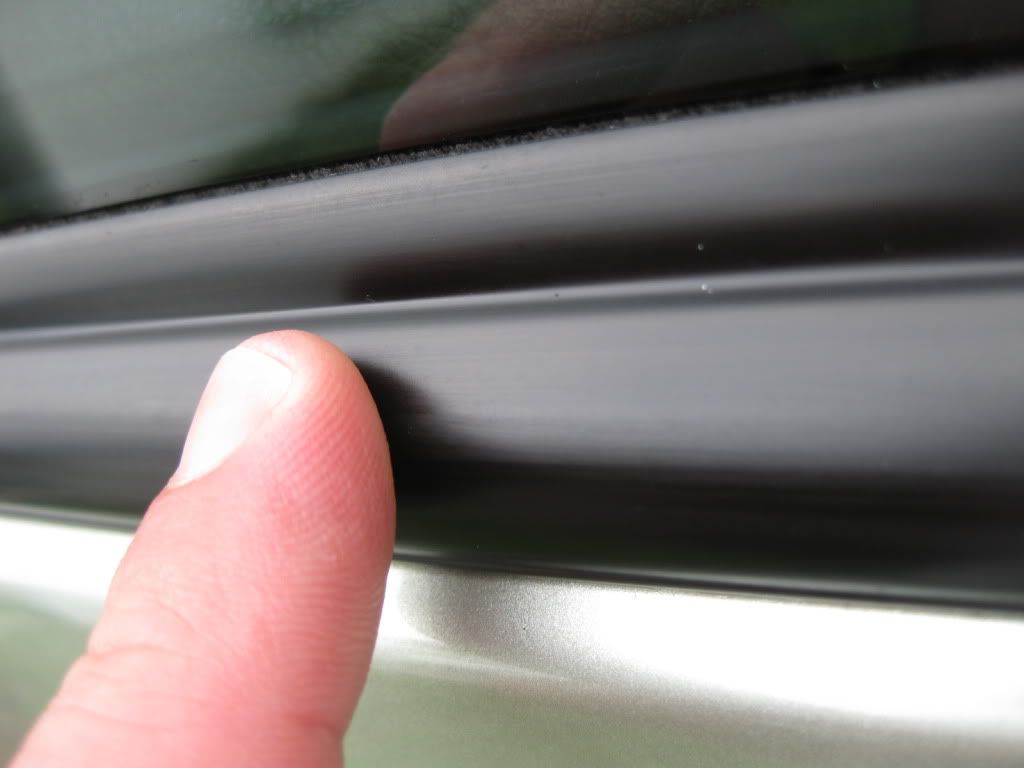
Window Seals:
One of the vehicles I was working on had some seriously nasty window seals. After attempting to clean them with rubber cleaner and a toothbrush I moved on to using water spot remover. This was able to clean them much better but the rot was too deep for me to be satisfied. I used my Flex 3401 armed with Duragloss Nano Polish and a tangerine HT pad to polish these seals before moving forward.
Before
Before
Uh Oh! It wasnât a bird that did that! I spilled some of my polish but after cleaning up the mess and under the seal I moved forward.
After I finished polishing and cleaning the seals I applied Cquartz to them. After buffing them 30 minutes later I moved on to other things and came back later to coat them with PERL (neat)
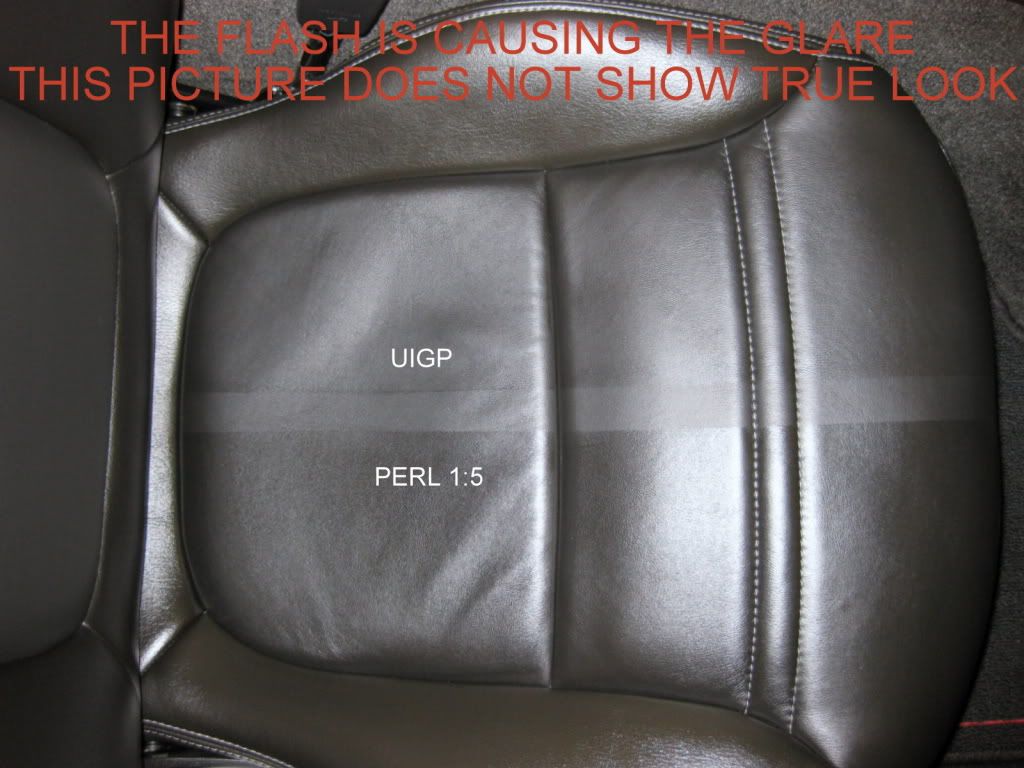
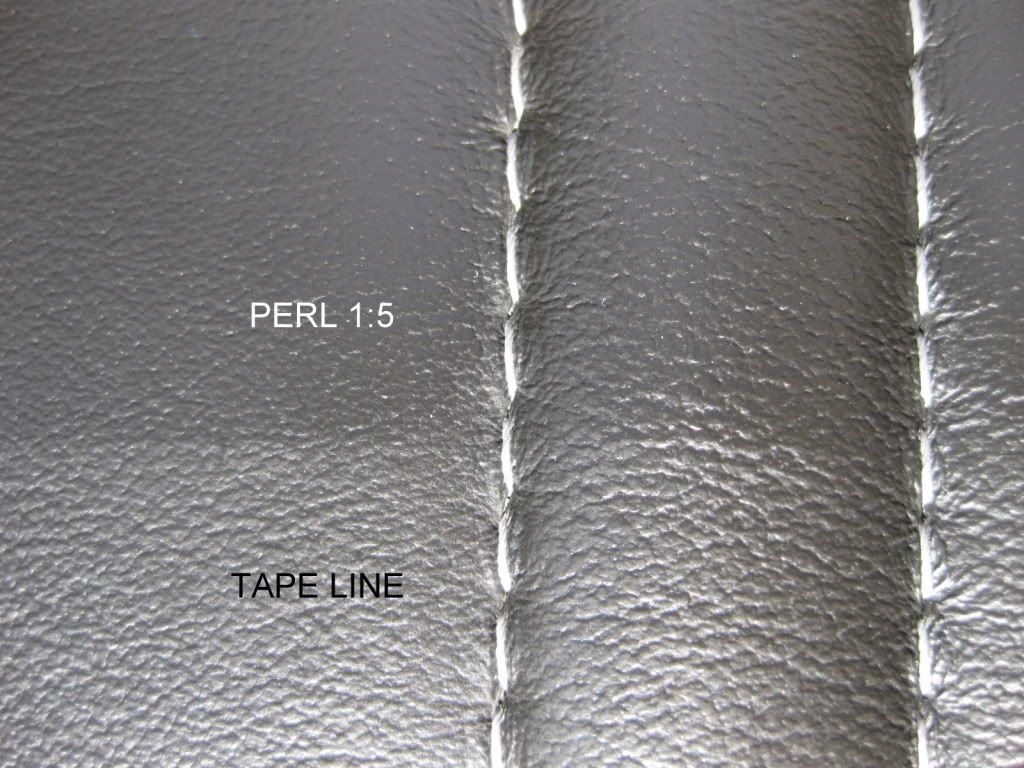
PART 3: INTERIOR
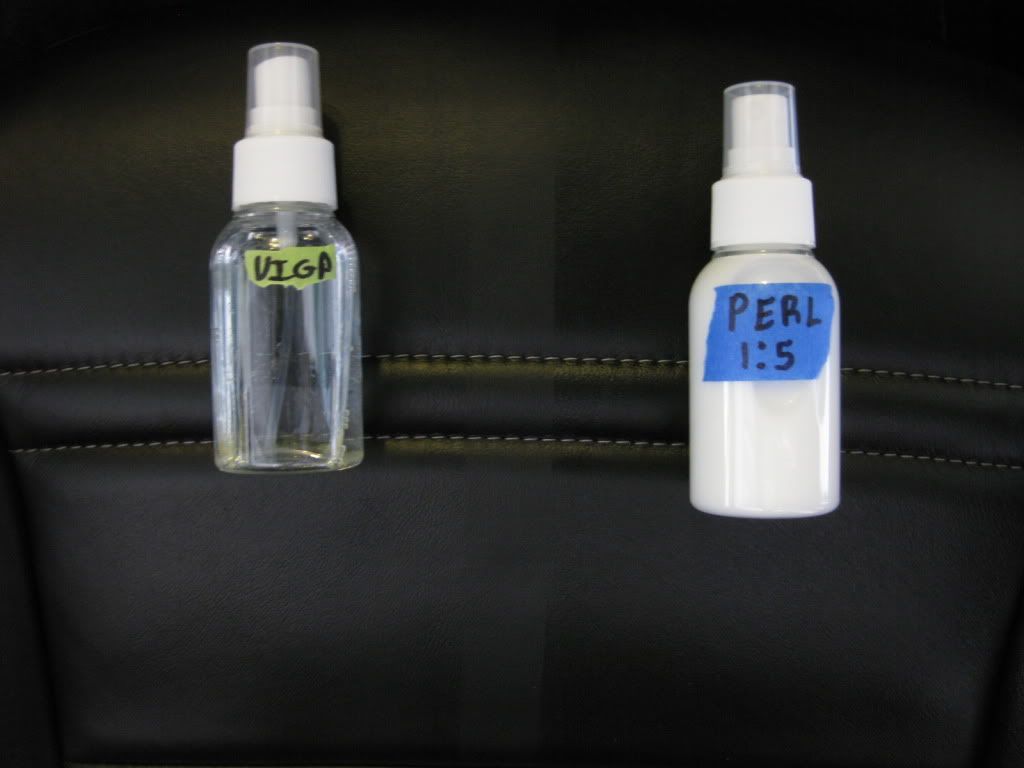
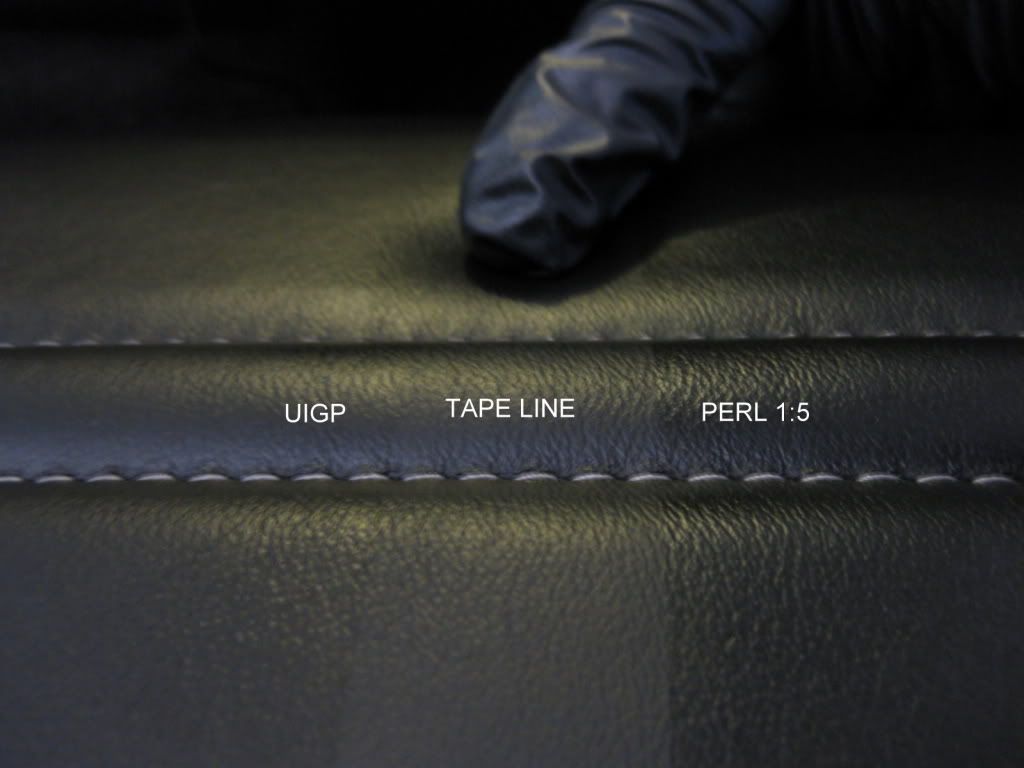
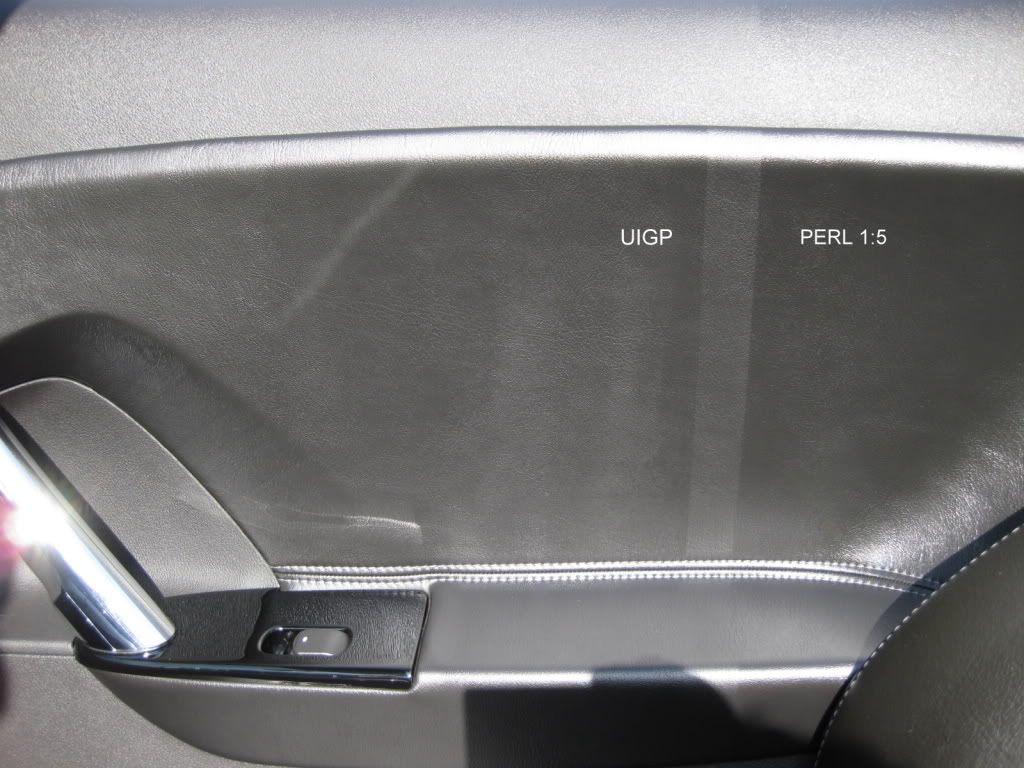
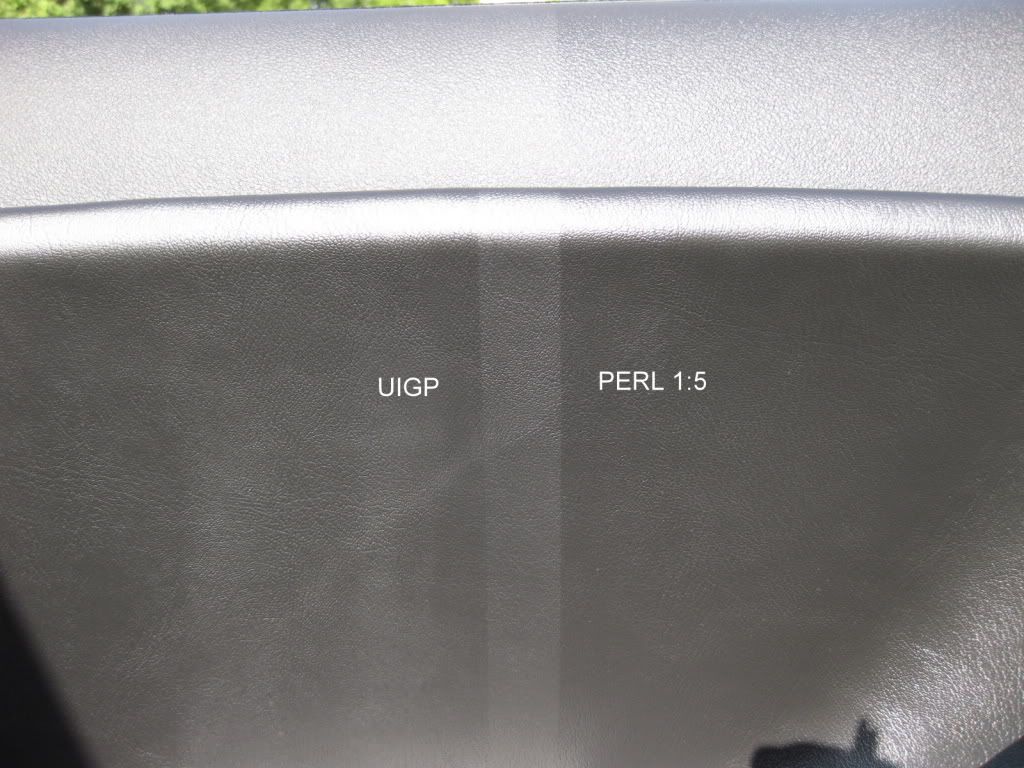
On interior surfaces I really didnât know what to expect from PERL. For a comparison I applied PERL and UIGP side by side on some of the surfaces in my Sky including finished leather and also vinyl.
On interior surfaces you can spray on and then wipe off with a Microfiber towel or apply with foam and lightly wipe with an mf towel. I found spraying on and wiping off to be simple and effective.
Video: Application
Pearl Vs Ultima Interior.wmv - YouTube
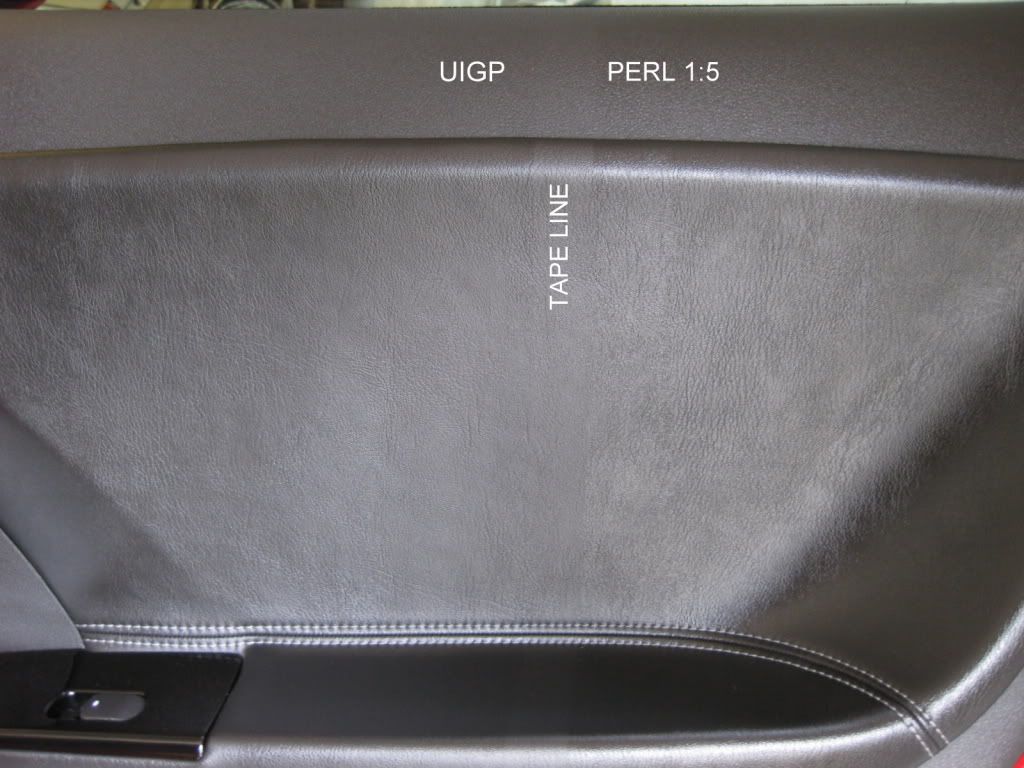
I didnât expect the surface to feel as dry to the touch as it did but was happily surprised. Next to UIGP it is darker which I like. Itâs less glossy than 303 AP but a hint more so than UIGP. I still need to get it out in the sun to see it in full light. Unfortunately the lighting in the garage forced me to use artificial lighting. The lighting and flash made the pictures turn out much different then the way the surfaces actually look in person where both products are much more flattering than shown here.
Products Used
Leather Seat
Leather Seat
Door Panel
Door Panel

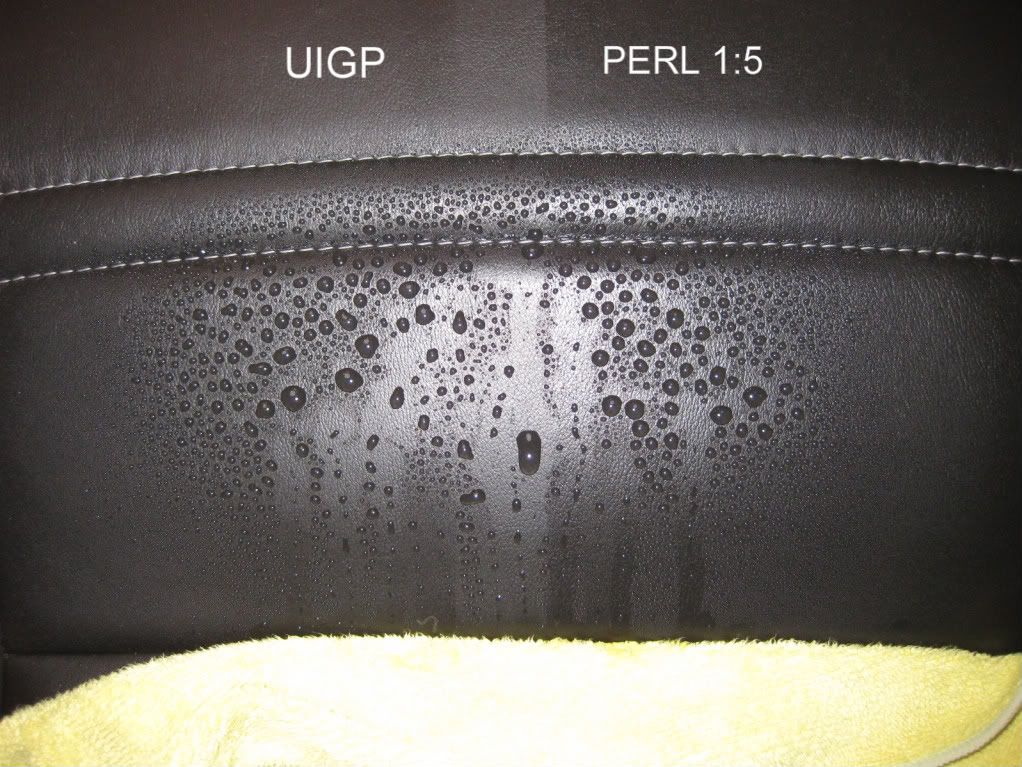
Hyrophobic
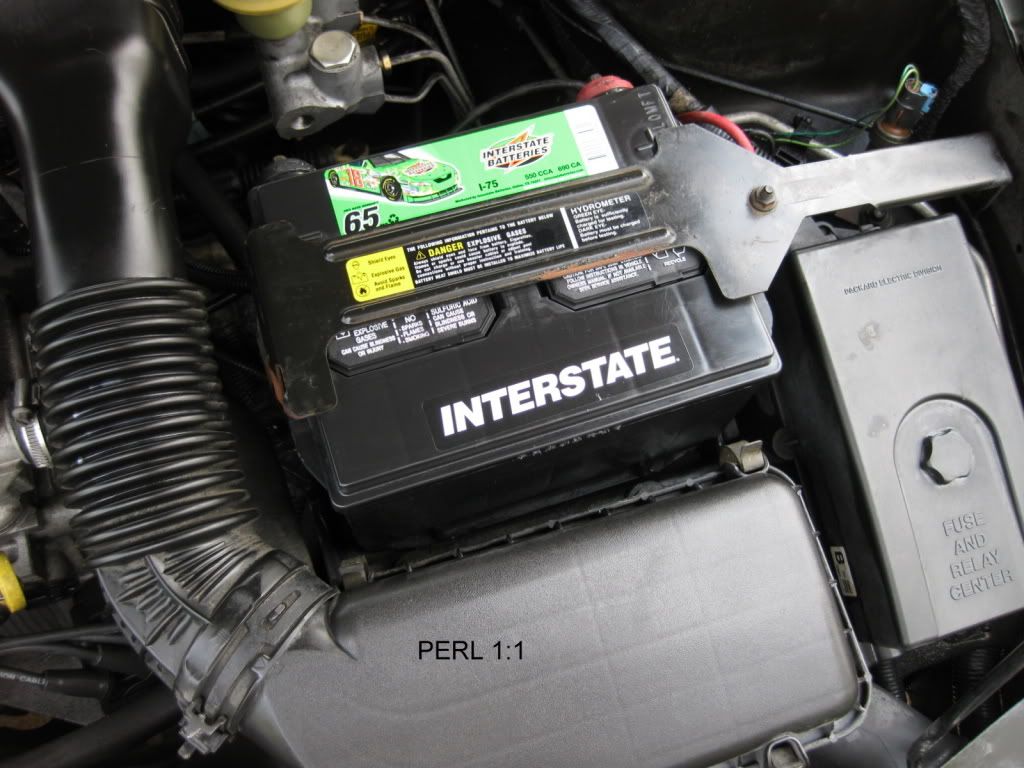
PART 4: ENGINE
Well, I hope you guys are still with me so Iâll speed through this last section. What you see below got a quick once over with Eco Touch APC and was then dressed with PERL 1:1.
Before

After
Pros:
1.- Application: Very easy (Spray on, wipe off gently)
2.- Appearance: Darkens the surface to a satin finish
3.- Versatility: Use on exterior trim and tires, interior vinyl and leather, and under the engine bay
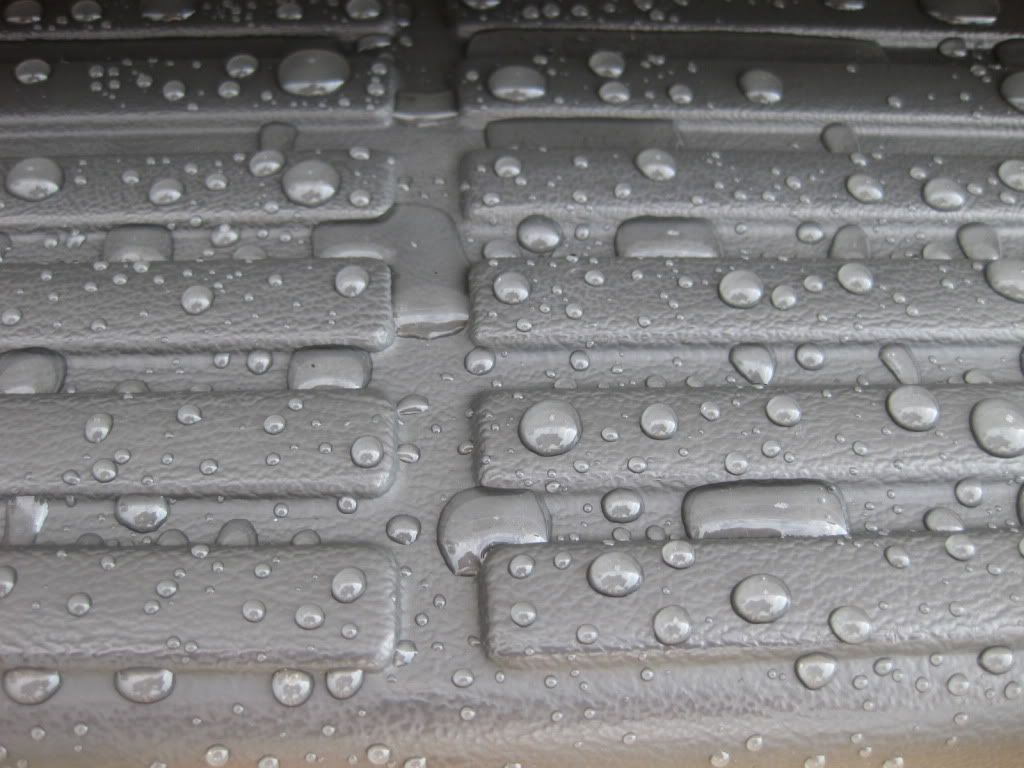
4.- Dry: (Non-greasy) finish that doesnât leave spots and lines on the trim when it rains
5.- No lingering scent on interiors
6.- Price: After diluting you really get a lot of product for the price
???:
1.- What will the durability be?
2.- Strong UV Protection (this was not added to pros because I did not test and prove it here
Cons:
1.-Multiple layers may be needed for strong durability in rainy conditions (To be continued)
Final Observations and Summary:
PERL is a jack-of-all-trades, a master of at least one, and a strong competitor with the rest. To me this product makes 303 Aerospace Protectant feel rather dated. You can use 303 AP on all the same surfaces that PERL can be applied to but its an entirely different product that is less greasy than 303 and it comes in a concentrate that can be diluted at different levels for the desired surface. Another important point is it is easier to apply than 303AP. In most cases it is spray on wipe off where as with 303AP you must apply a bit more effort wit your towel to tame the shine and receive the finish you want.
PERL is darker than UTTG and restores faded trim better initially. I never expect anything to hold up to UTTG in the durability department but I am excited to find out if layering gives me decent durability. But what do I know? I told Avi I didnât expect it could hold up to UTTG and he welcomed me to pit one against the other. It should be exciting to see. On most trim I prefer UTTG at this time but on faded trim Iâm thinking PERL will accept the position.
On tires I really like the look of PERL and I love, love, love the look when itâs layered. Iâve never seen anything so black and the best part is its jet black AND dry to the touch without too much gloss or any kind of greasy look. From here on Skybaby will be getting 3 layers of PERL on her tires. This will be her go to tire dressing.
As far as interior performance I really like the look and ease of application but the UIGP still has that tactile feel that I love and can also be used on fabrics. There are 2 products in my favorites for use on finished leather but I now have a third. L1 is just a pinch darker than UIGP but it fails miserably in the hydrophobic dept next to UIGP. PERL on the other hand is darker than both L1 and UIGP but it doesnât quite have the tactile feel of UIGP although I do like it. As far as the hydrophobic properties of PERL at 1:5 it is equal to beading and resistance UIGP gives and a good deal better than L1. On many vehicles PERL will become my go to interior dressing but on my Sky I think I will still use UIGP. I may switch back and forth on this.
Bottom line is I welcome someone to name a product that (on interior and exterior) applies this easily, looks this good, and feels this dry to the touch, while still achieving the prices that PERL offers. After dilution this product is an excellent value in my estimation.
Thank you for taking the time to read this review! Cheers
I have to post this picture one more time⦠I just love that look on the right.
-
08-29-2011, 08:16 PM #3
- Join Date
- Sep 2008
- Posts
- 217
- Post Thanks / Like
Great review as usual Corey! Can`t wait for some more durability updates.
-
08-29-2011, 09:07 PM #4Forza Auto Salon


- Join Date
- Aug 2004
- Location
- Troy, MI
- Posts
- 12,534
- Post Thanks / Like
This is excellent review! Thanks for sharing it with us. I`ll be adding this to the Review sub-forum shortly. Keep em coming Corey! 2 Likes added.
Metro Detroit`s leader in cleaning, preserving & perfecting fine automobiles!
-
08-30-2011, 07:55 AM #5
- Join Date
- Apr 2010
- Posts
- 1,354
- Post Thanks / Like
 Originally Posted by Rei86
Thank you! I`m looking forward to that as well.
Originally Posted by David Fermani
Originally Posted by David Fermani
Thank you David! Will do
-
08-30-2011, 09:18 PM #6
- Join Date
- Sep 2010
- Posts
- 1,207
- Post Thanks / Like
another great review. i`ve eyed this for sometime but haven`t gotten around to trying it.
-
09-02-2011, 09:03 AM #7
- Join Date
- Mar 2011
- Posts
- 761
- Post Thanks / Like
Very nice review. Thanks for taking the time to inform us.
-
09-02-2011, 09:41 AM #8Hooked For Life

- Join Date
- Aug 2003
- Location
- The First Coast
- Posts
- 13,271
- Post Thanks / Like
This was such a fantastic review I commented on at L2D. It really looks promising for all those surfaces and it may just be the answer for a super long lasting tire dressing. Exciting product! Thanks again. :xyxthumbs
Treat it like it`s the only one in the world.
-
09-03-2011, 10:24 AM #9
- Join Date
- Apr 2010
- Posts
- 1,354
- Post Thanks / Like
Originally Posted by wascallyrabbit
Originally Posted by lostdaytomorrow
Originally Posted by Bill D
Thanks guys, I appreciate the comments. Thanks Bill, I have some interior pictures that show the product in sunlight and also someexterior durability updates coming this weekend.
-
09-03-2011, 10:25 AM #10
- Join Date
- Apr 2010
- Posts
- 1,354
- Post Thanks / Like
Interior photos update:
Well, just went for my morning drive and took some good photos of the interior while I was out in the sun.
Leather Seat (In Sunlight)

Leather Seat (In Sunlight)
Door Panel
Door Panel
Door Panel

Door Panel (Upper area)
-
09-03-2011, 11:28 AM #11
- Join Date
- Apr 2010
- Posts
- 1,354
- Post Thanks / Like
PERL 1:1 Tire Update
The day after application the product began being tested for durability on tires.
It rained 3 days this week and on two of those days it rained a lot. On one of those days there would be a rainstorm and then just enough time for it to dry before another storm would come through. So it saw at a couple hours of rain the first day and then was driven with the roads still wet for approximately 20 miles.
All PERL was applied 1:1 See titles for qty. of layers per picture
Vehicle kept outside 24-7
Day 1 â Hot & humid with no rain
Day 2 - Total miles: 40 â Rainy
This is the parking lot it was sitting in at work just before I left after the first of the rainy days.

And after I got home I snapped a couple pictures.

Day 3 - Total miles: 40 â Rainy
Day 4 - Total miles: 40 â (1) Shower
Day 5 â Hot & humid with no rain
Day 6 â Hot & humid with no rain
Here is the tire after 1 week
TOTAL MILES: 200
3 layers
3 layers
3 layers

2 layers

1 layer

PERL 1:1
Trim Update â 2 WEEK UPDATE
Applied to cowl (2 weeks ago) 1:1 with NO layering itâs still looking good.
-
09-05-2011, 12:52 PM #12
- Join Date
- Apr 2010
- Posts
- 1,354
- Post Thanks / Like
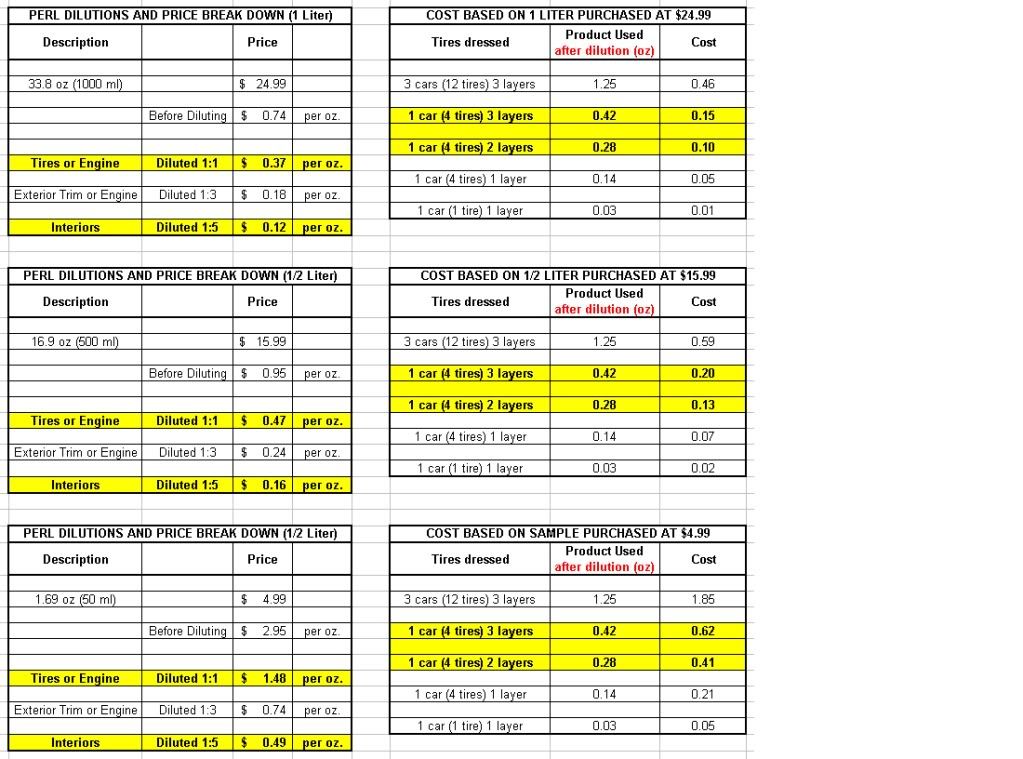
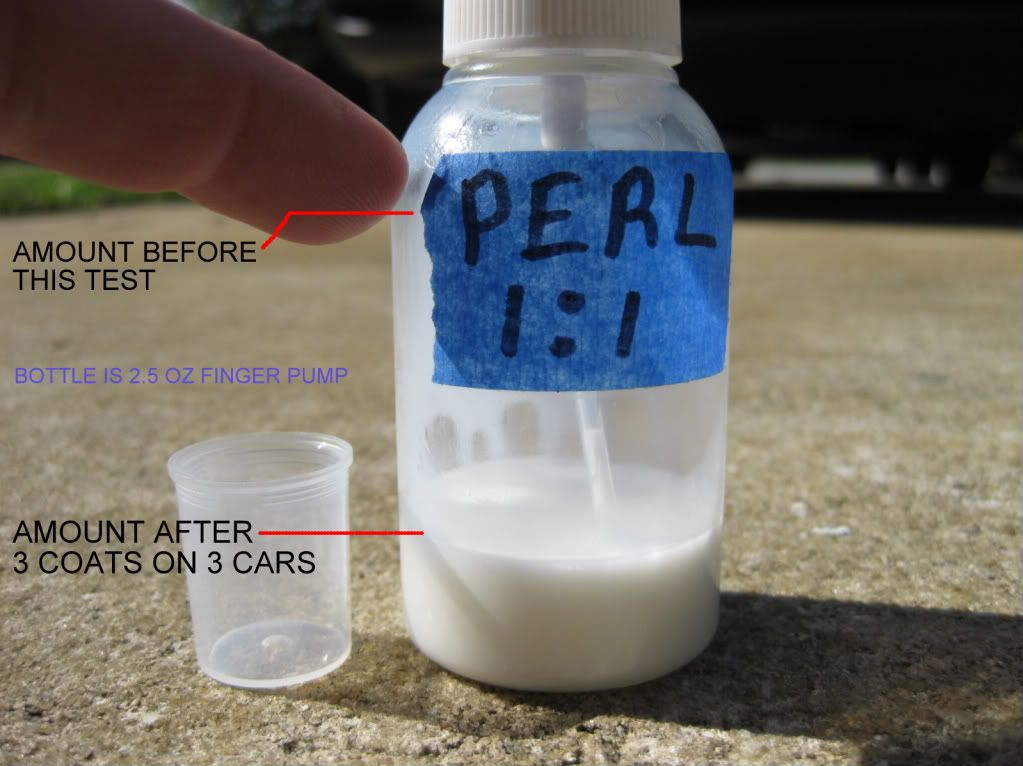
Part A: AMOUNT USED AND PRICE PER TREATMENT (PERL 1:1)
Fred questioned the cost of PERL if they were to layer the tires with 2 or 3 coats so I put together this break down which also includes some additional charts.
Note: Product used varies based on tire sizes and the type of spray nozzle used. It was calculated with 15âs as shown in the durability tests and with the bottle shown below.
Application: Sprayed one time every +/- 45 degrees and then spread very thin with an applicator made from an old tangerine HT pad cut into âpie slicesâ. Then allowed to dry before application of next layer.
Also based on the amount of product I show used for tires you can understand doing an interior is going to take very little product. Interiors only get one layer 1:5 (spray on and wipe off) so I would say if purchasing the 1/2 liter it costs between $0.05 and $0.20.
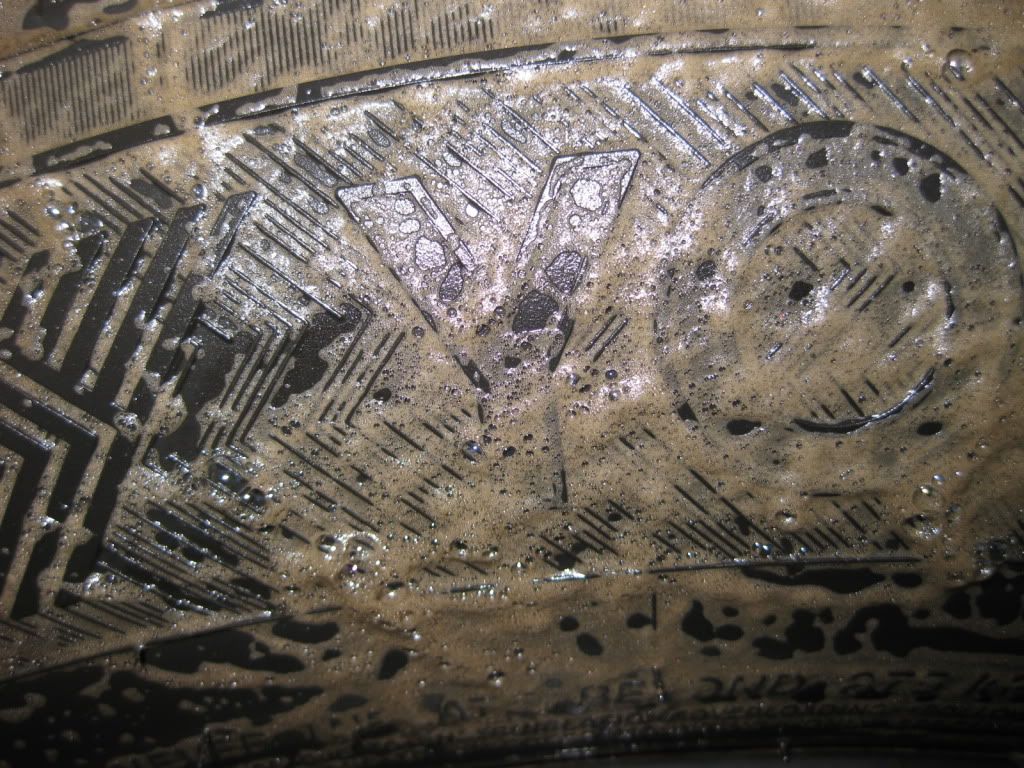
Part B: (HYDROPHOBIC)
Hereâs a quick video that shows the product is still hydrophobic after 1 week. While PERL certainly took a hit from the rainstorms etc it is still there. The zoomed in video is on the single layer. I would have liked to zoom on the multiple layers in the video but they were at ground level and for these purposes this will do. You can see images of the different layers after 1 week up close in the previous update.
1 Week Update.wmv - YouTube
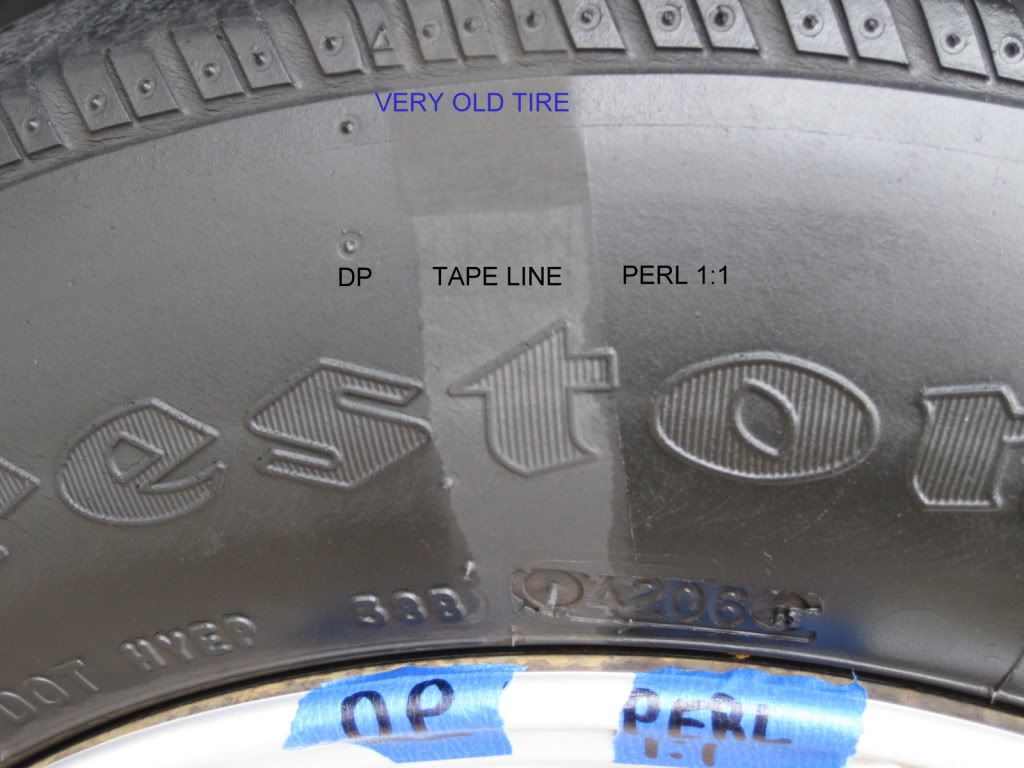
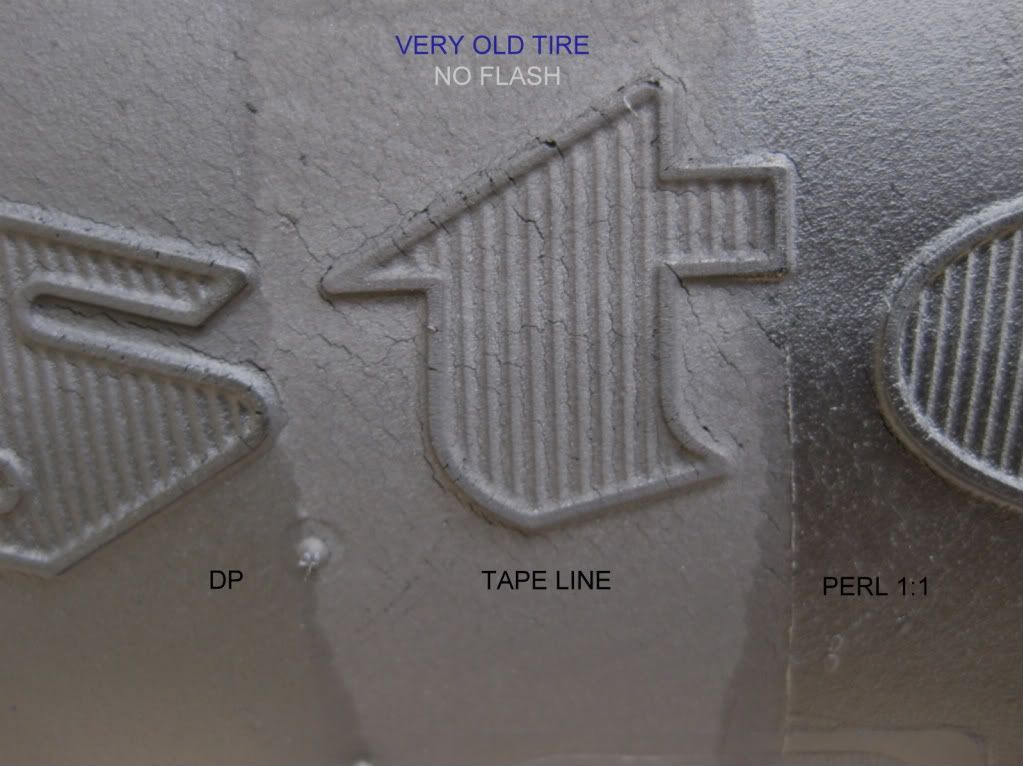
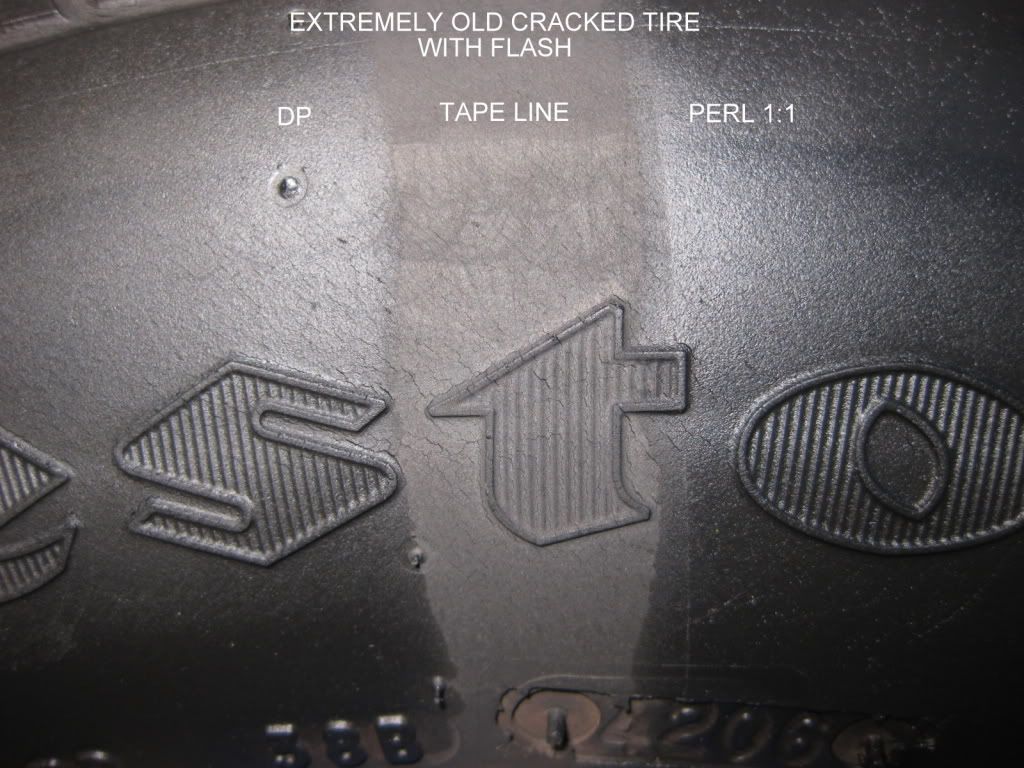
Part C: - Old Cracked TIRE TEST (PERL vs. DP)
Tim was curious how PERL looked next to DP. I wanted to do a PERL vs. DP durability test for my own information as well so here we go. First let me apologize to you Tim because I did this test on one of the older tires on the green SL. If only I had replaced 2 tires when the Tires Plus guy told me to! I would have done the test on the Blue SL but I had already placed one layer of PERL over all of its tires before I realized how bad the tires were on green.
So, we have a good depiction of how these two dressing look on extremely aged and abused tires but not much in the way of how they will look on your tires.
Part D: (Just for Fun)
PERL applied
-
09-05-2011, 12:59 PM #13Hooked For Life
- Join Date
- Aug 2003
- Location
- The First Coast
- Posts
- 13,271
- Post Thanks / Like
Just when I thought the review really couldn`t get better!
 to those charts. You`d impress a marketing and sales department for sure! PERL really is economical! I have the liter bottleon the way and I gathered all my small spray bottles, plus a cooking oil pump bottle to fool around with it in. It really sounds like a solid winner of a product!
Treat it like it`s the only one in the world.
to those charts. You`d impress a marketing and sales department for sure! PERL really is economical! I have the liter bottleon the way and I gathered all my small spray bottles, plus a cooking oil pump bottle to fool around with it in. It really sounds like a solid winner of a product!
Treat it like it`s the only one in the world.
-
09-08-2011, 07:01 PM #14
- Join Date
- Sep 2011
- Posts
- 478
- Post Thanks / Like
:clap2::clap2: Great review !!! I have really wanted to try this, I have used WGETS & UTTG , pleased with both.
Next order PERL is on my list.........
-
09-09-2011, 10:30 PM #15
- Join Date
- Apr 2010
- Posts
- 1,354
- Post Thanks / Like
Thanks guys!


 Reply With Quote
Thread Information
Users Browsing this Thread
There are currently 1 users browsing this thread. (0 members and 1 guests)
Similar Threads
-
CarPro PERL how do YOU apply it?
By EVOlved in forum Tire, Wheel, Chassis and Engine DetailingReplies: 8Last Post: 08-05-2014, 09:25 AM -
Review - CarPro PERL
By Wors in forum Detailing Product ReviewsReplies: 11Last Post: 06-23-2014, 11:33 AM -
Is silicon in Carpro PERL a bad thing?
By ihaveacamaro in forum Auto Detailing 101Replies: 7Last Post: 10-19-2012, 02:46 PM -
Review: CarPro PERL
By CEE DOG in forum Detailing Product ReviewsReplies: 33Last Post: 10-03-2011, 06:28 AM
Bookmarks